TaxScribe Government User Guide NC
- Krista Strzeszkowski (Unlicensed)
- Lorrie Warden (Unlicensed)
Introduction
Contained in this document is a detailed TaxScribe Government or (TaxScribe Gov) user guide. TaxScribe Gov and TaxScribe Business make up the TaxScribe suite, an online filing system for business personal property listings. TaxScribe Gov is the interface the county employees use to approve forms submitted by tax payers through TaxScribe Business AND TaxScribe Individual. This guide includes information regarding TaxScribe Government specifically - including how to activate it, how to administer users, and how to use all of the functionality that is included within the application.
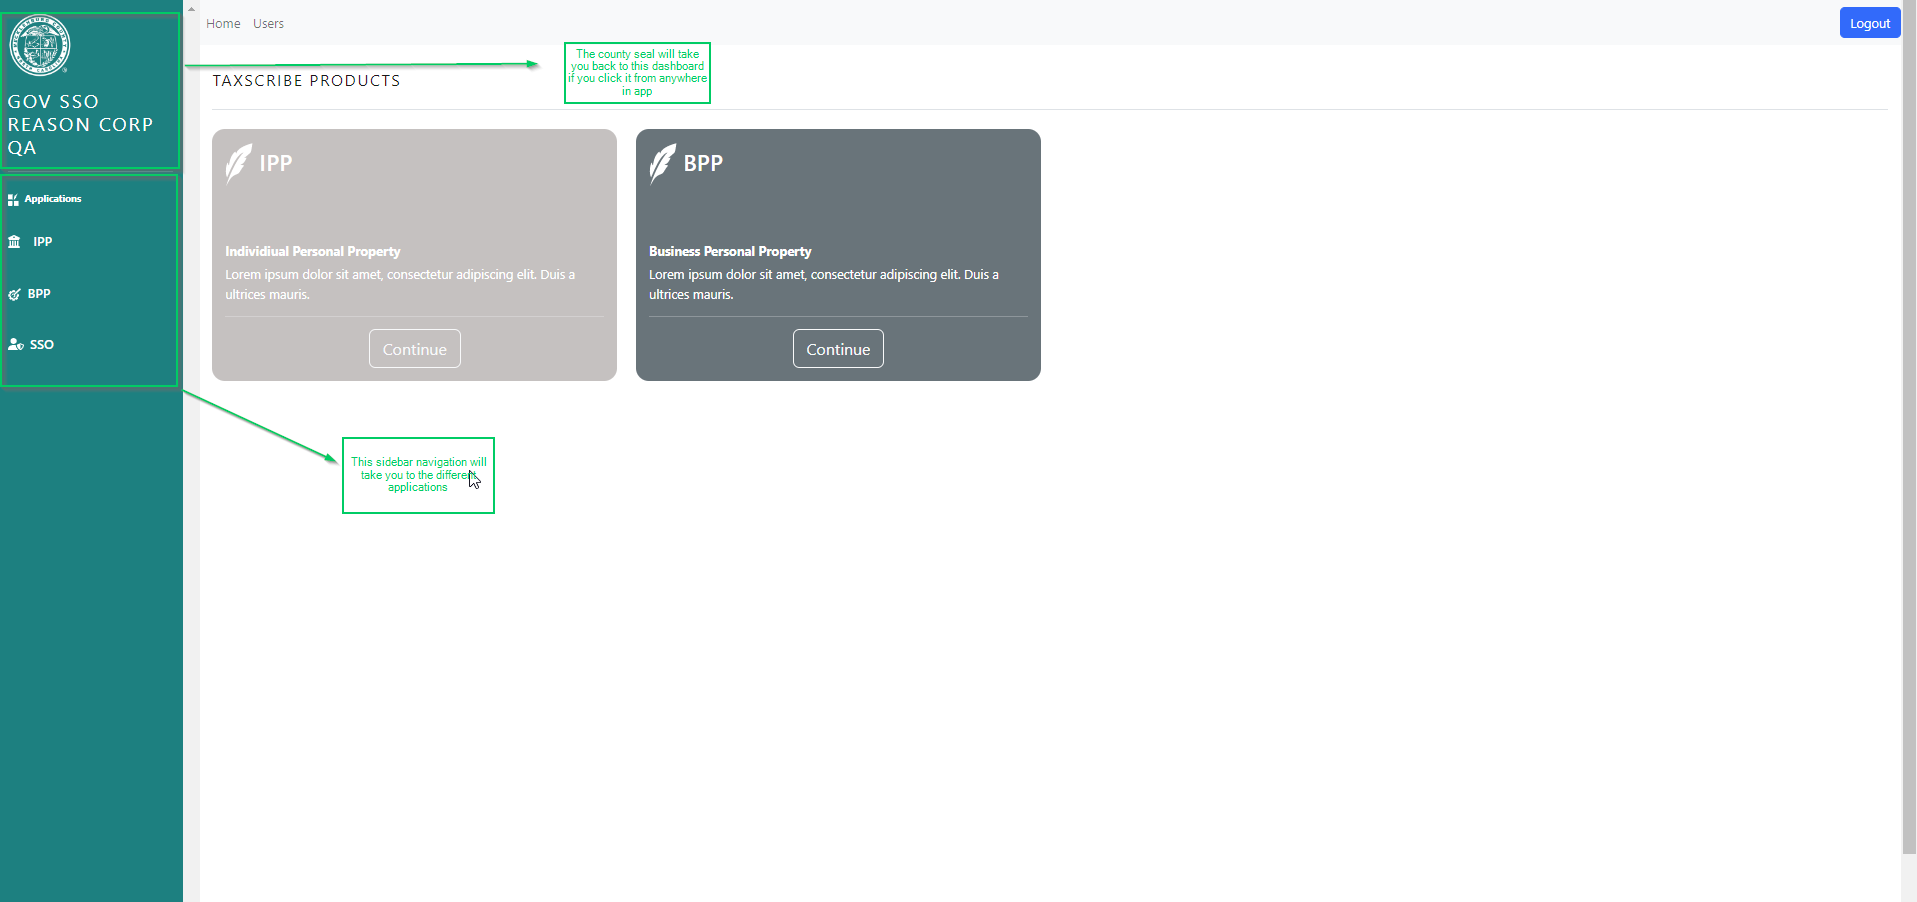
TaxScribe Gov now contains a sidebar navigation directing the user to the different dashboards: BPP or SSO.
TaxScribe Government User Management
Once access is granted, TaxScribe Gov administrators can add, remove, or modify users. While setting up a new user profile or modifying an existing one, you will see several user permission options. These options are described below. Users can have one or all of these permissions.
Administrator: Add, remove, or modify users in TaxScribe Gov using Reason Consulting Login
User: Search listings/extensions, assign them individually, and approve or reject forms.
Bulk Assign Listings: Assign business personal property listings in bulk (use in combination with "user")
Bulk Approve Extensions: Approve extension requests in bulk (use in combination with "user")
- Bulk Sync Extensions: Sync extension requests in bulk (use in combination with "user")
Dashboard
User sees this screen upon logging in
From here user can navigate to the other applications within TaxScribe Gov: BPP, SSO. BPP will include information for the following form types: Listing, IPP Listing and Extensions.
The user can get back to this dashboard at any time by clicking the county seal (NOTE: the IPP selection will be removed for the 2024 tax year!)
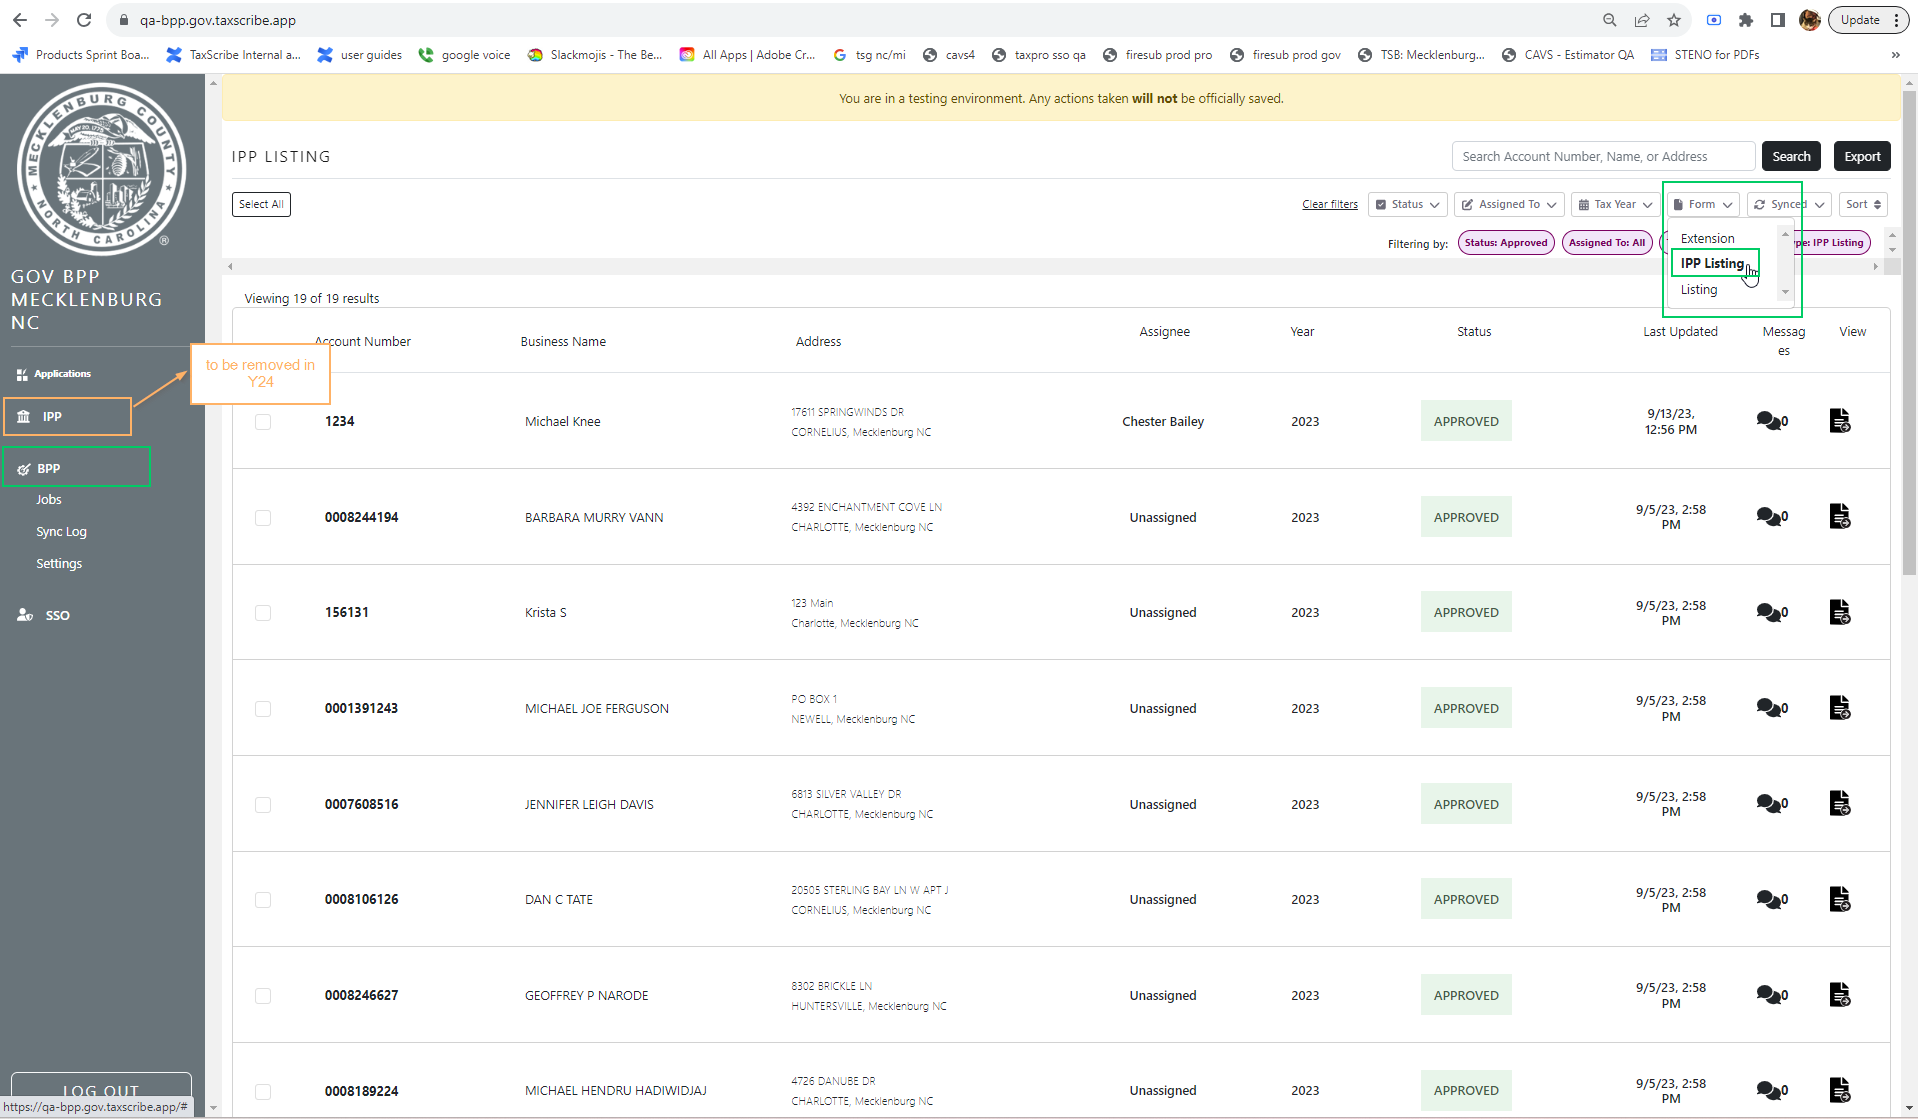
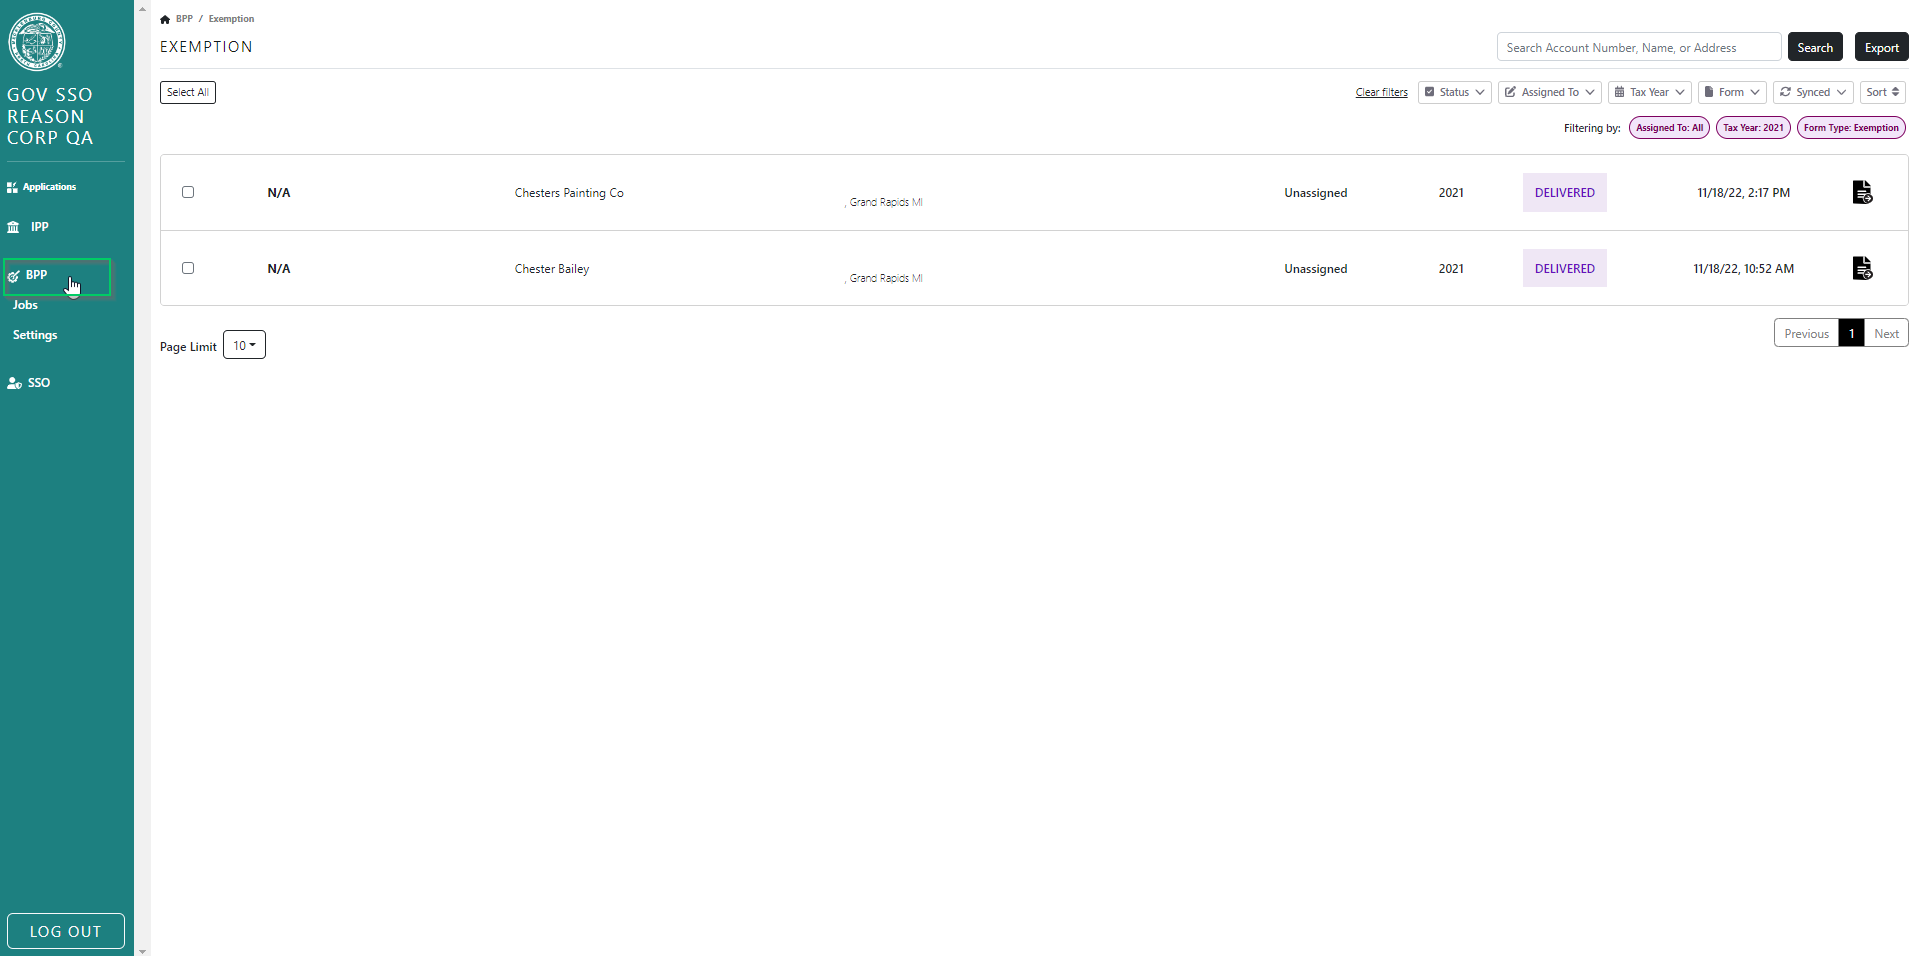
BPP
When user clicks BPP they get transferred to the BPP dashboard
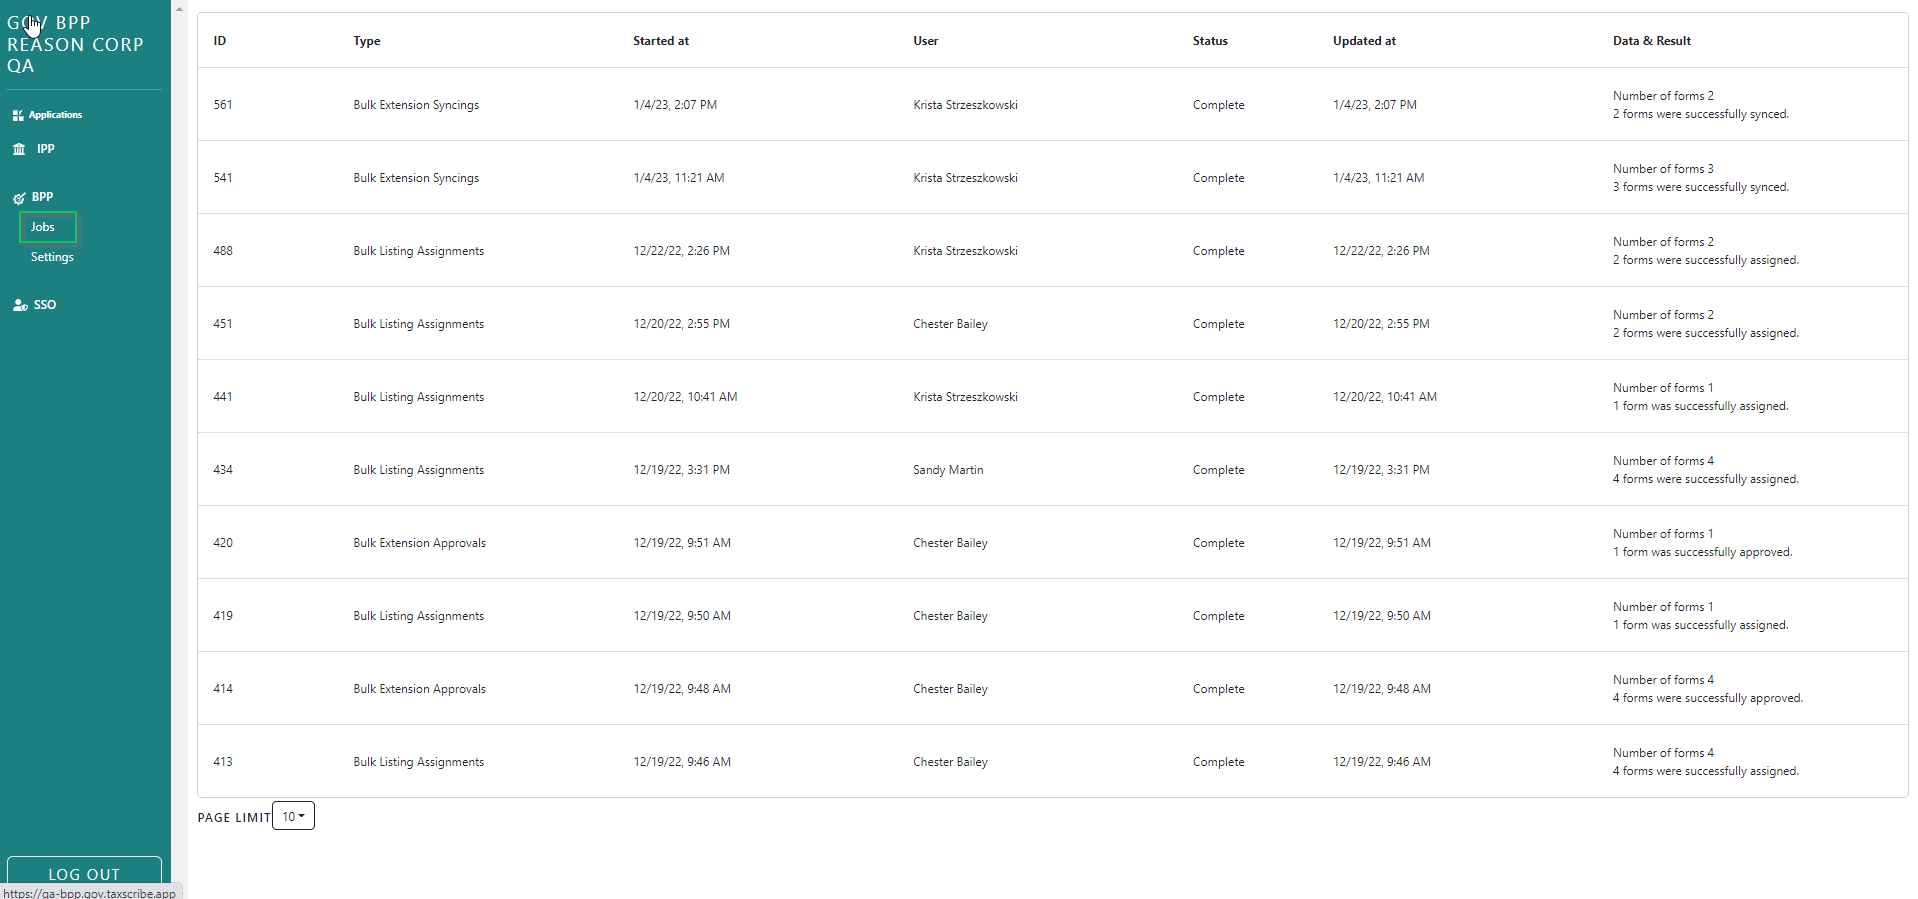
BPP Sidebar Pages
There are 3 pages under the BPP sidebar navigation: Jobs, Sync Log and Settings
The Jobs page is where the user can see background jobs
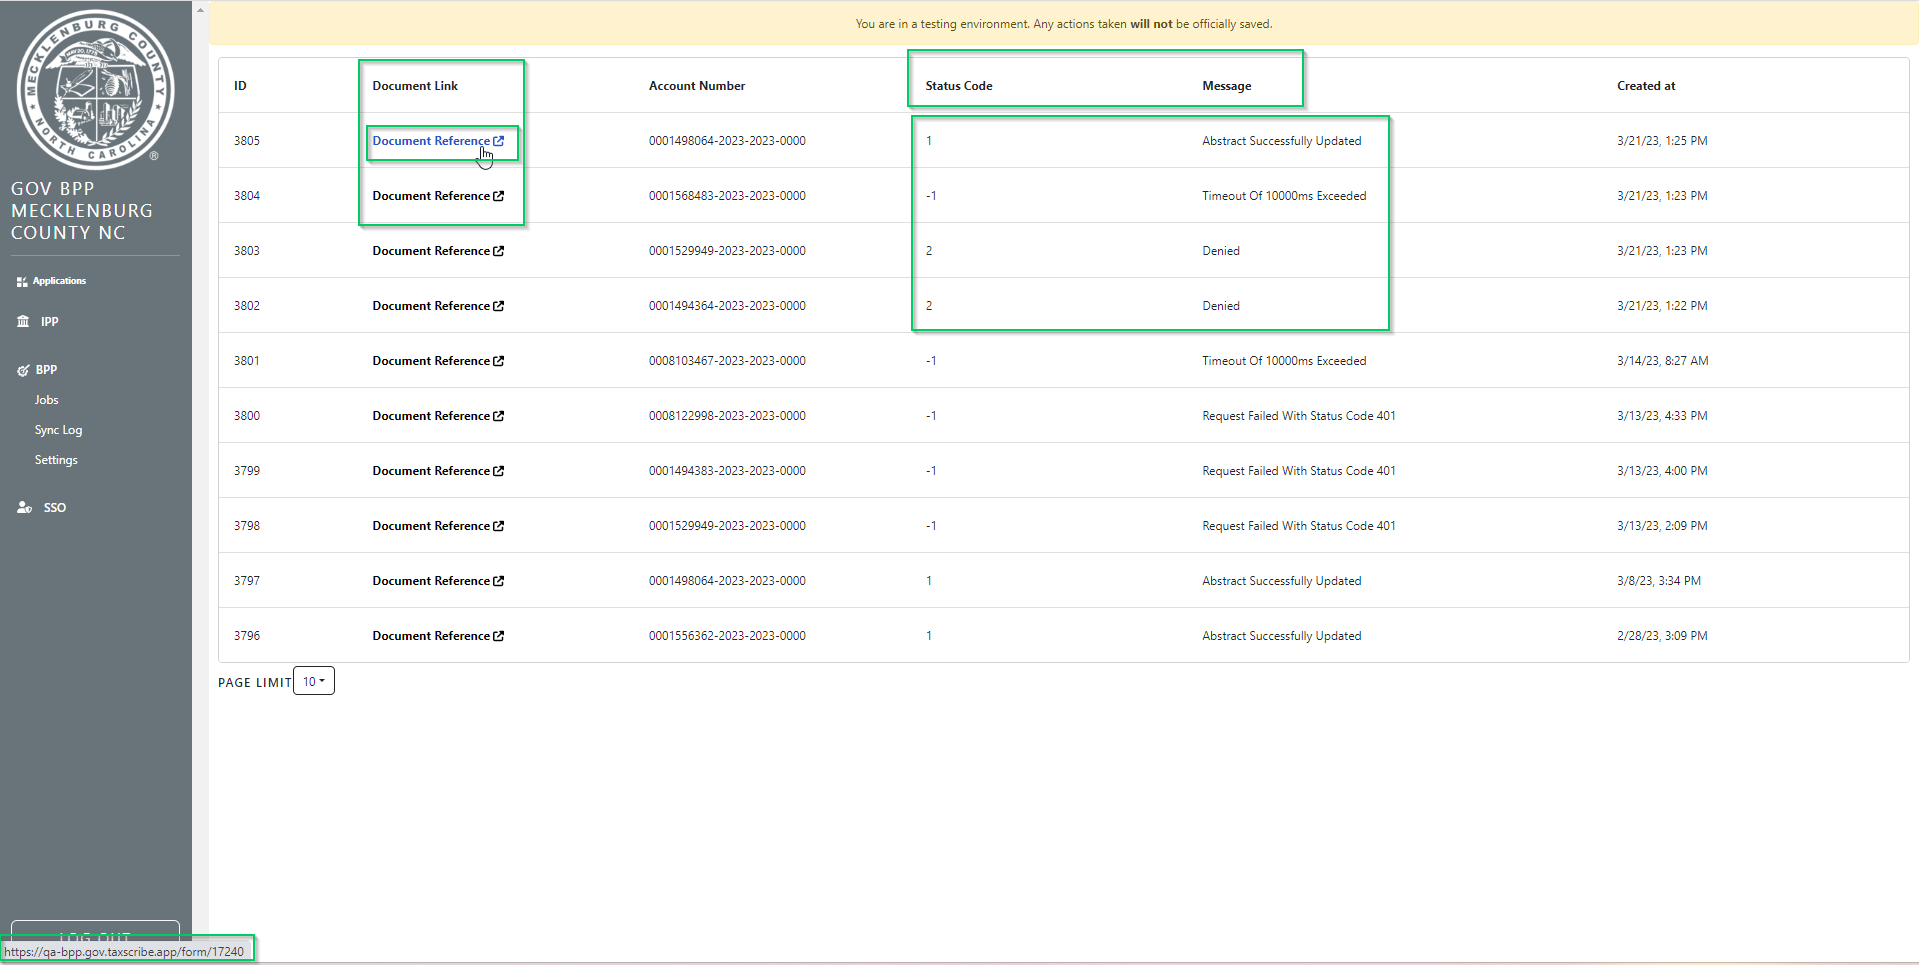
- The Sync Log page shows all of the forms that have been synced
- The document link column will have a link to the form so you can reference it, when you click the link you will go to that form detail screen in TSG
- The Status Code and Message column shows you if the sync was successful or not
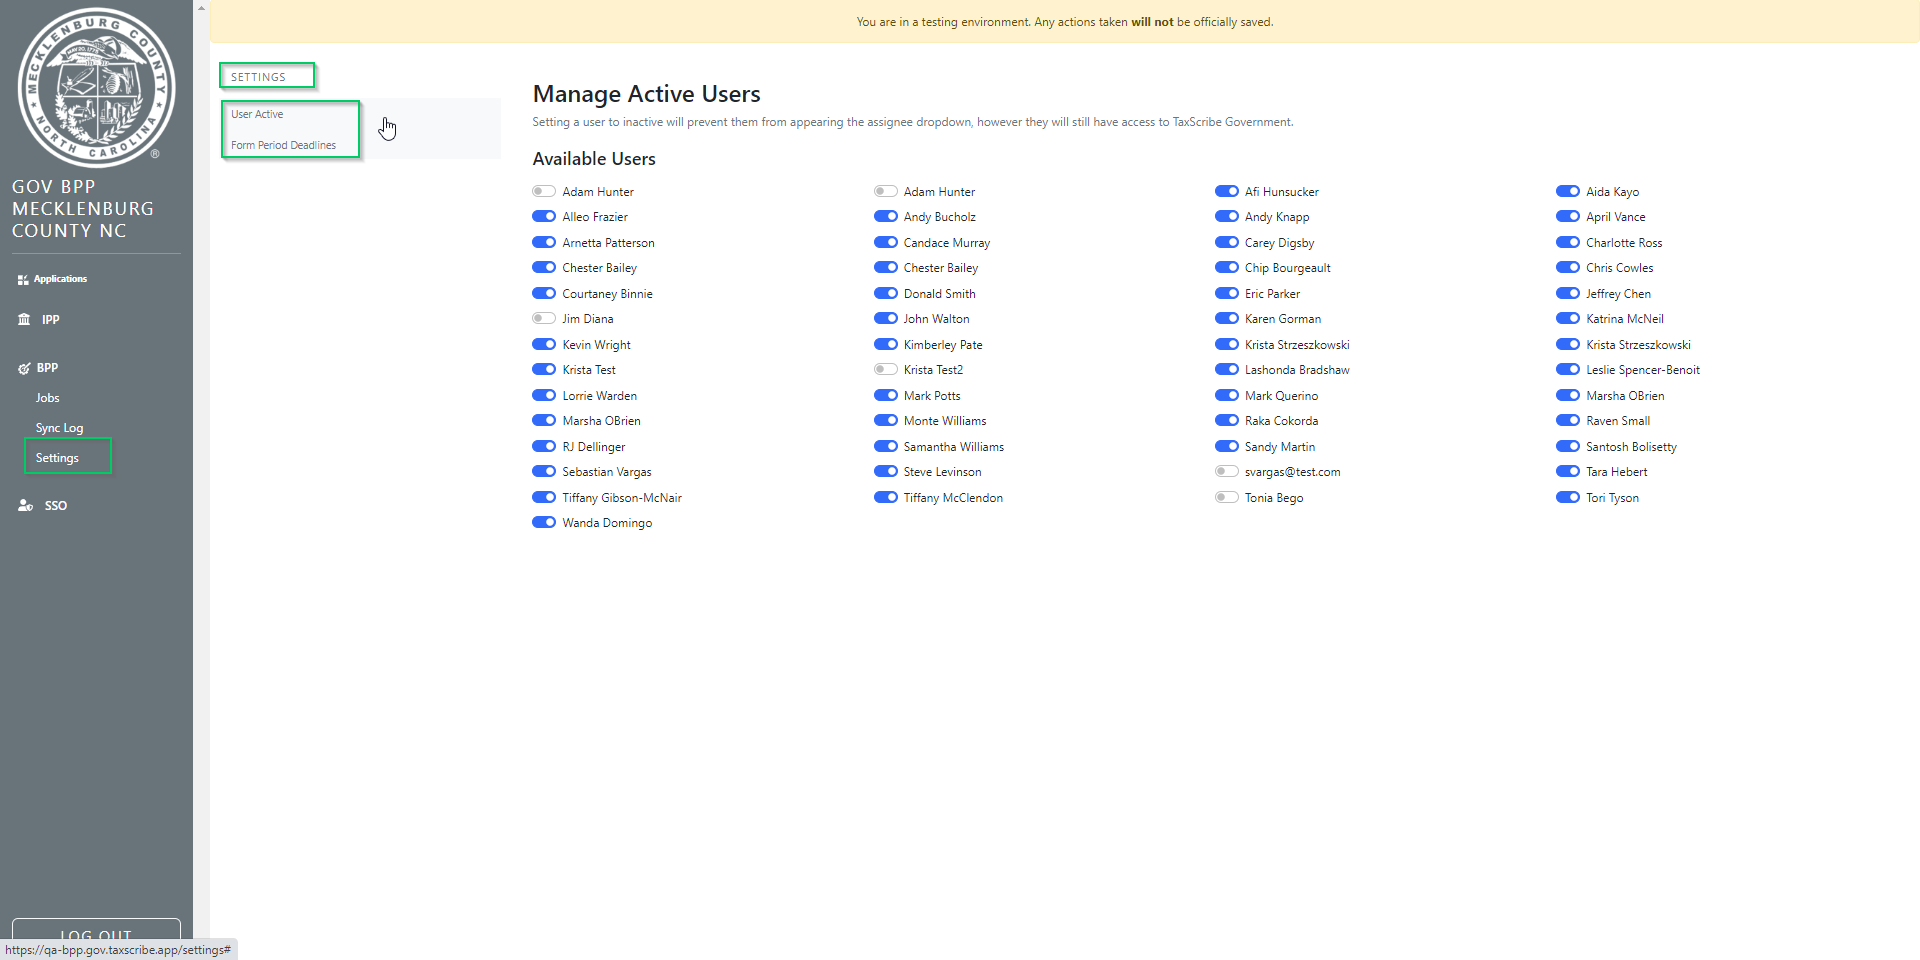
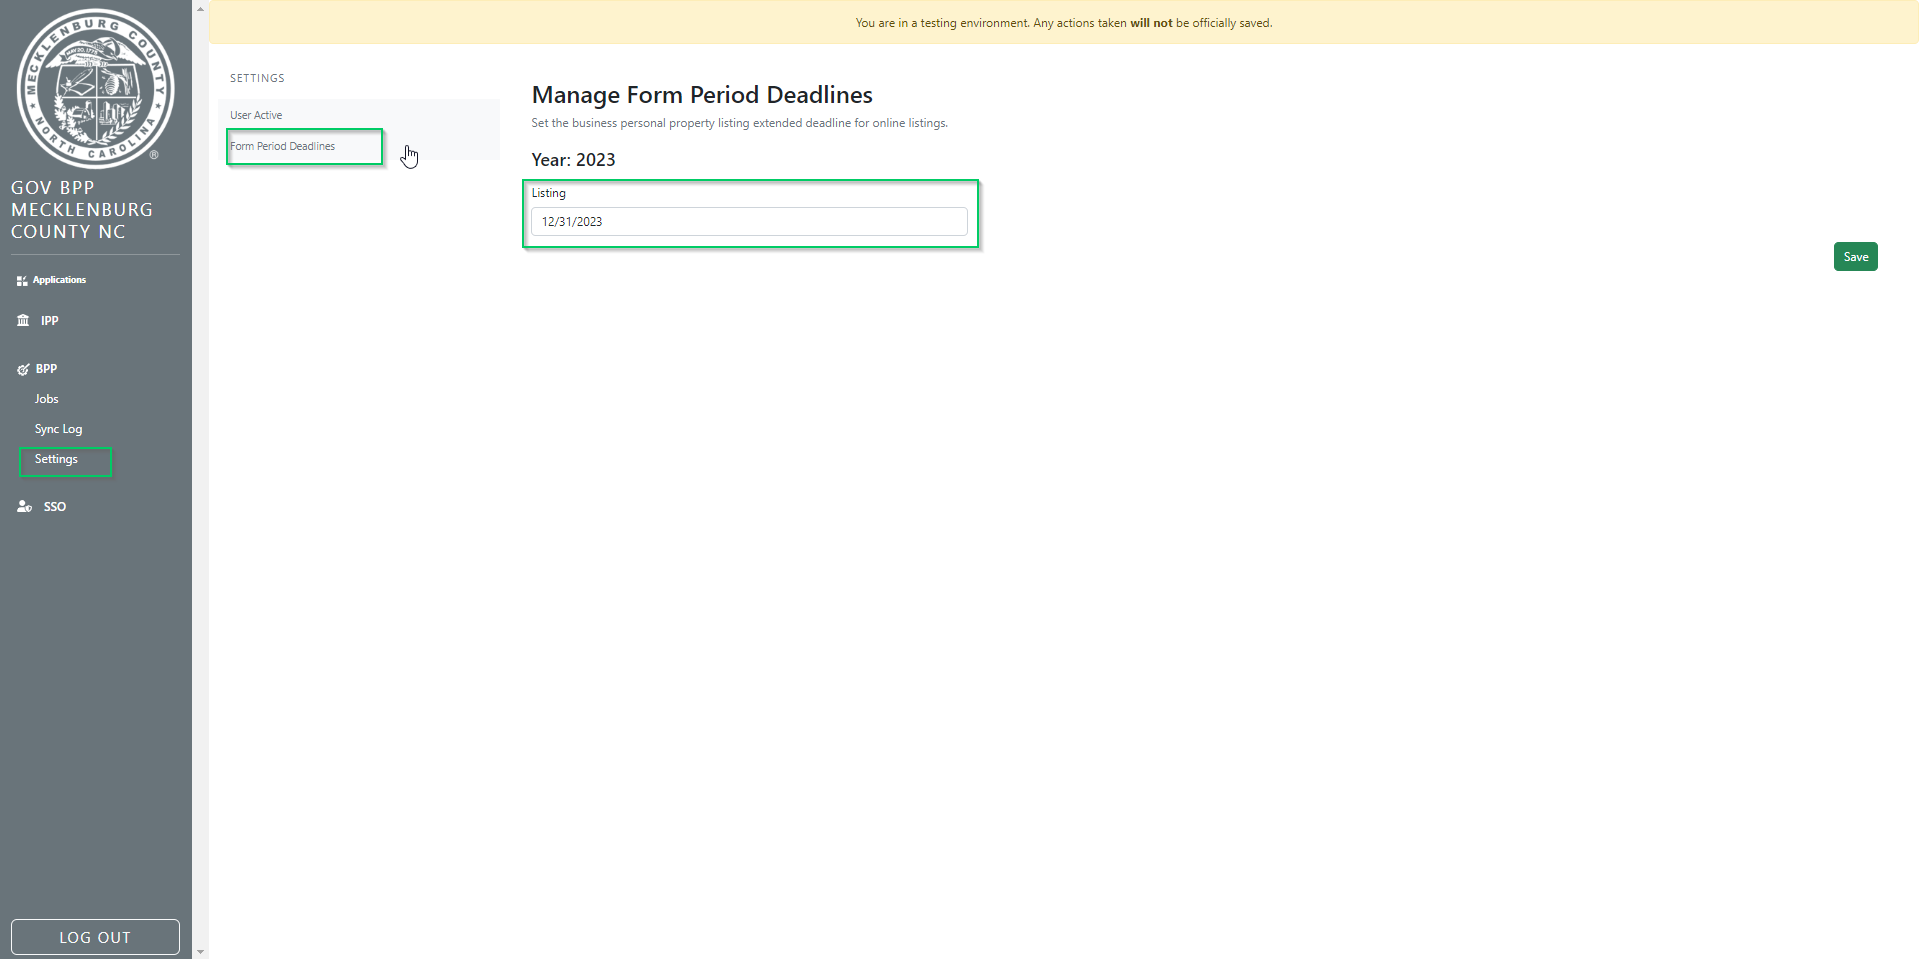
The Settings page has 2 sub pages: User Active and Form Period Deadline
- The Active Users page shows all of the users in your jurisdiction and you can use the button next to their name to render them active or inactive
- The Form Period Deadline screen allows you to change the Listing deadline for your jurisdiction
- *NOTE: only ADMINS have permission to view the Settings pages
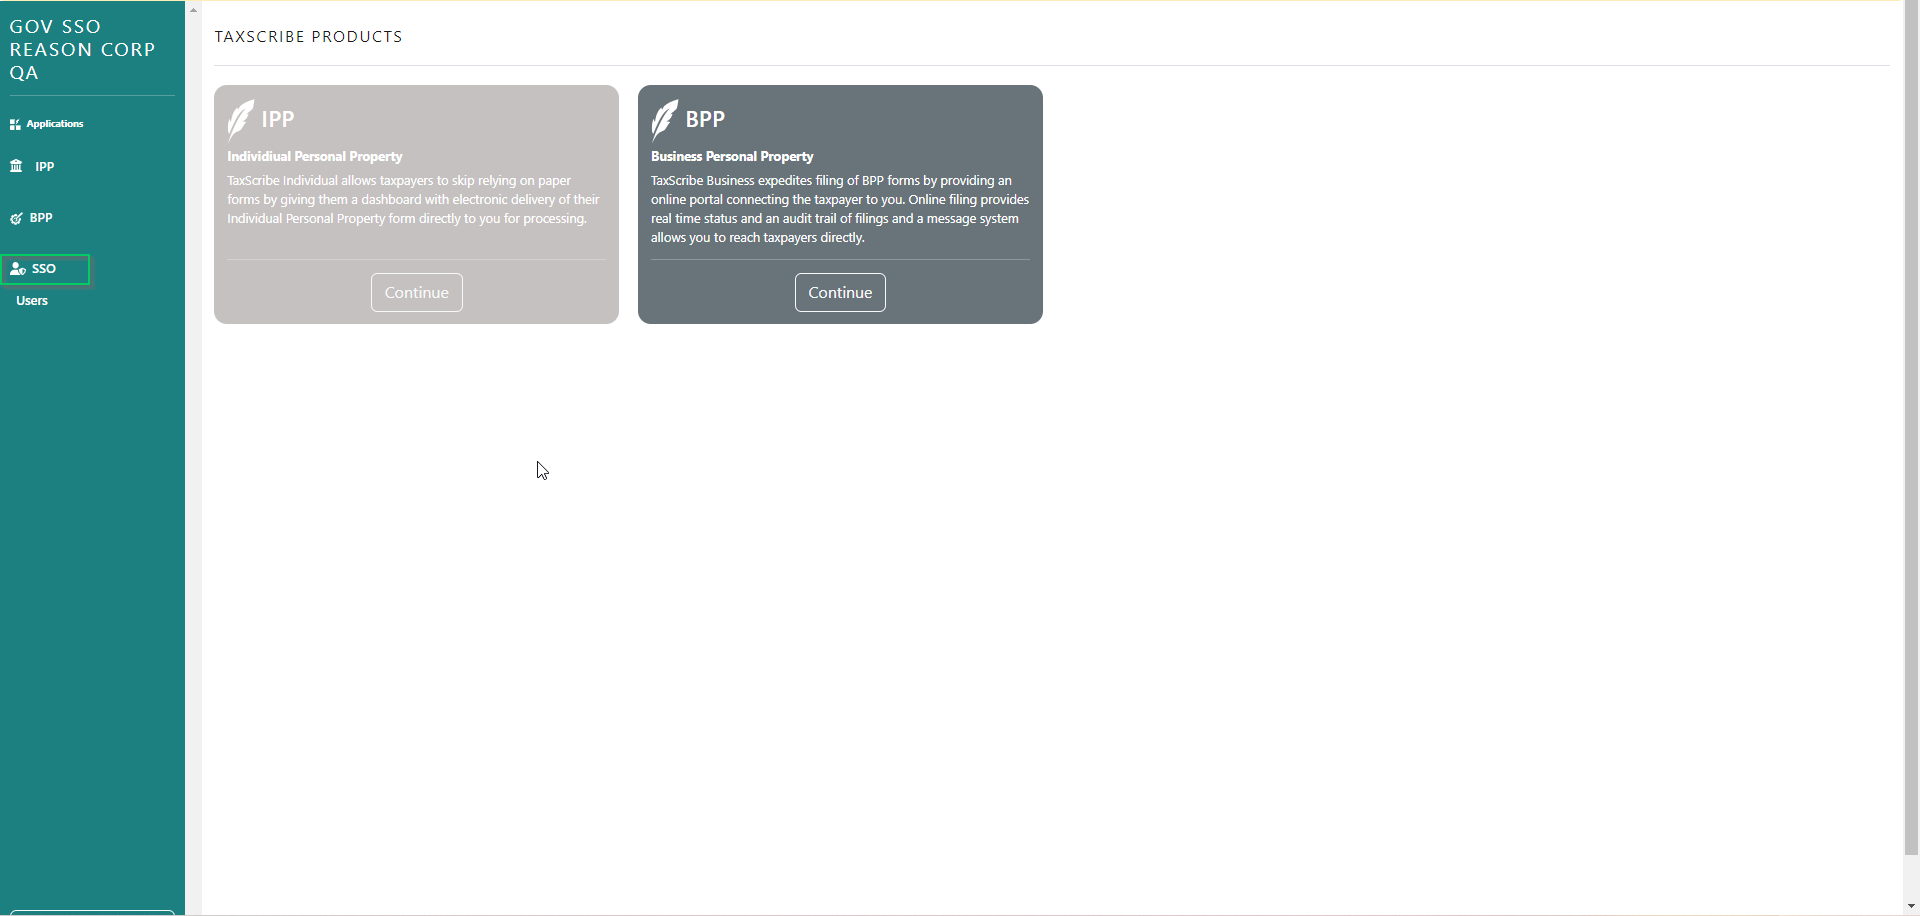
SSO
When user clicks SSO they get transferred to the SSO dashboard which has links to back to SSO and BPP
There is also a 'Users' tab where you can add users and search users

BPP Search Dashboard
Default Search Parameters
Upon logging in, you see the Search Dashboard. The search dashboard defaults to Unassigned Listings in Delivered status, but you can search for forms using a variety of options. Several Quick Filters are provided based on the most common types of searches.
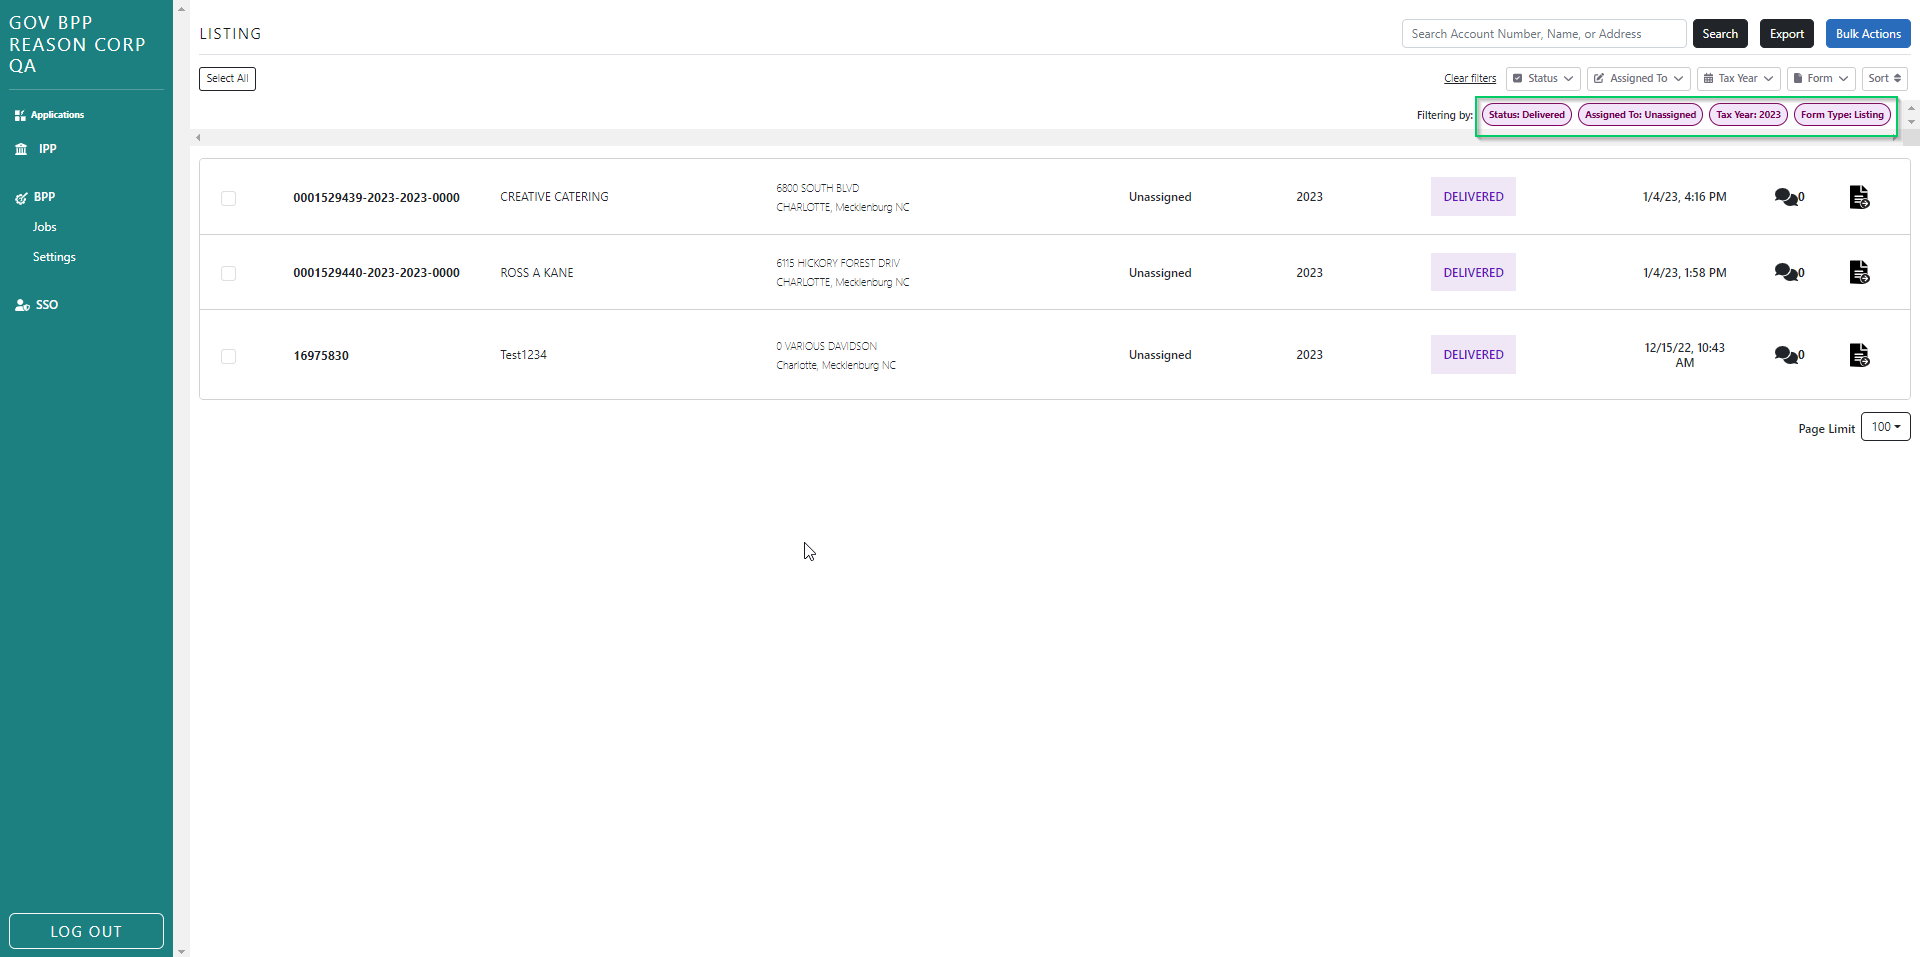
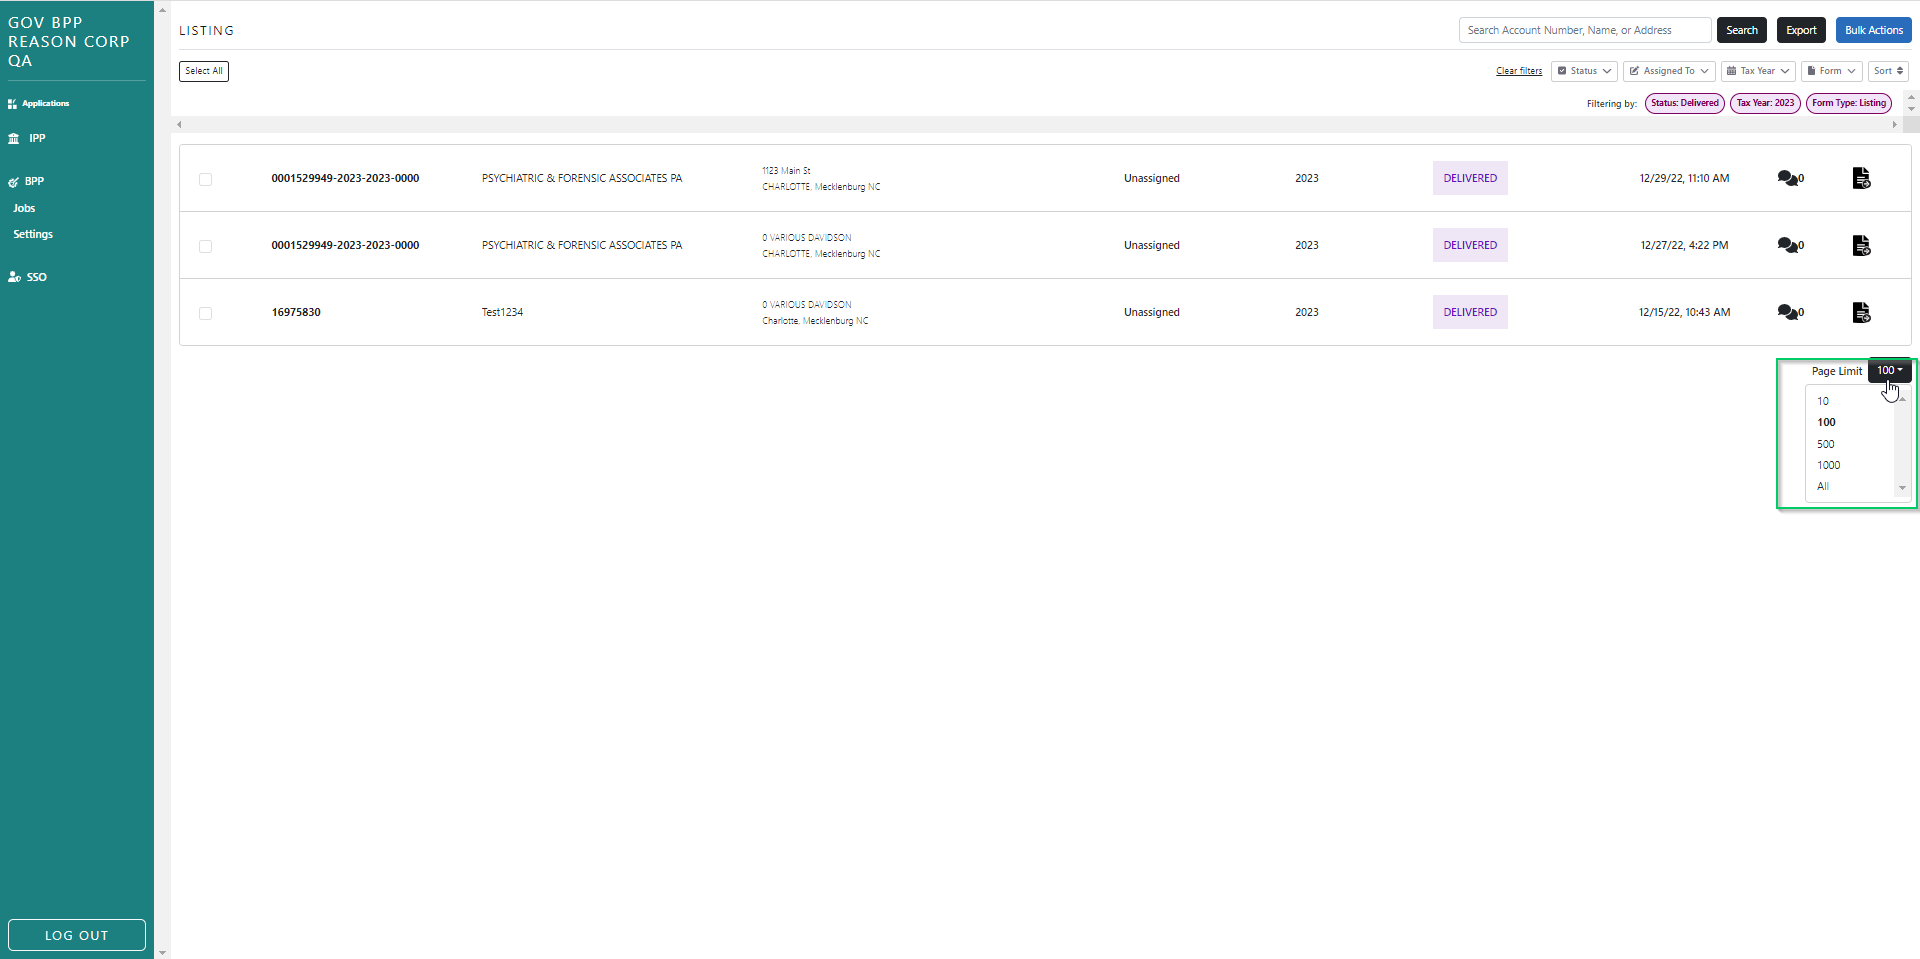
Use the "Page Limit" selector on the bottom right side of the screen to choose how many records to display at one time. The page limit defaults to 100 records. Choosing a large number of records may impact performance depending on how fast your internet connection is.
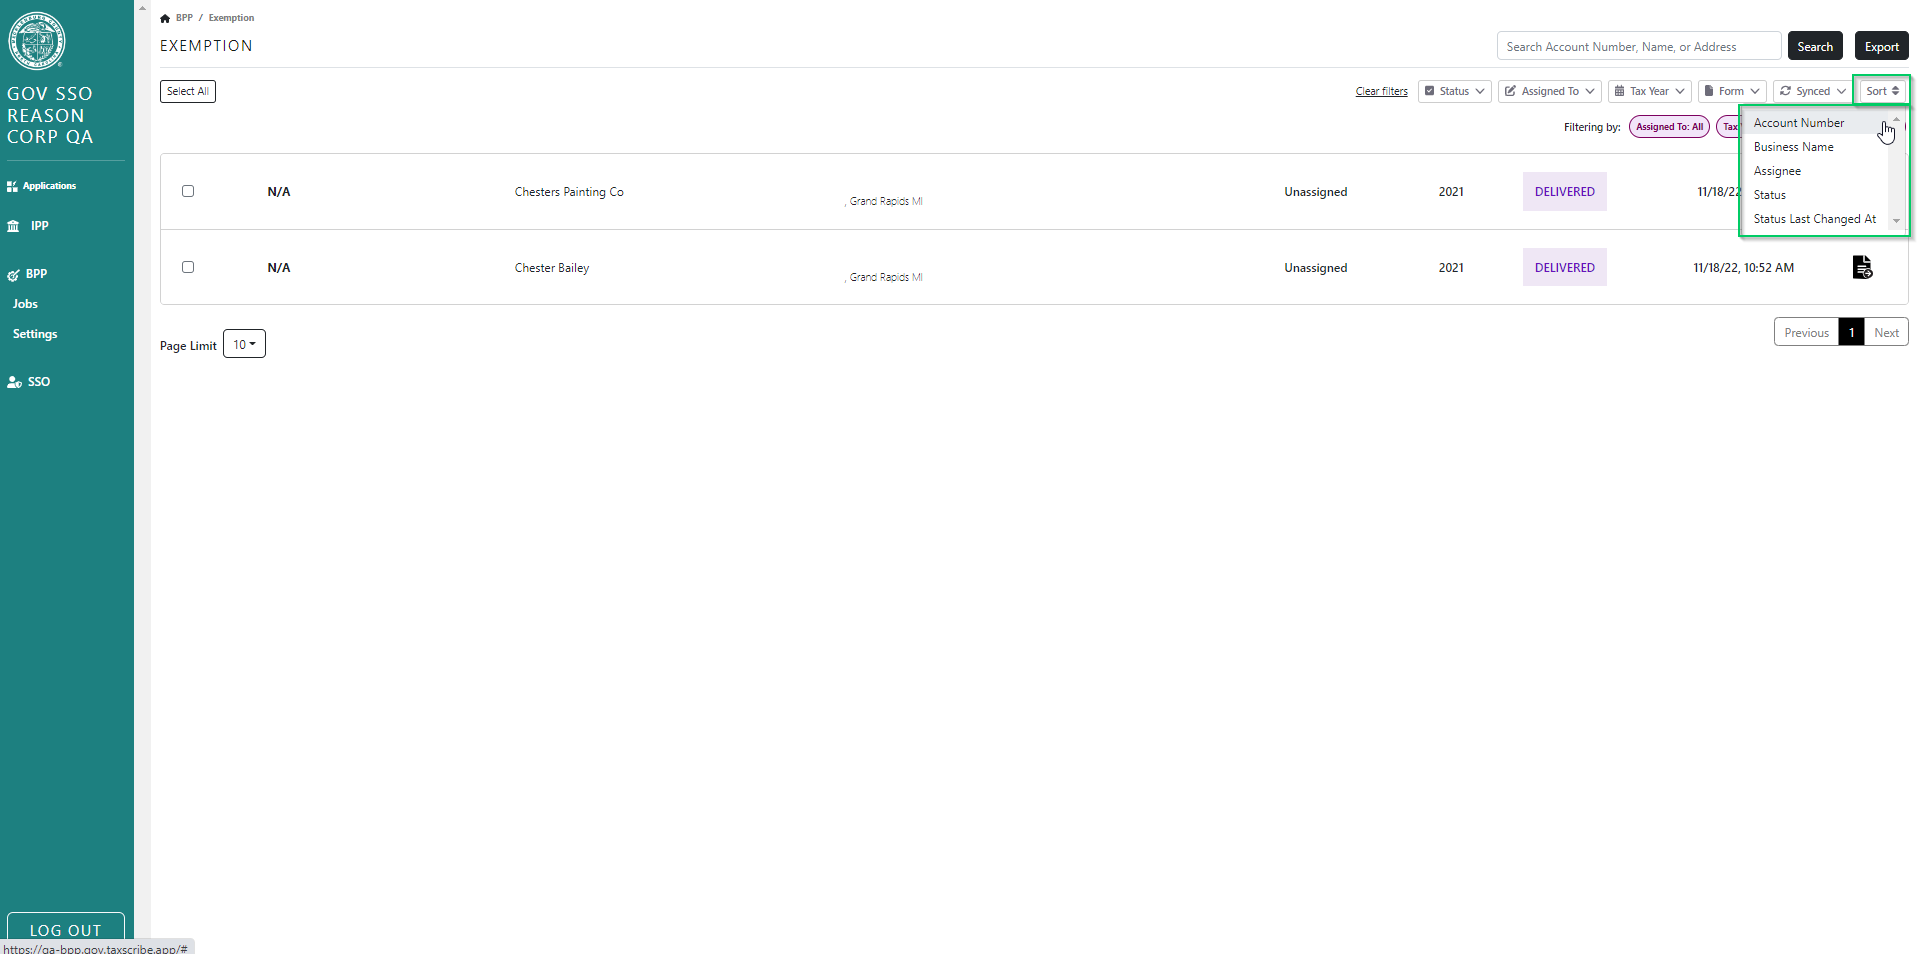
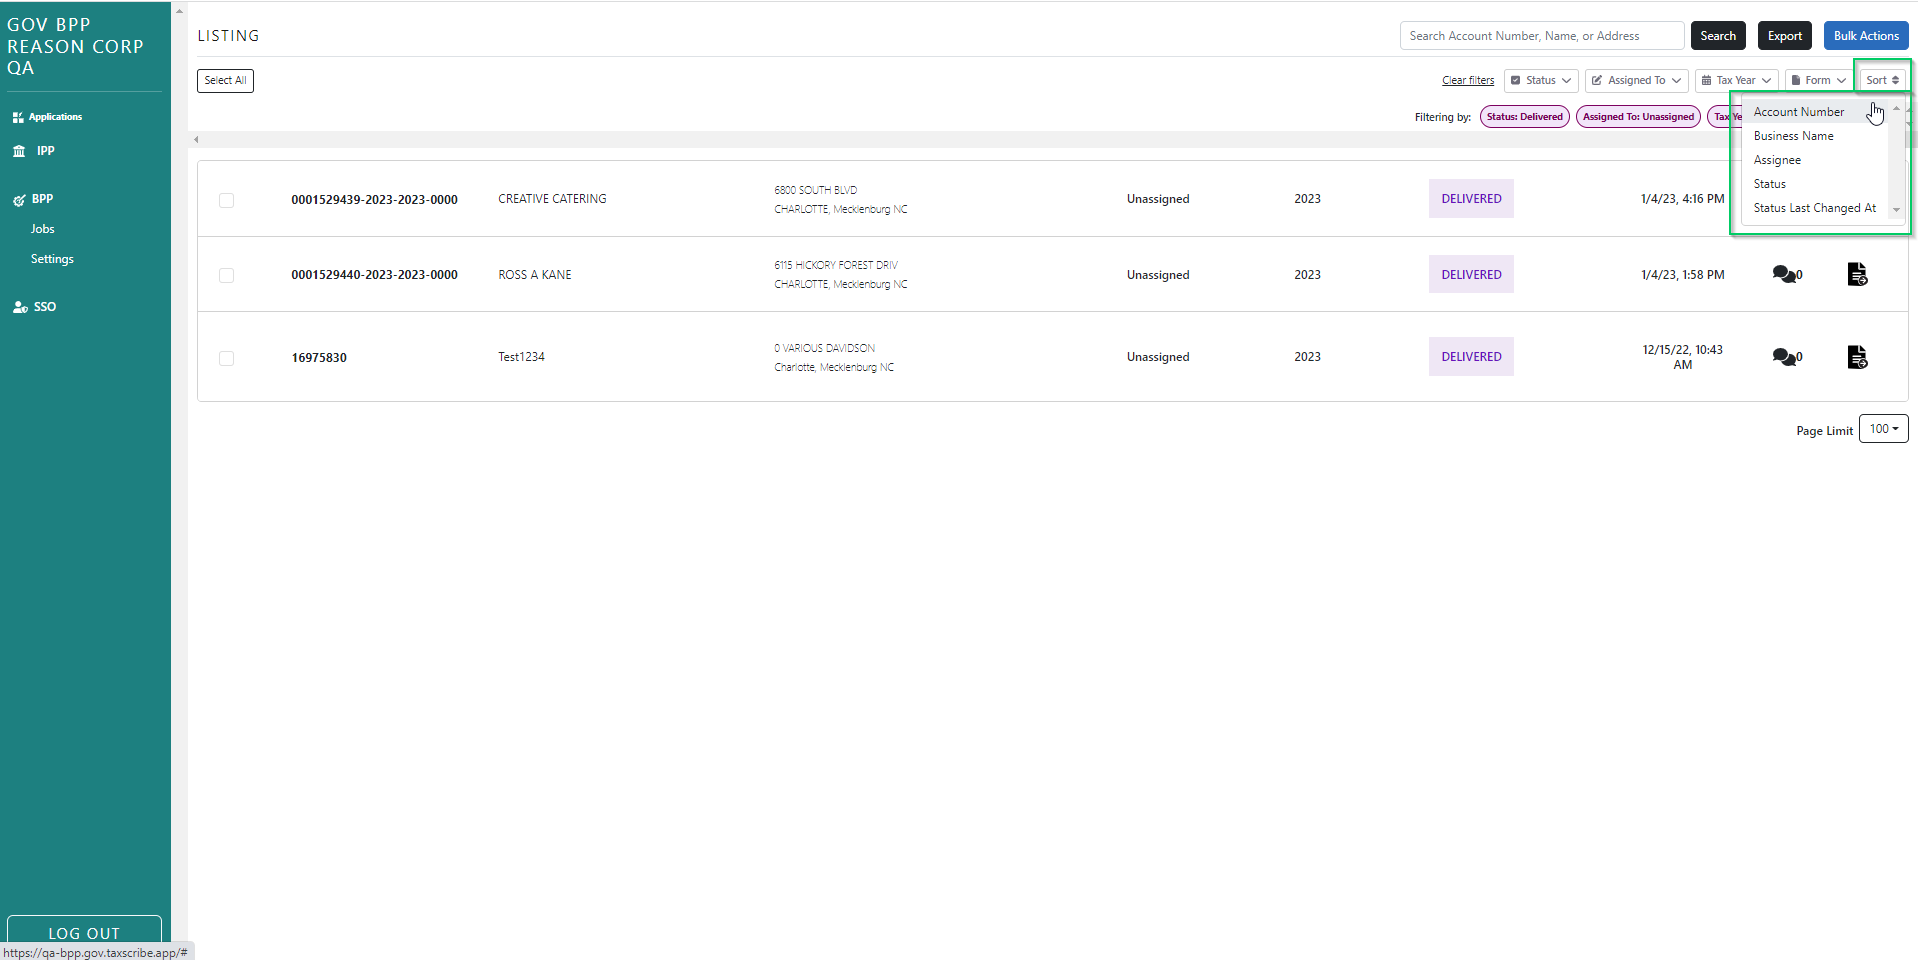
Sort Filter
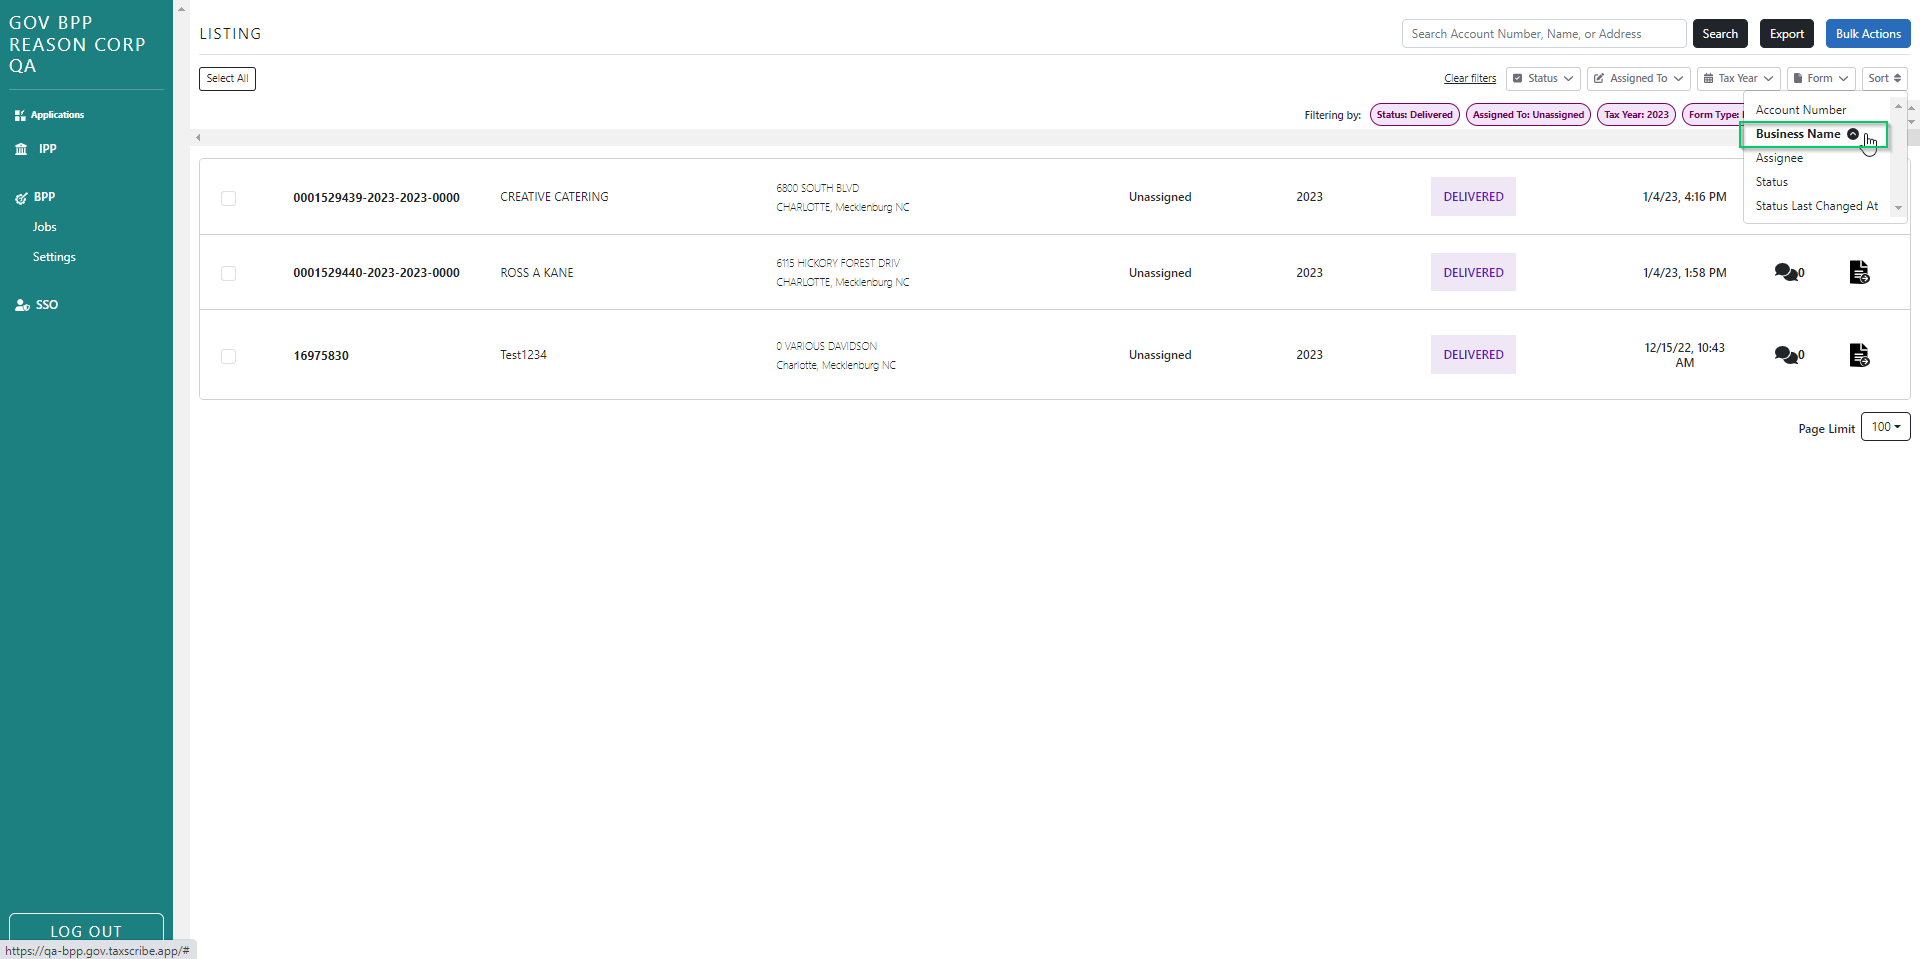
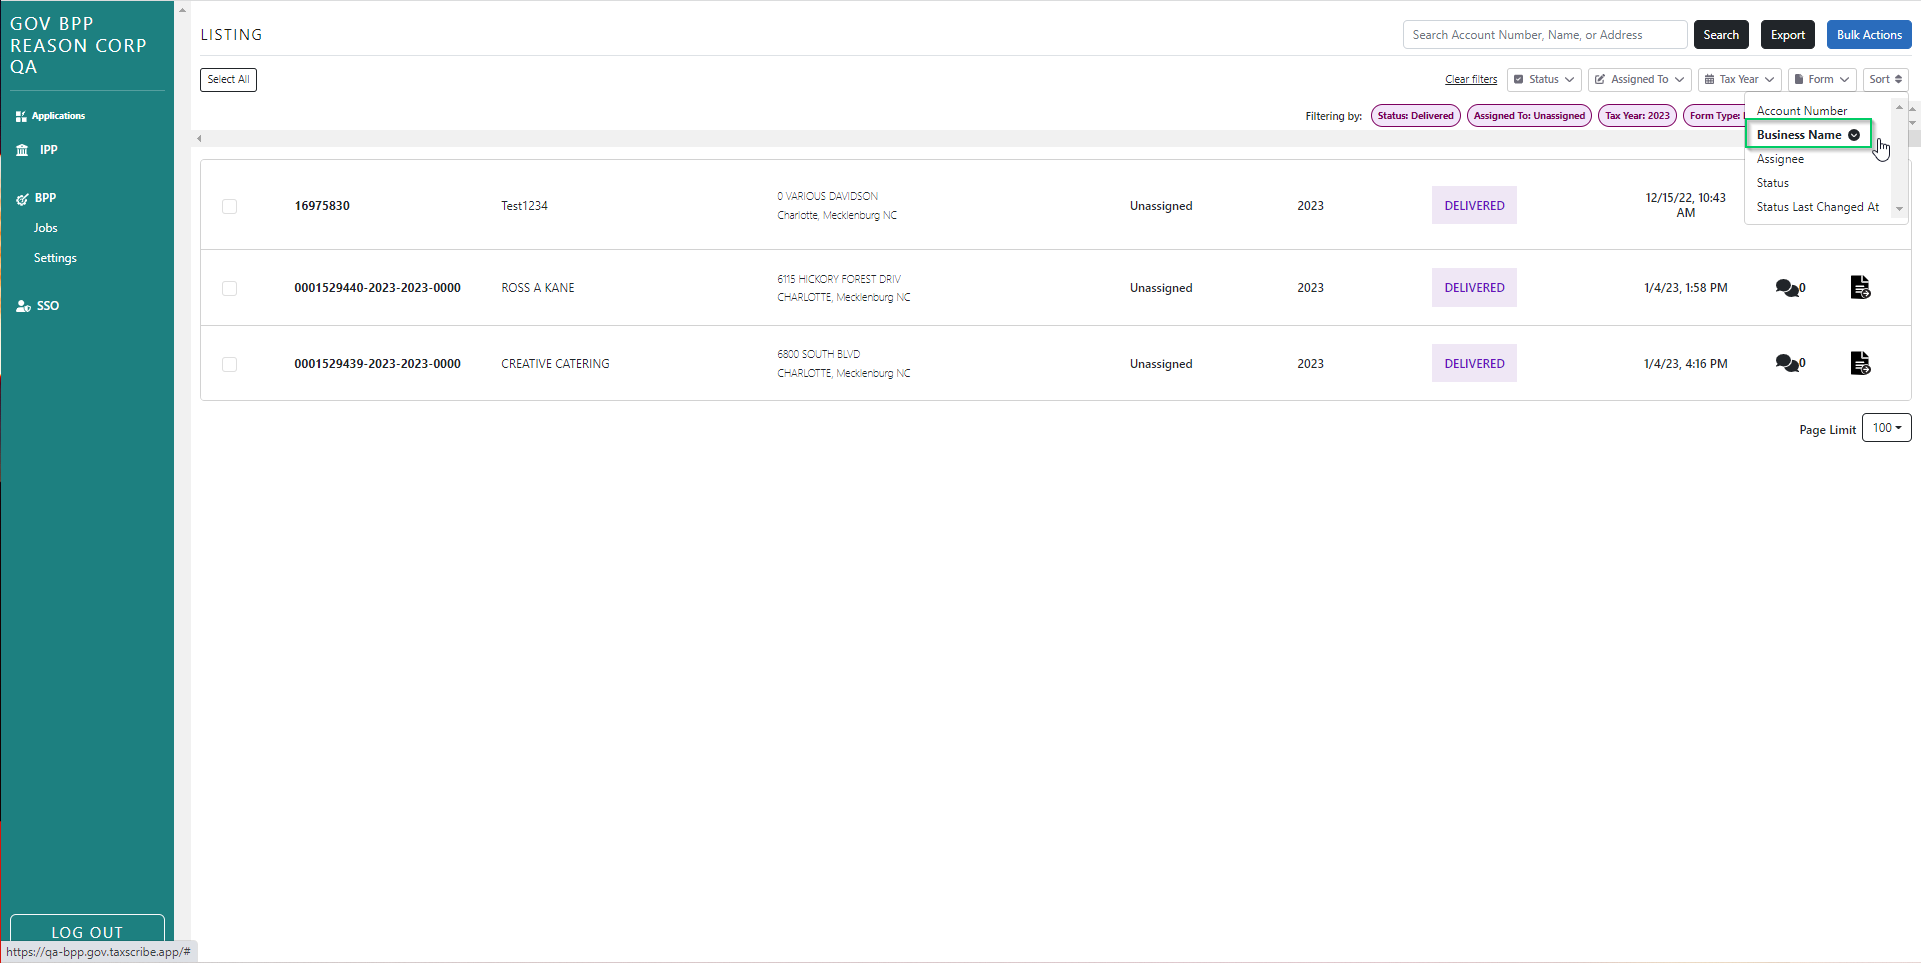
The sort filter is a drop down with 5 sort options: Account Number, Business Name, Assignee, Status, Status Last Changed At.
Sorting Options
There is a sort filter you can use to sort the results on the dashboard. If you expand this filter you see Account Number, Business Name, Assignee, Status and Start Last Changed At. When you press one of the options the filter is applied and sorts your results in ascending order (A-Z) based on the selection. If you press that option a second time the results sort in descending (Z-A) order. Click that sort option a third time to remove the sorting by that option.
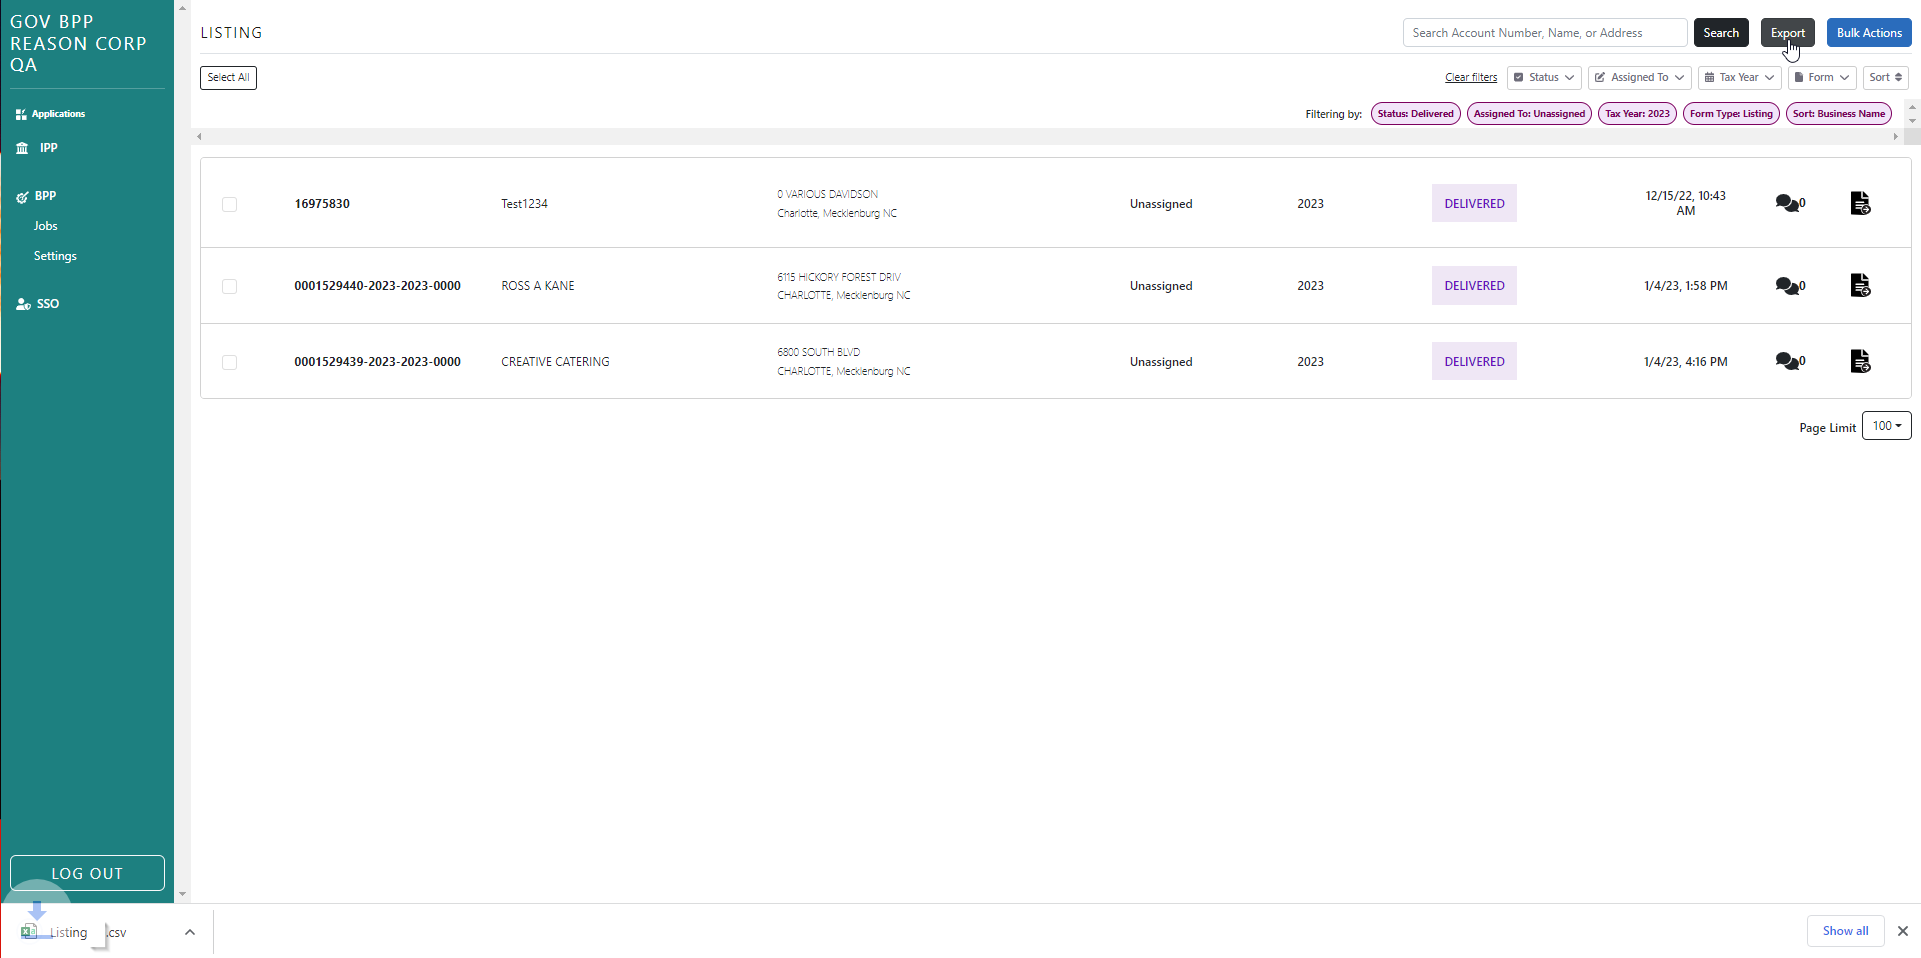
Export Search Results
After applying your search parameters, you have the ability to export the results to a .CSV file using the black "Export" button on the top right hand side of the dashboard. The export includes anything listed on the screen, as determined by the search parameters as well as the page limit. The check-boxes on the left hand side of the grid are not considered in the "Export" button at this time.
Form Assignment
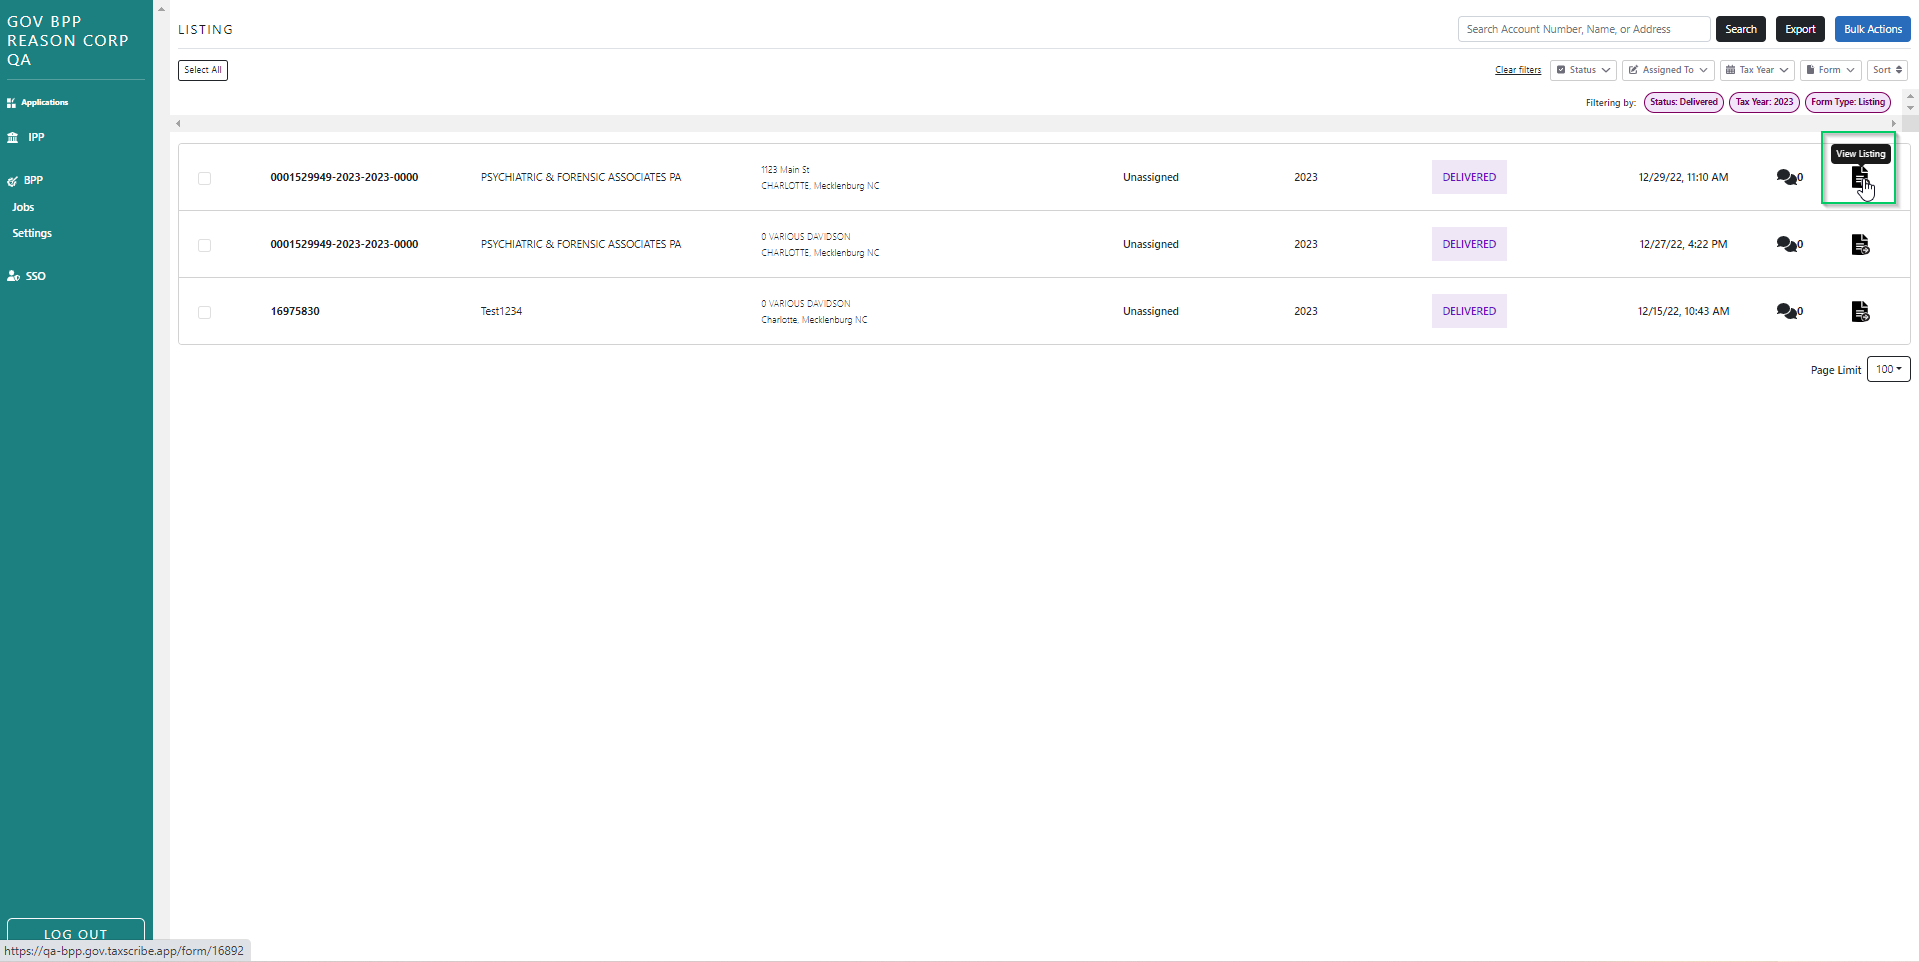
To review a form, click the 'view listing/extension' icon associated with any form in the search results grid. You'll then see all the information that the taxpayer submitted through TaxScribe Business displayed on the page.
If the form is in "delivered" status, click Start Review. This automatically assigns the form to you and moves the status to "In Review". After clicking "Start Review", the taxpayer receives an email notification letting them know that their form is being processed. Other users can still view the form, but only the assigned user can approve or reject it. You can also manually assign the form using the assignee drop down, as long as the form is still in Delivered status.
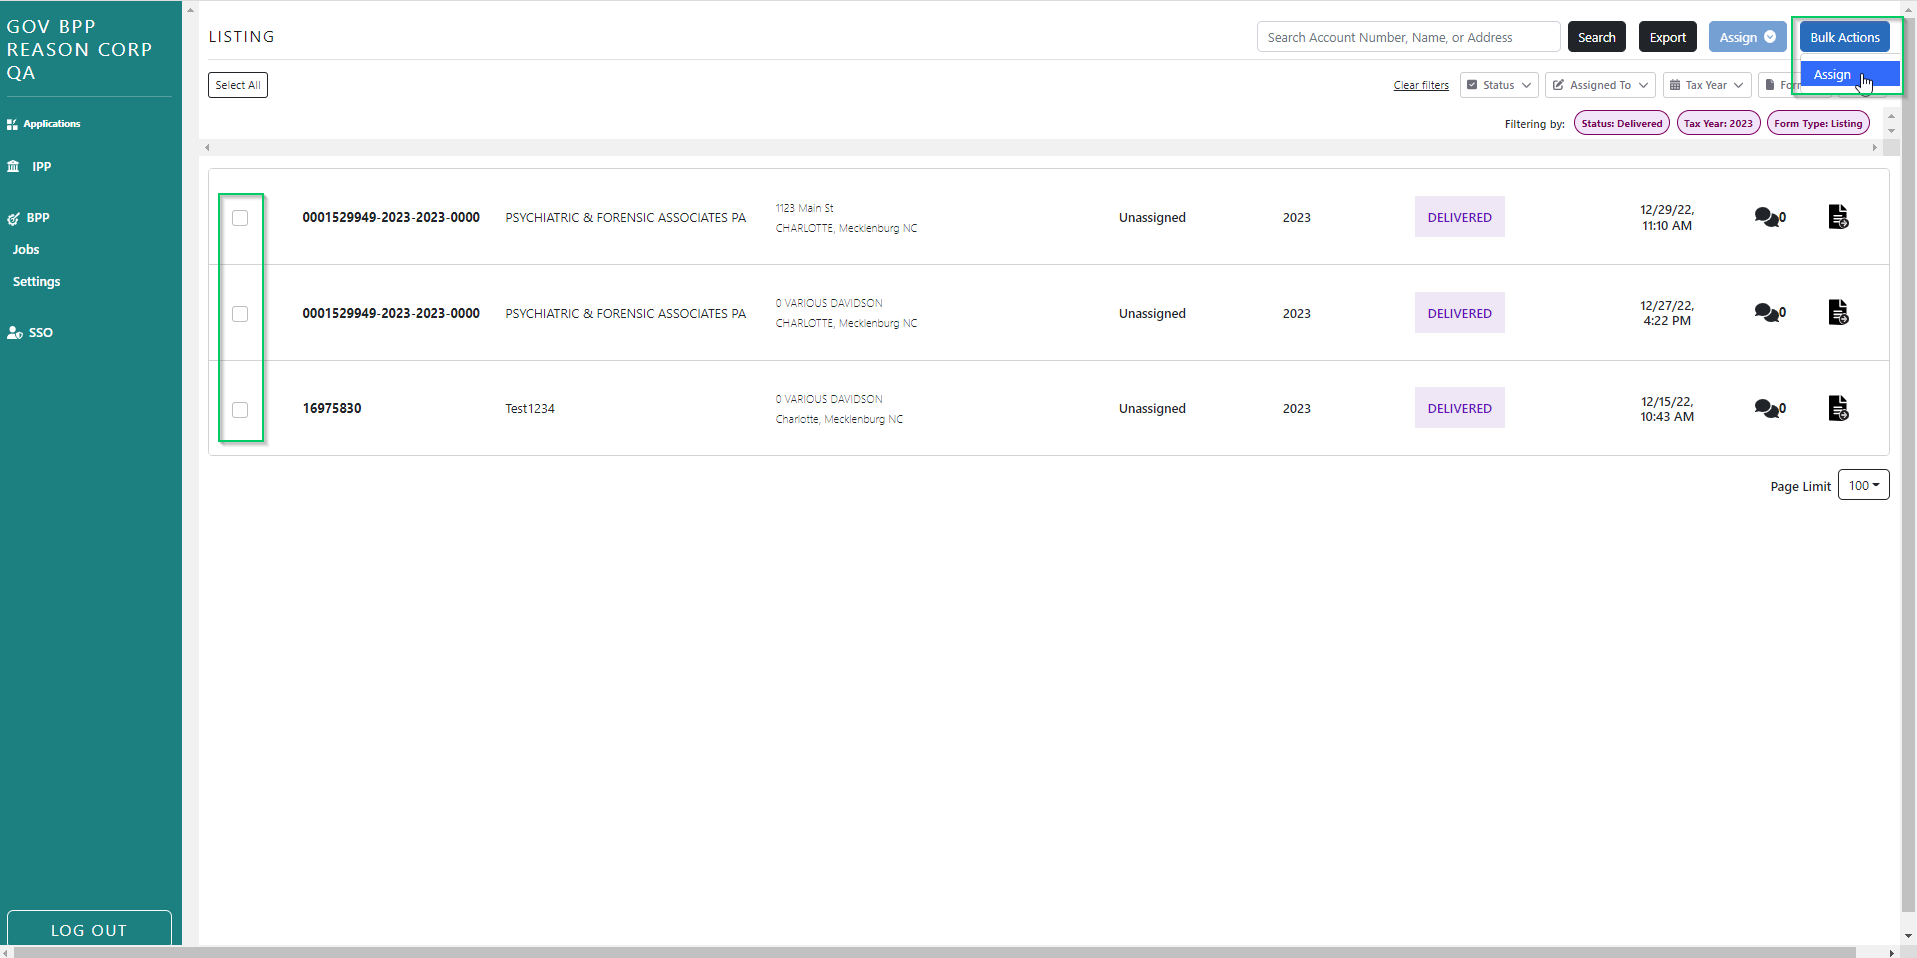
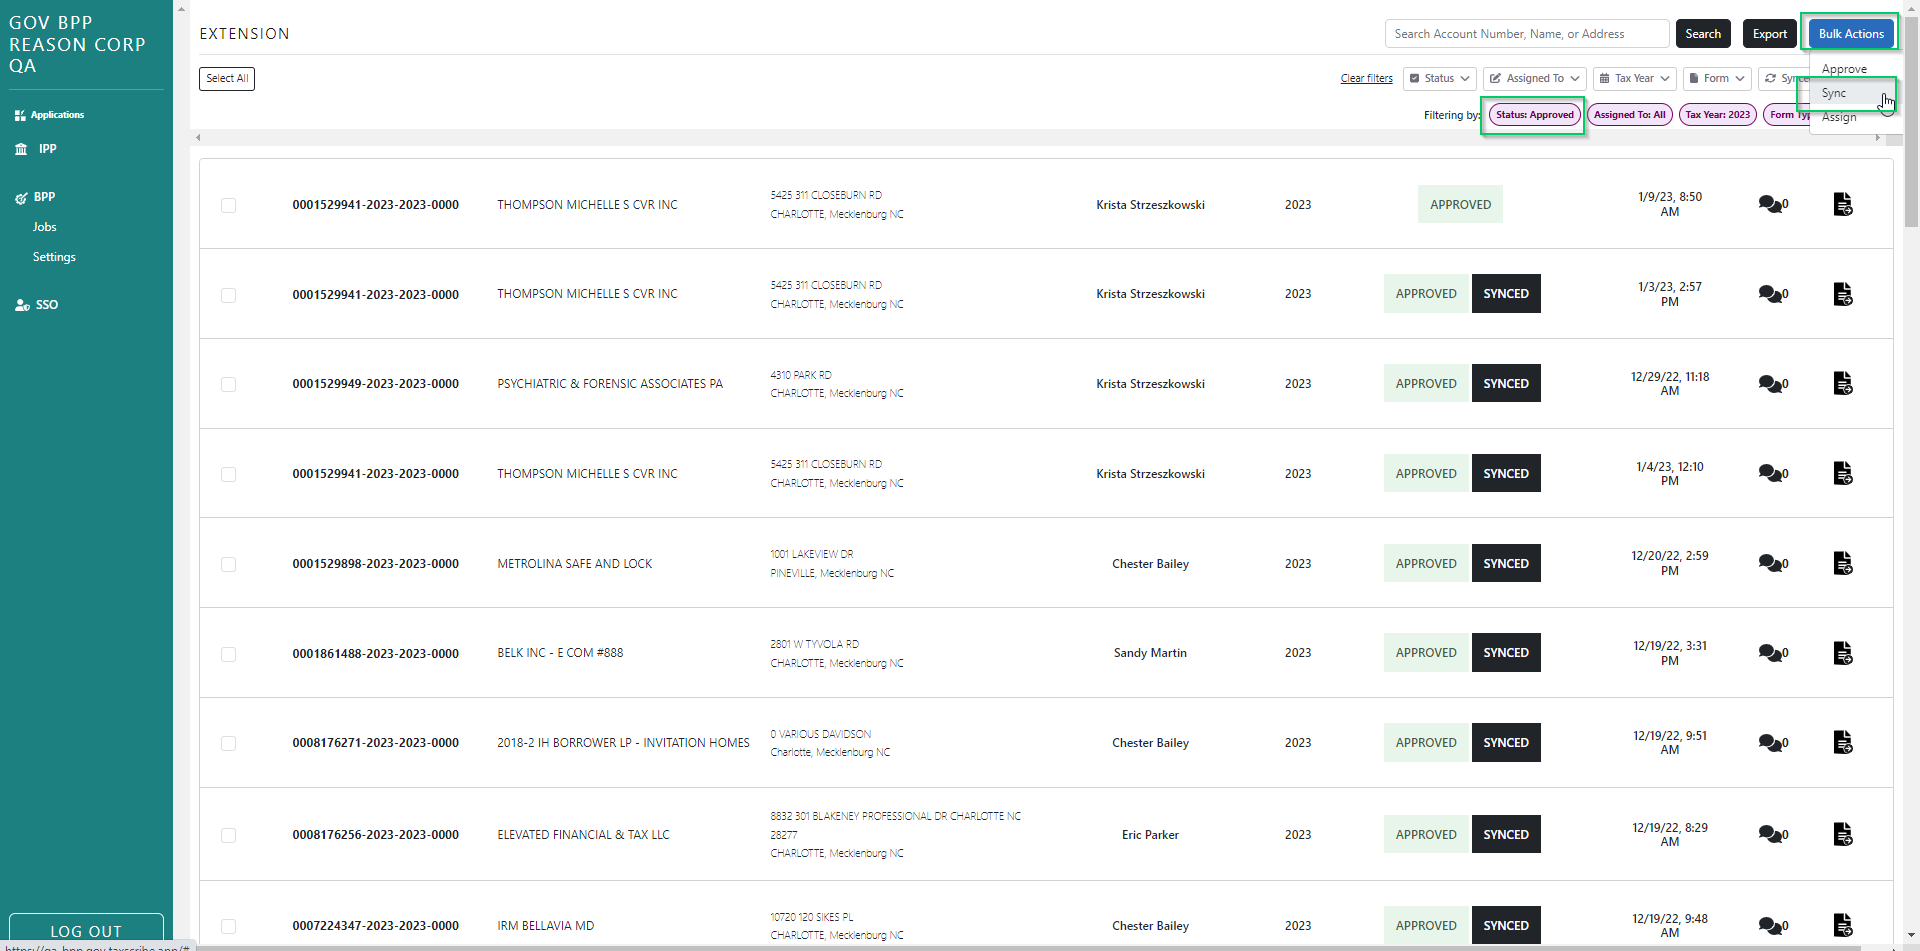
Bulk Actions
Bulk Assign Listings
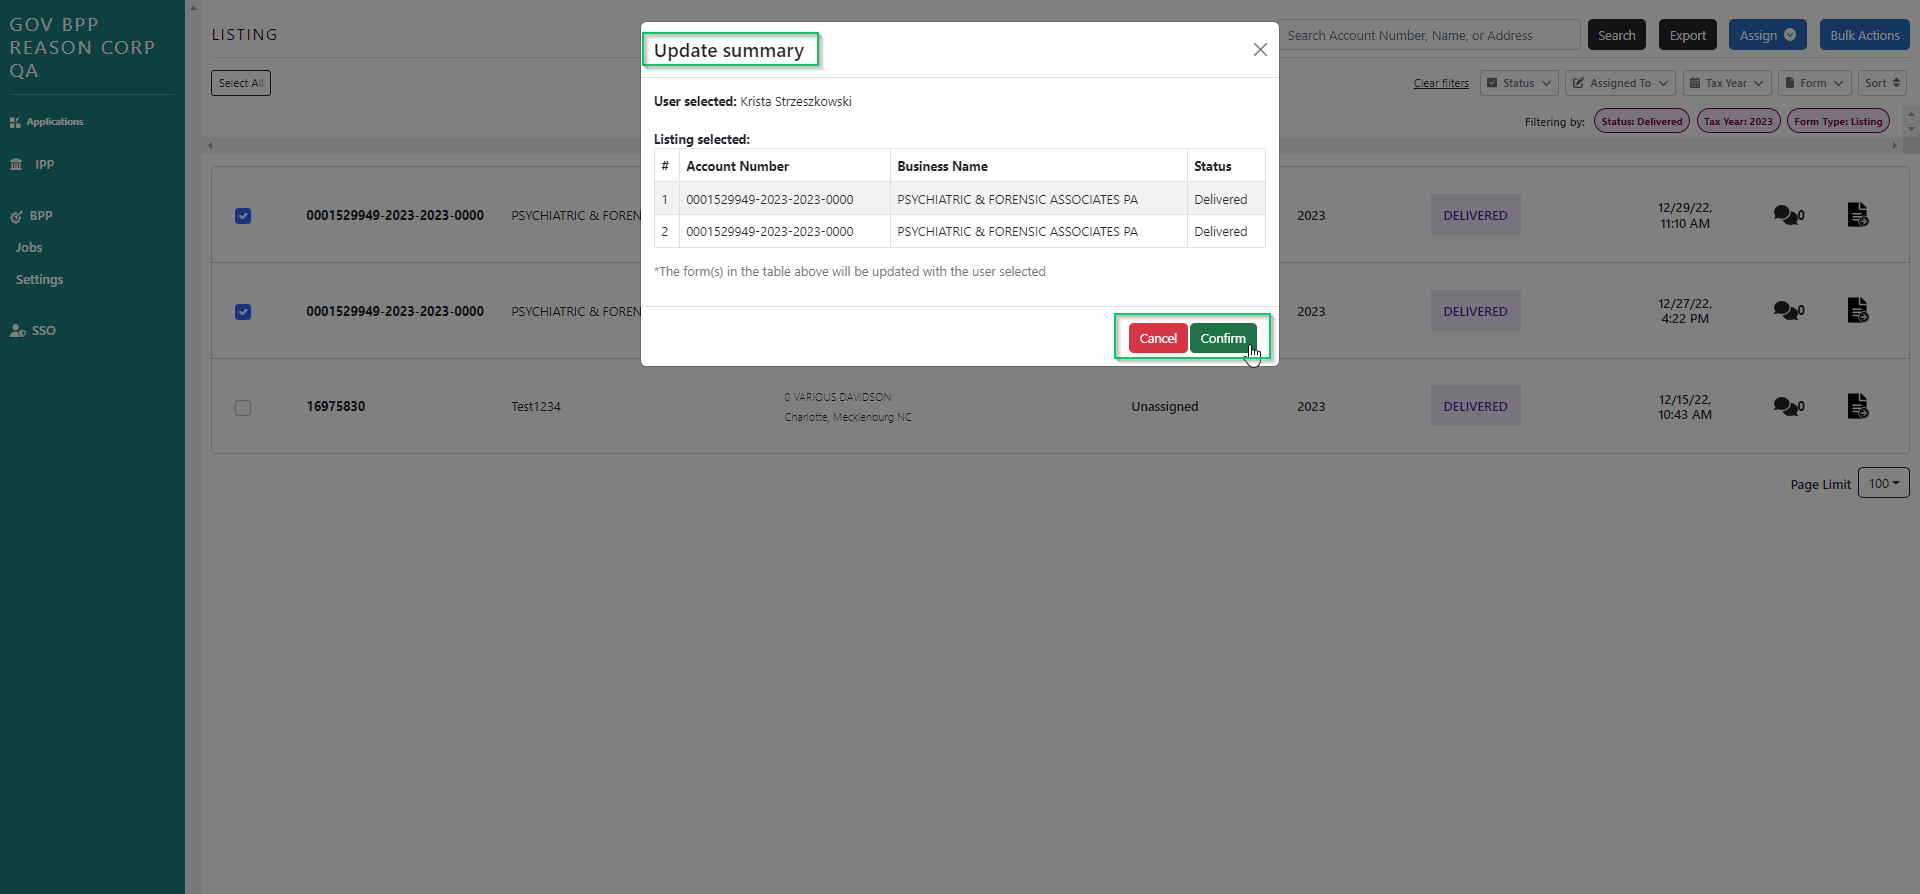
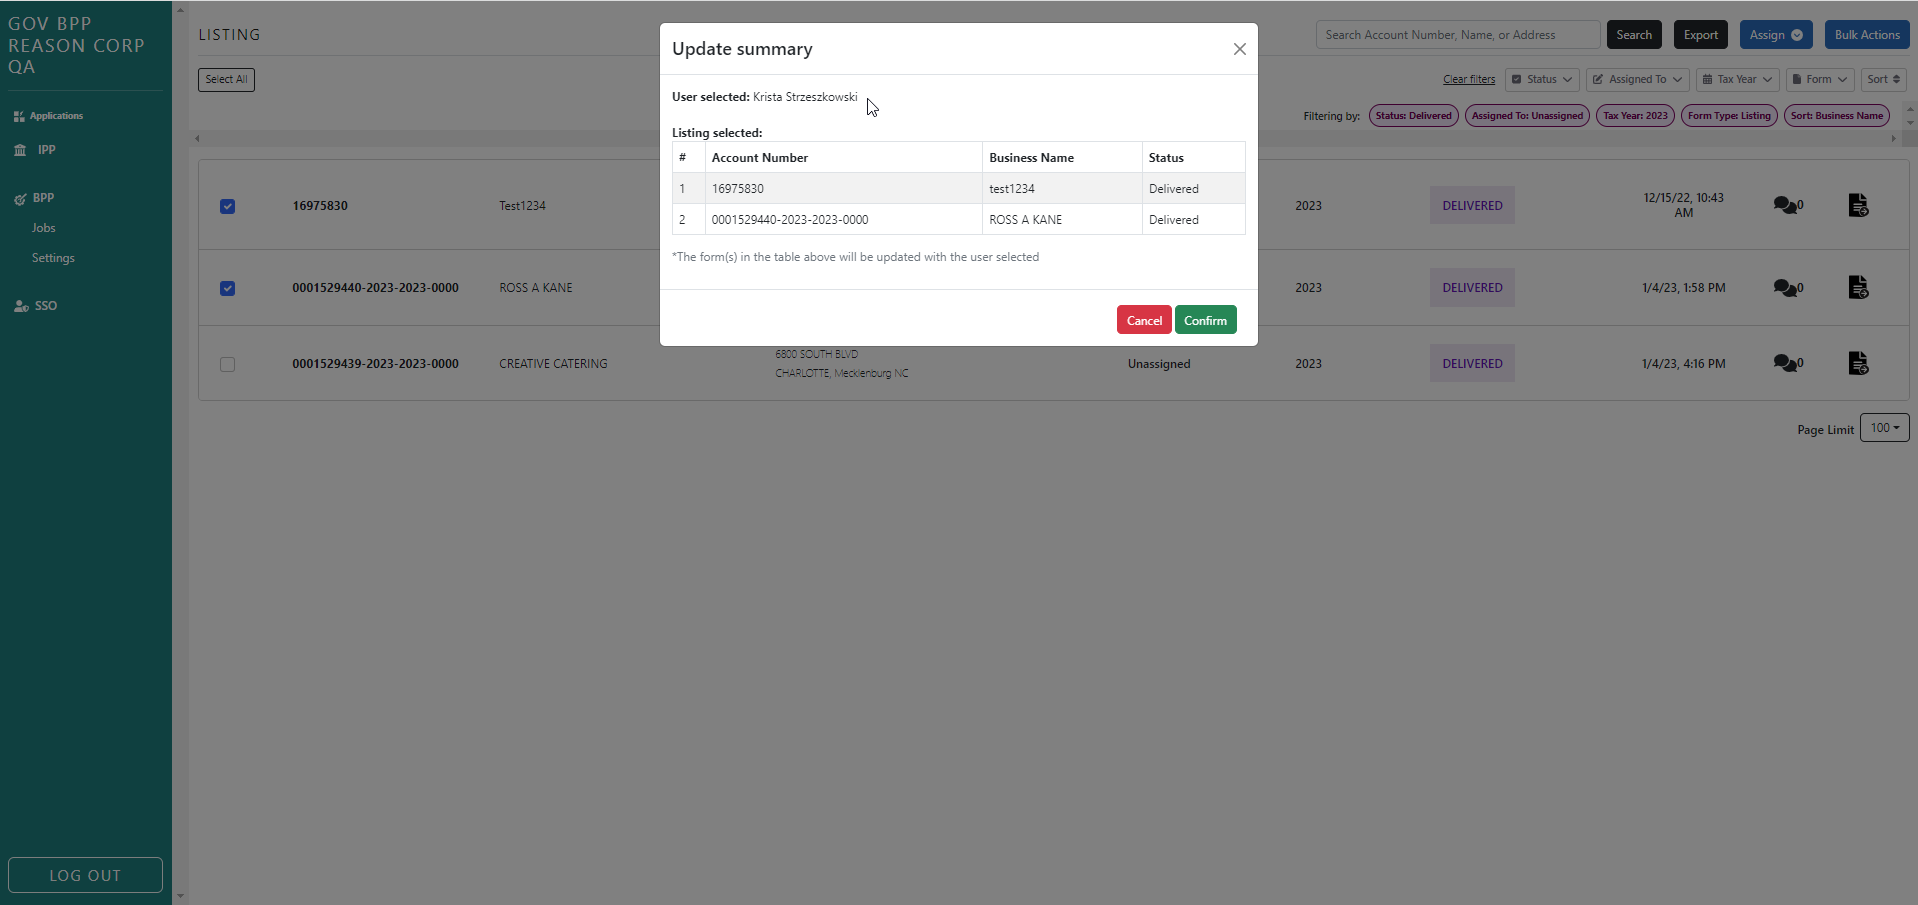
If the user has the "Bulk Assign Listings" permission enabled on their user profile, they will be able to assign multiple listings at once to themselves or others from the BPP dashboard. To perform a bulk assignment request, follow the steps below:
Make sure form type filter is Listing
Press Bulk Action button and choose the Assign selection – the checkboxes for forms that are eligible for bulk assign will become selectable
Choose the listings you wish to bulk assign using the checkboxes on the left-hand side of the search results grid
Click the blue "Assign" button on the top right
Choose the user you wish to assign the listings to
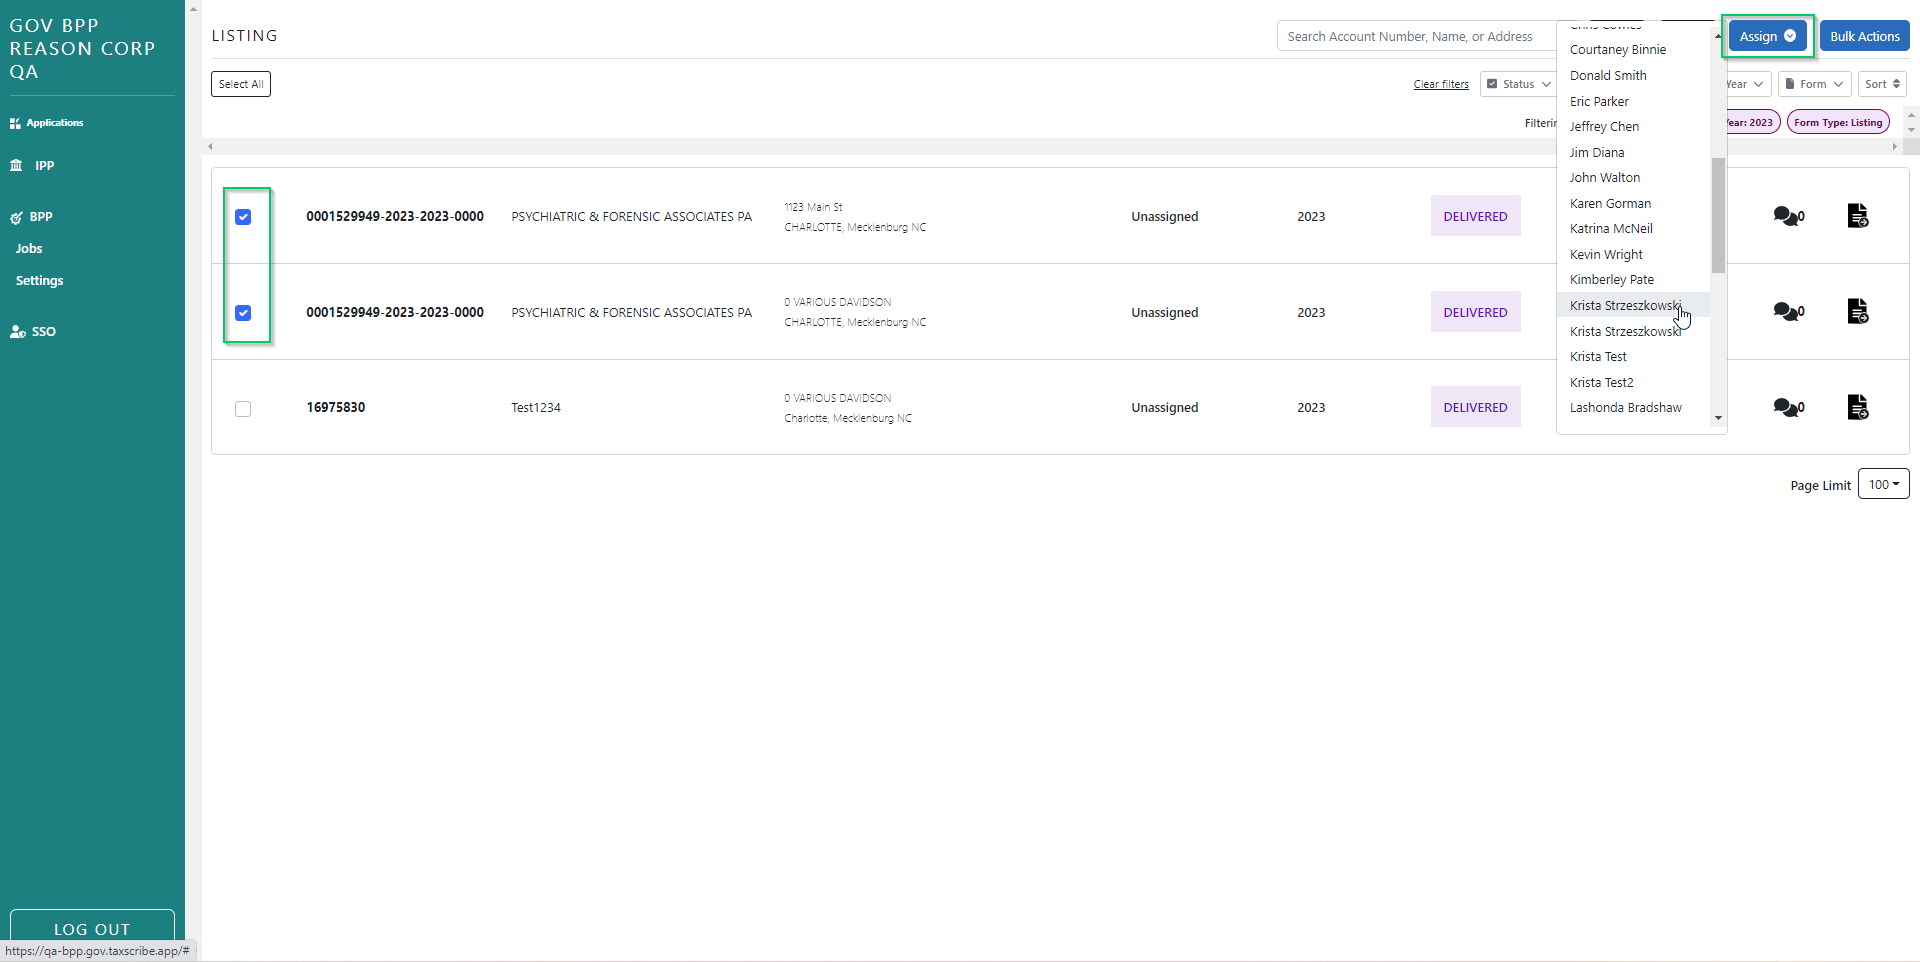
Review the confirmation dialogue box summarizing the changes you are trying to make
If everything checks out, click "Yes". You'll then see a confirmation dialogue confirming the bulk assignment request was submitted
If the user has the "Bulk Approve Extensions" permission enabled on their user profile, they can approve multiple extensions at once from the search dashboard. To perform a bulk approval request, follow the steps below:
Make sure form type filter is Extension
Press Bulk Action button and choose the Approve selection – the checkboxes for forms that are eligible for bulk approve will become selectable
Choose the extensions you wish to bulk approve using the checkboxes on the left-hand side of the search results grid
Click the blue 'Approve' button on the top right
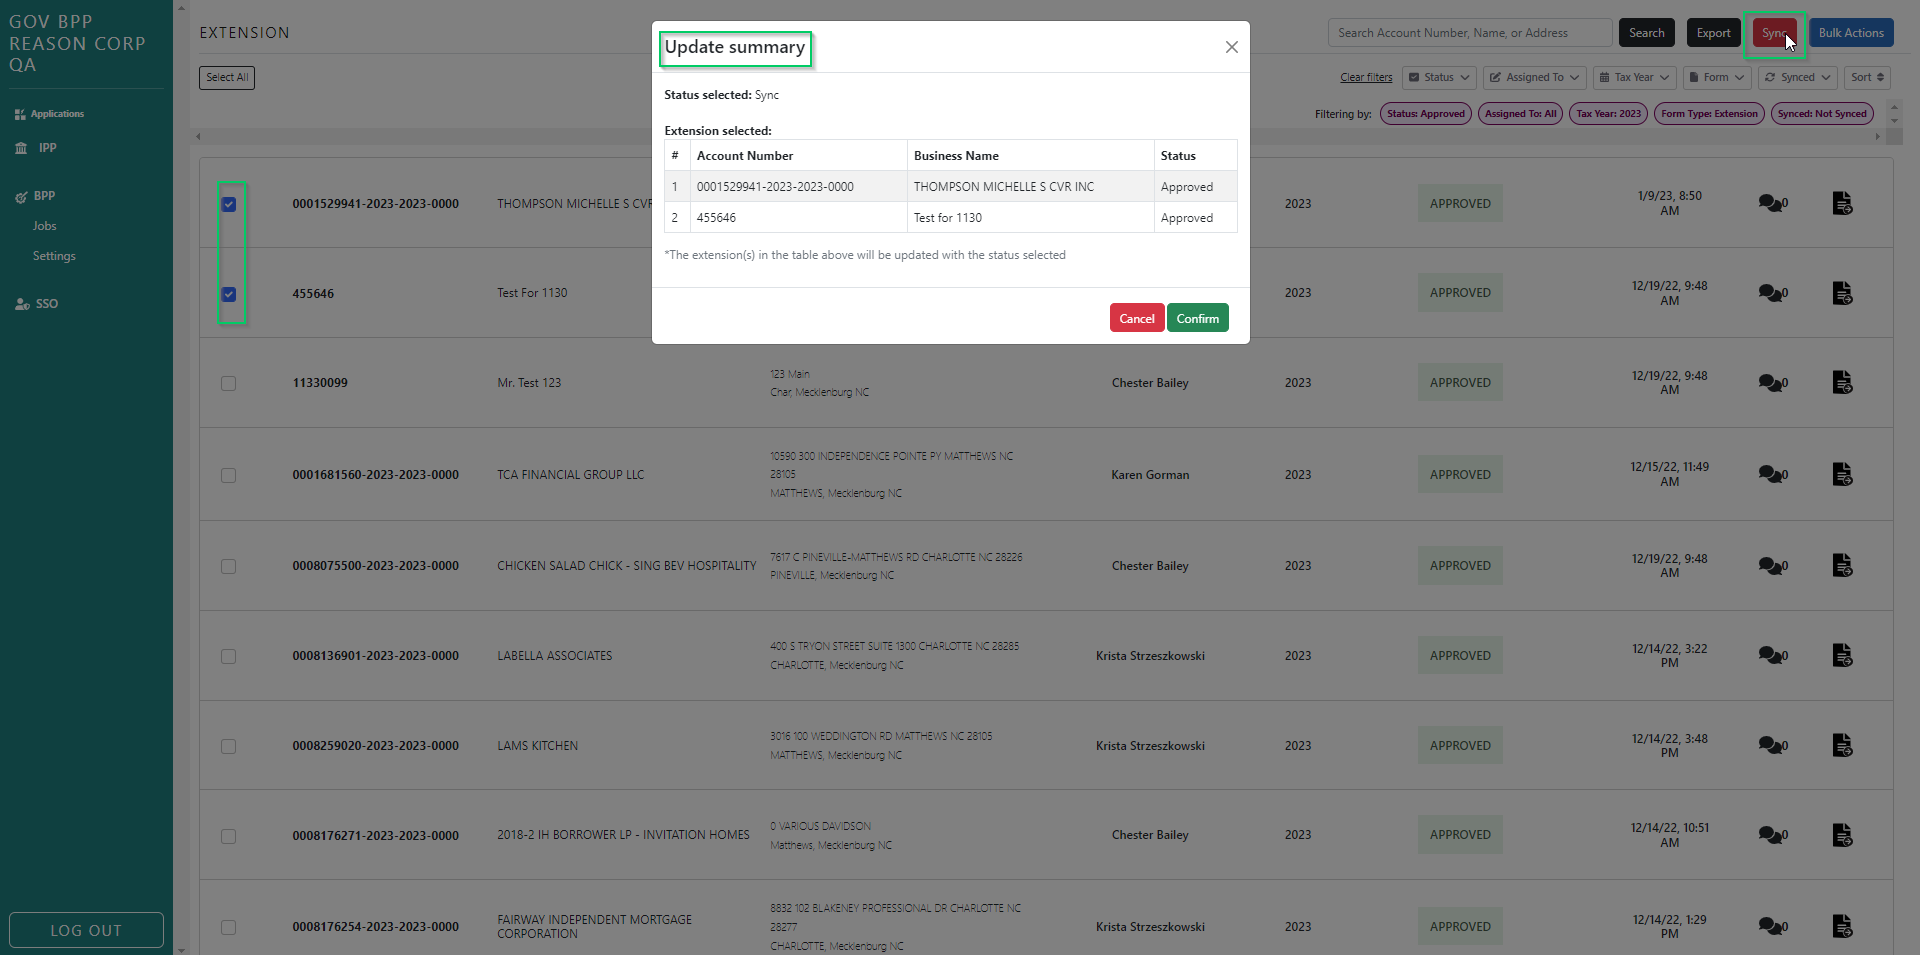
Review the confirmation dialogue box summarizing the approvals
If the user has the 'Bulk Assign Extensions' permission enabled on their user profile, they can assign multiple extensions at once from the search dashboard. To perform a bulk approval request, follow the steps below:
Make sure form type filter is Extension
Press Bulk Action button and choose the Assign selection – the checkboxes for forms that are eligible for bulk assign will become selectable
Choose the extensions you wish to bulk assign using the checkboxes on the left-hand side of the search results grid
Click the blue 'Assign' button on the top right
Review the confirmation dialogue box summarizing the assigns
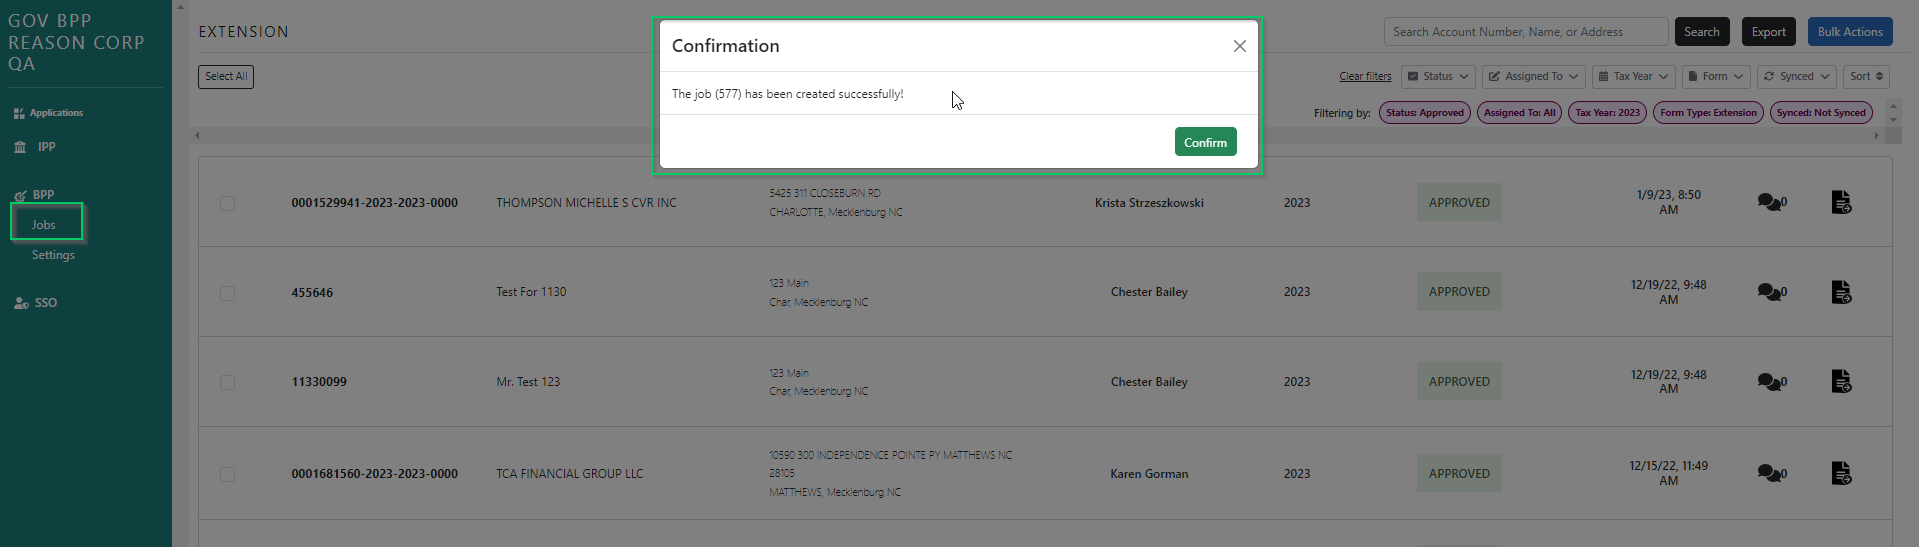
Bulk Jobs Page
After confirmation that the request was submitted, you can either close the dialogue box to continue working, or view the status of your request from the jobs page. The jobs page shows all of the active and completed bulk requests in chronological order, with the most recent on top. Activity from all users within your jurisdiction will show up here.
NCPTS Sync
Individual Extension Sync
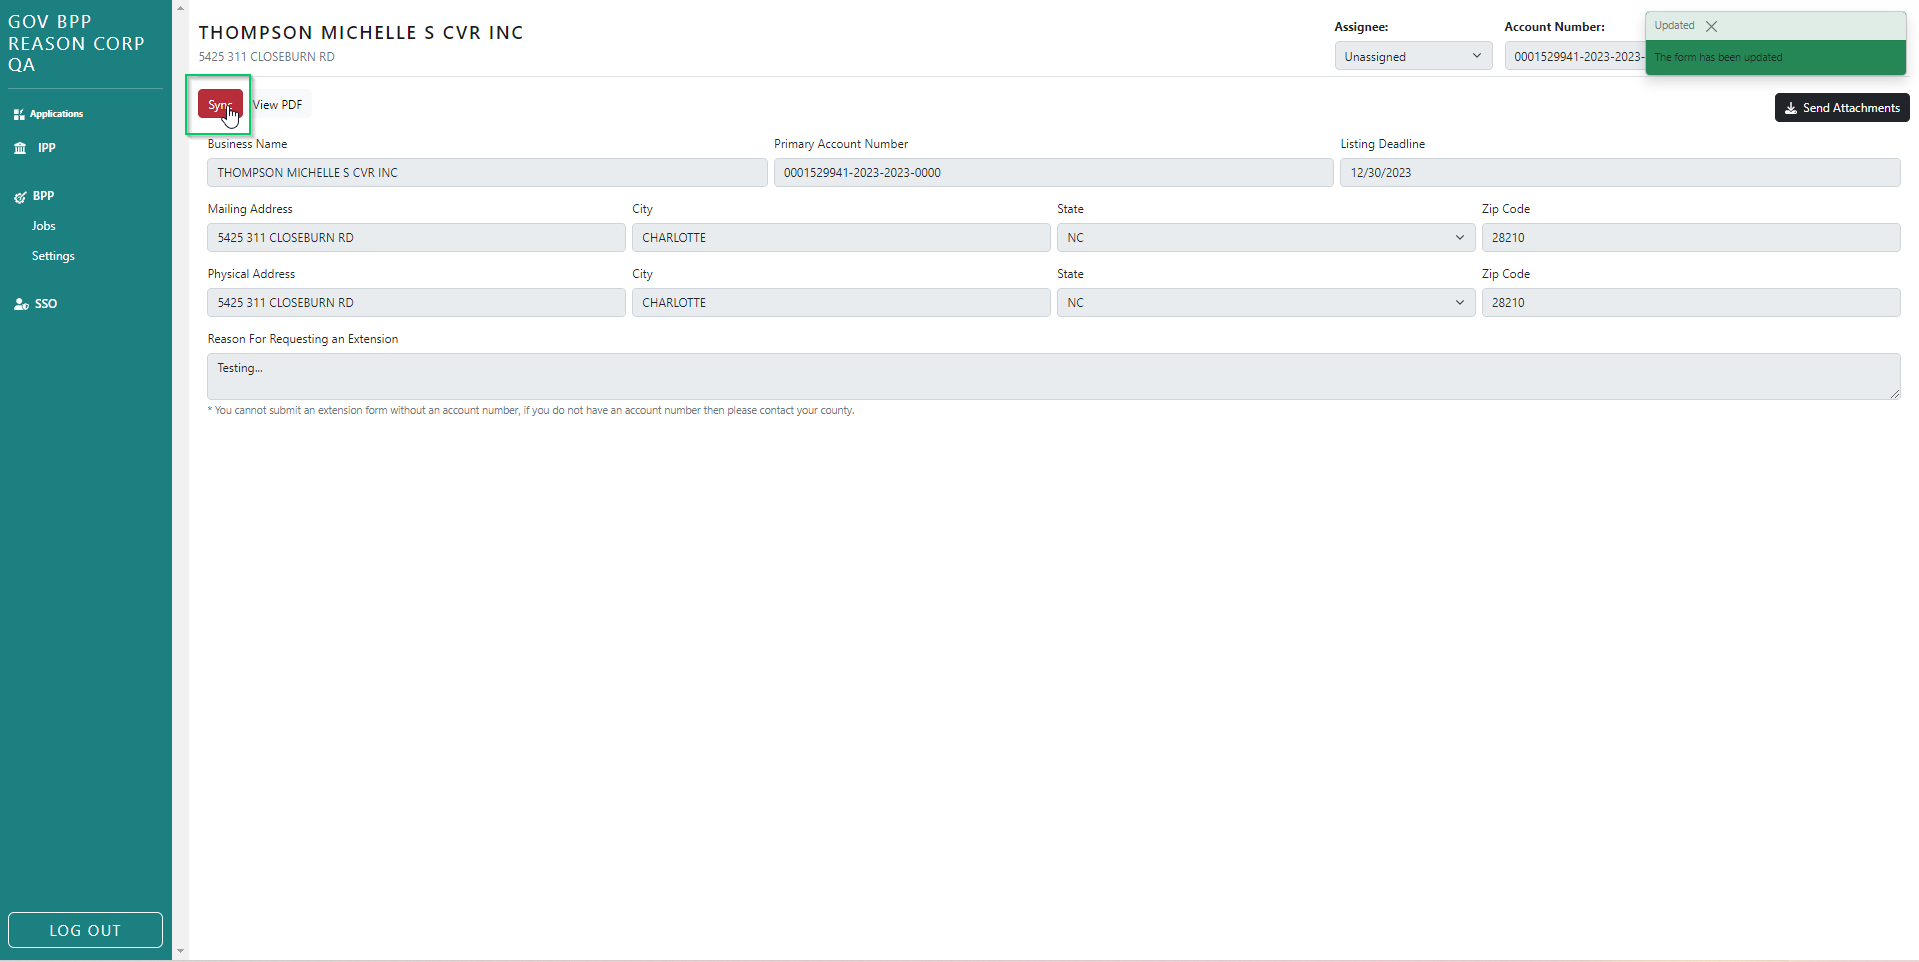
Extensions can be synced individually or in bulk. In order to sync an extension it must be in approved status and have a valid account number. To sync individually, find the extension and click 'View Extension' icon, press Start Review, Approve. Upon approving, the Sync button will appear. Once you press sync you will get a success message or an error message (depending on if the action was successful or not).
Bulk Extension Sync
To sync in bulk, change status filter to 'Approved' (& form type filter is extension) and press the Bulk Actions button, the Sync option is now selectable. Select the sync option and choose some forms (forms that have 'Synced' status box next to 'Approved' cannot be selected) then press the red Sync action button. Choose confirm on the update summary. If your user account has permissions to view the job page you can check the status of the job there.
Individual Listing Sync
Listings can ONLY be synced individually. To sync individually, find the extension and click 'View Extension' icon, press Start Review, Approve. Upon approving, the Sync button will appear. Once you press sync you will get a success message or an error message (depending on if the action was successful or not).
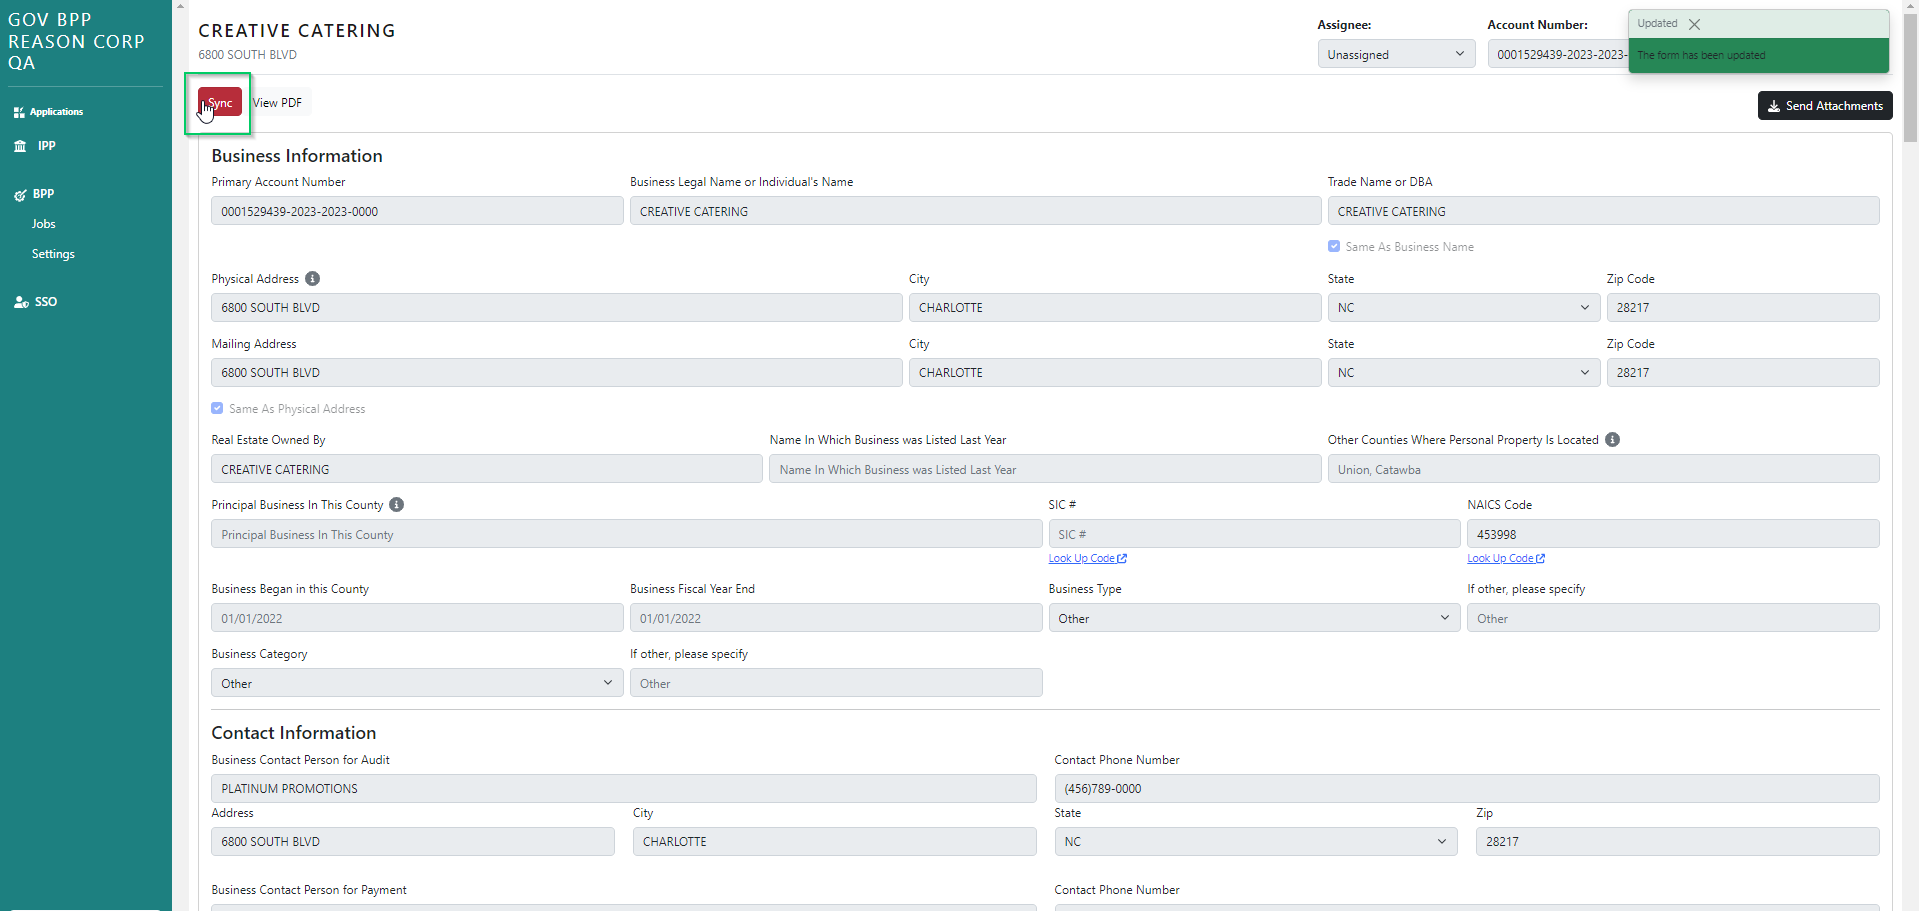
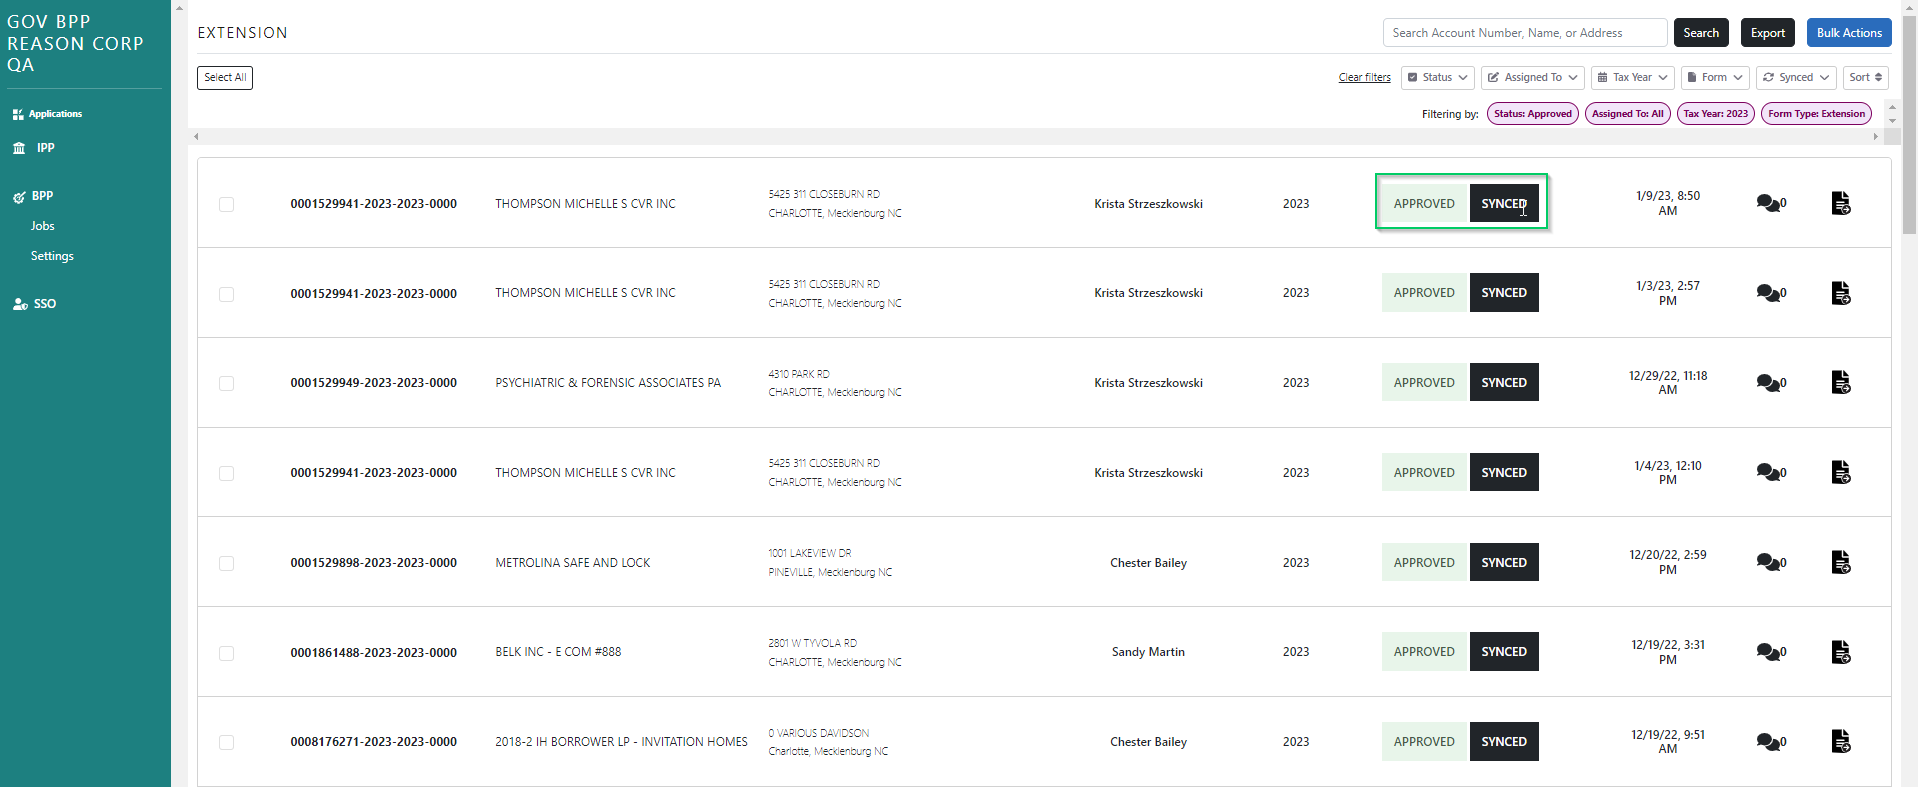
Status Upon Syncing
The status on the dashboard will show synced once the action is complete.
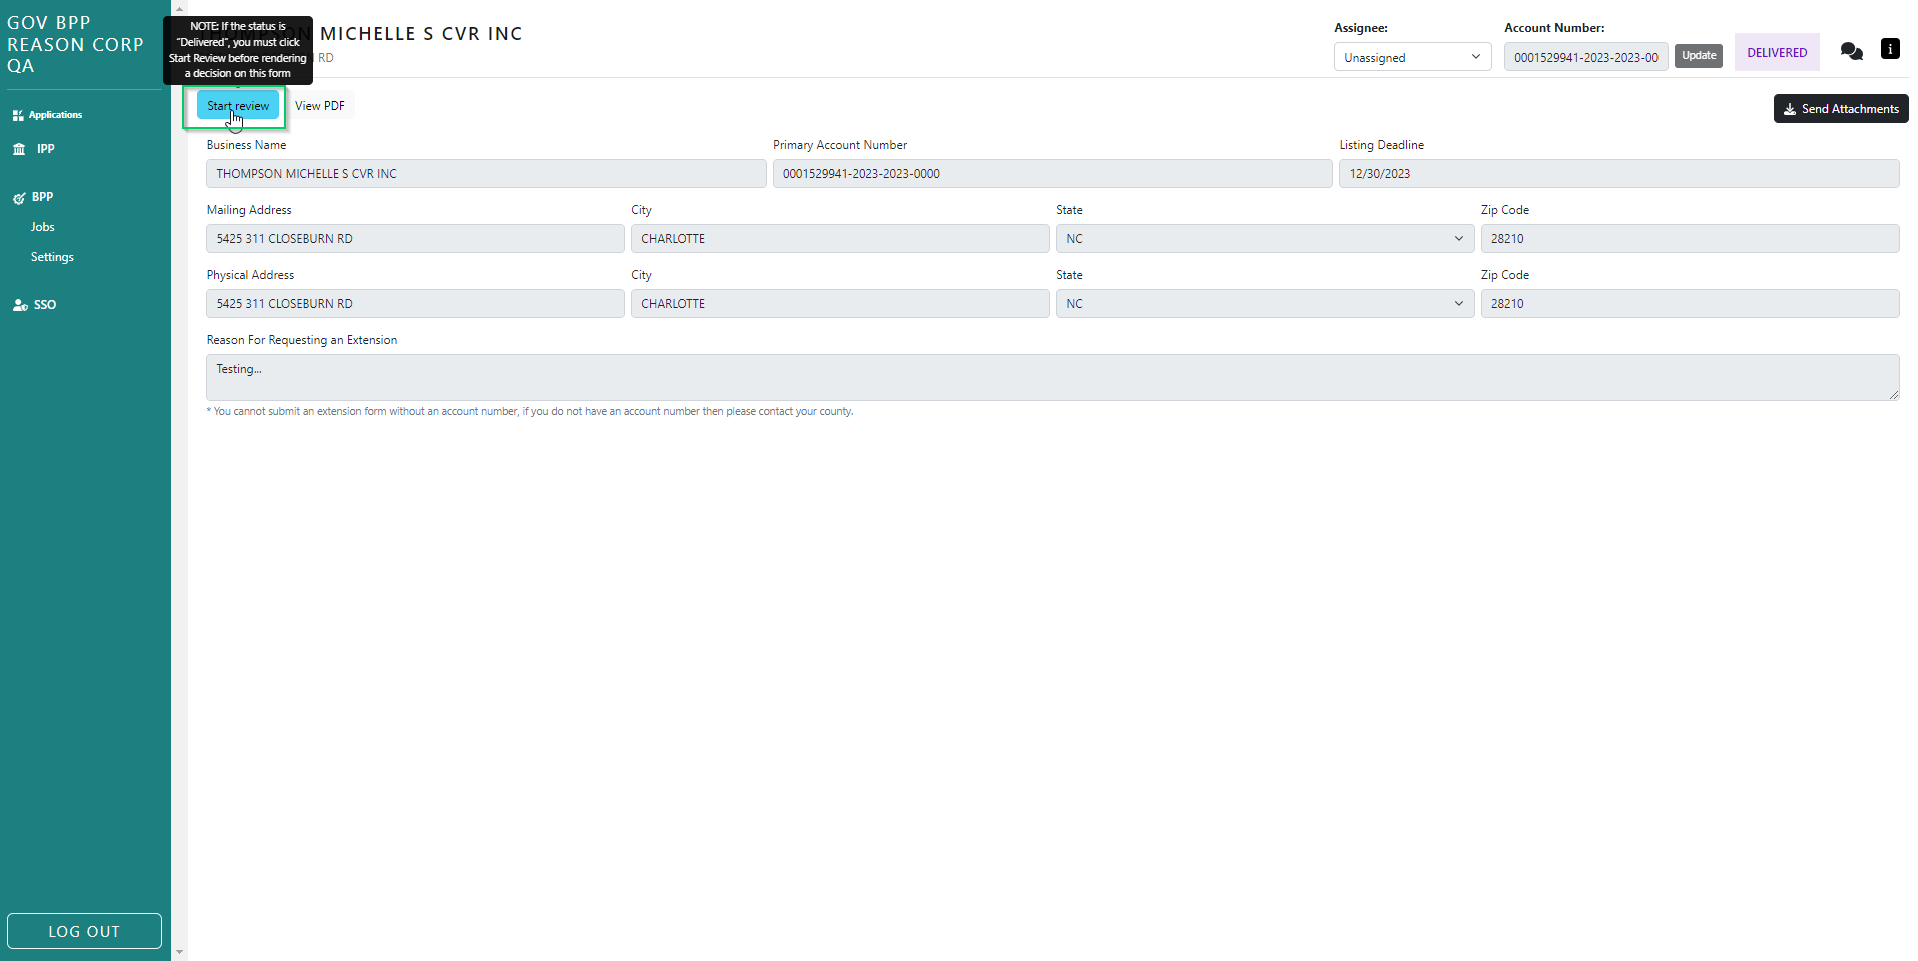
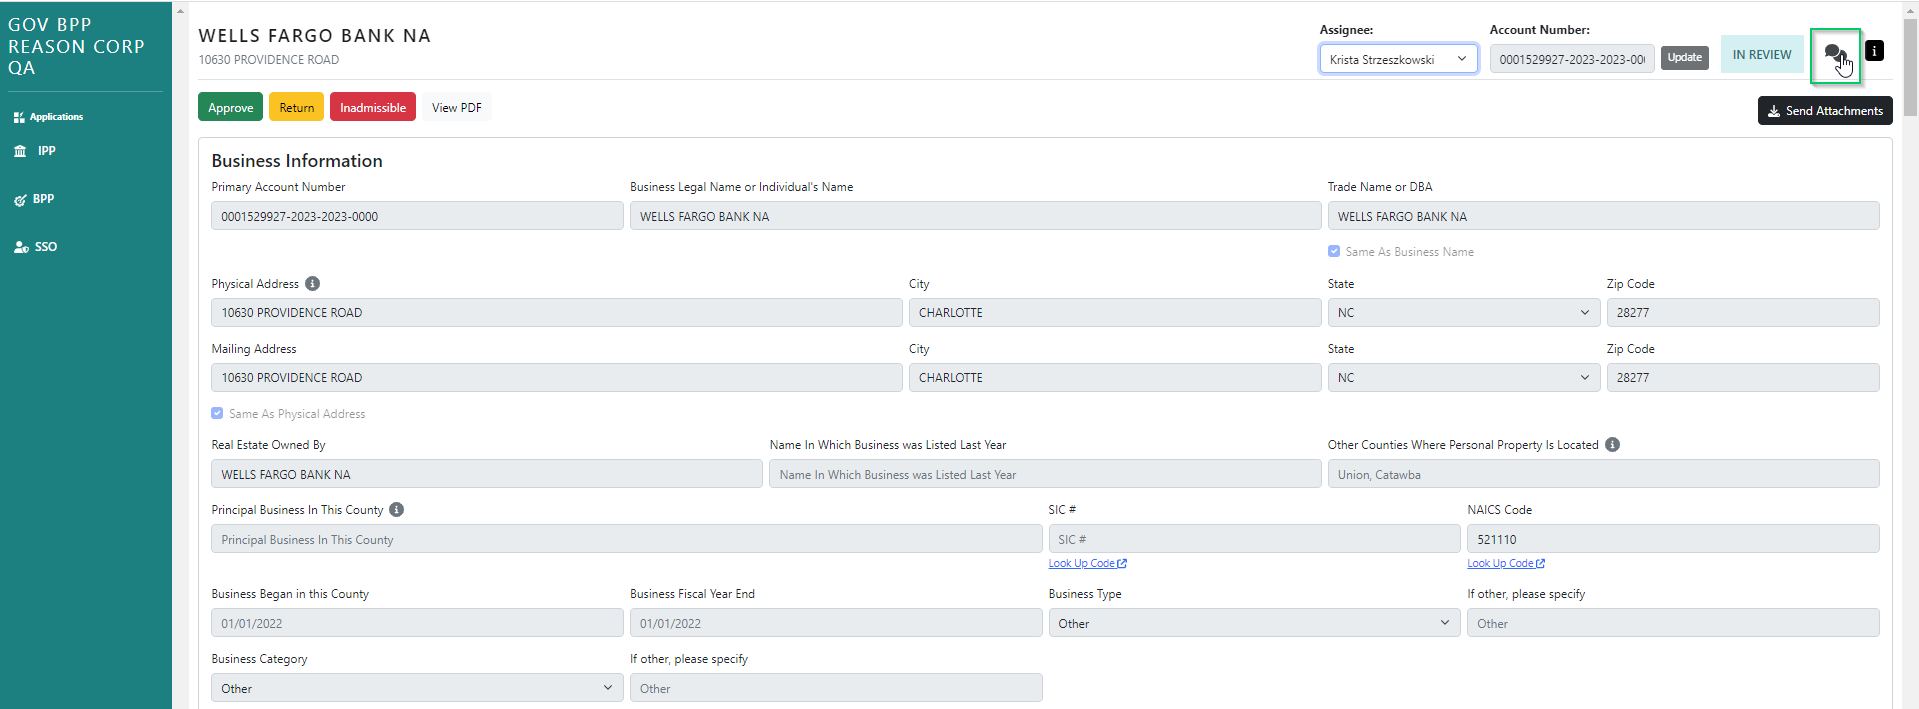
Account Information
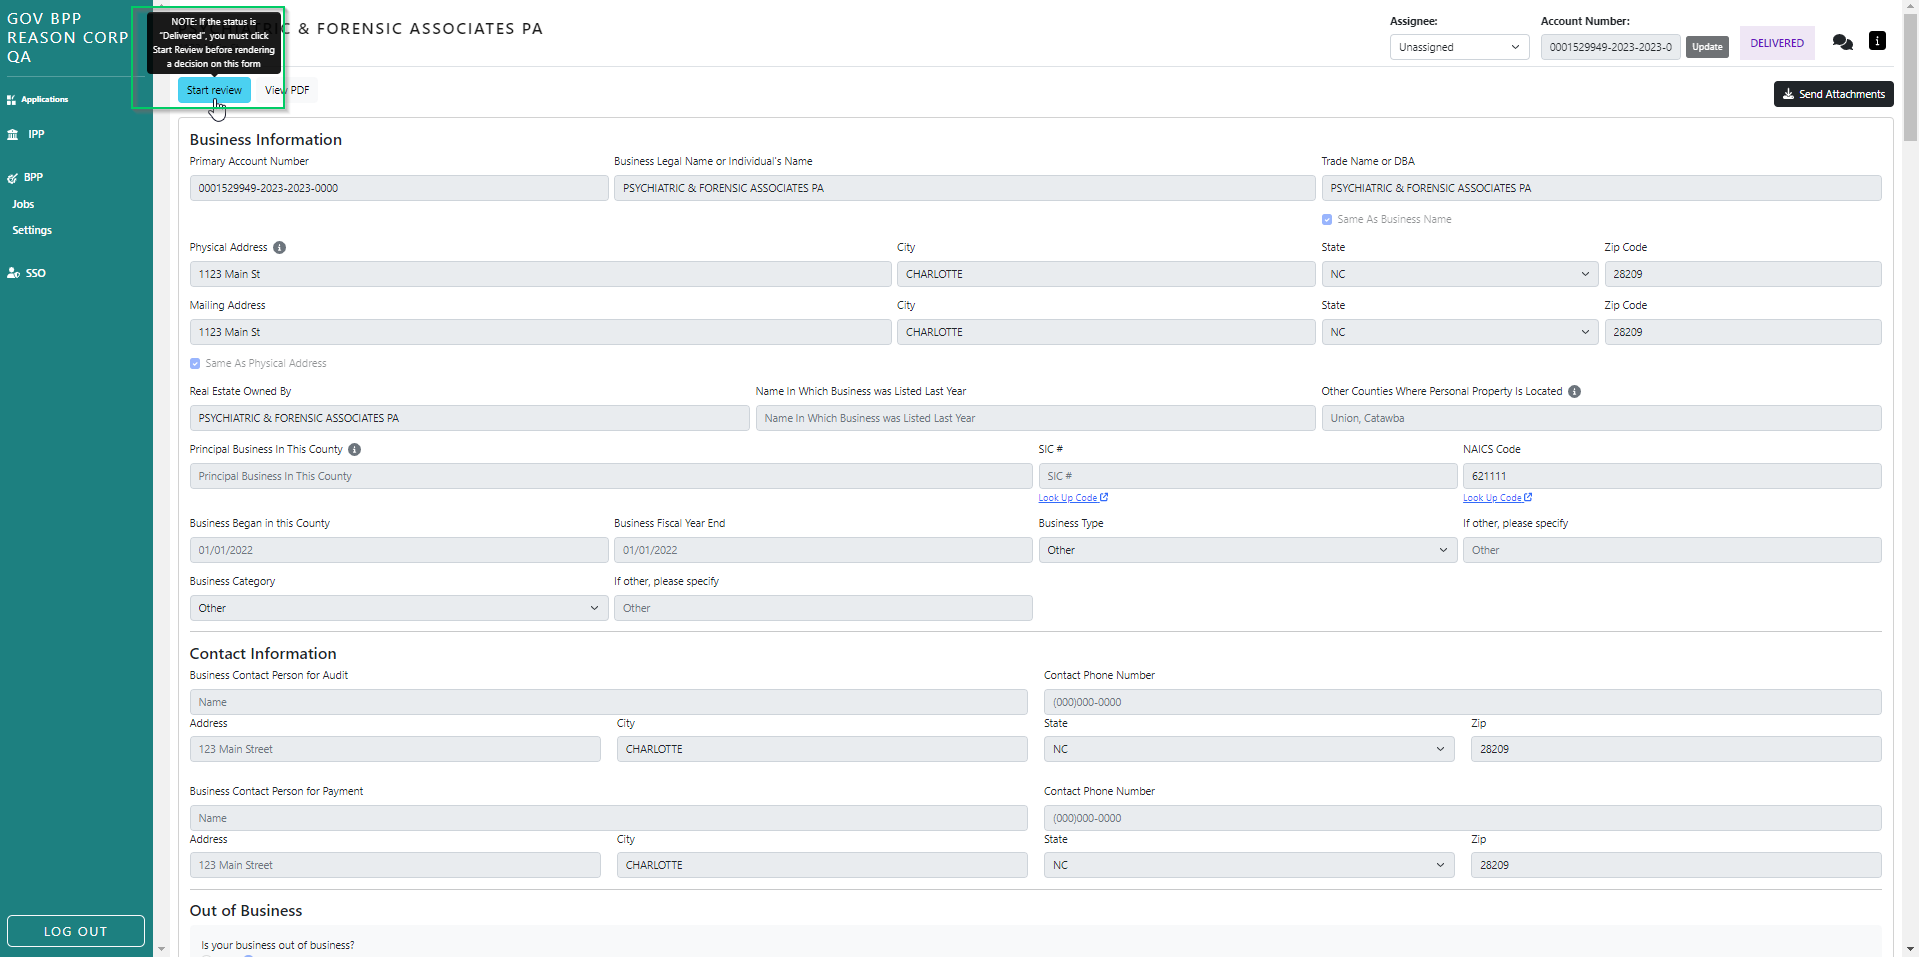
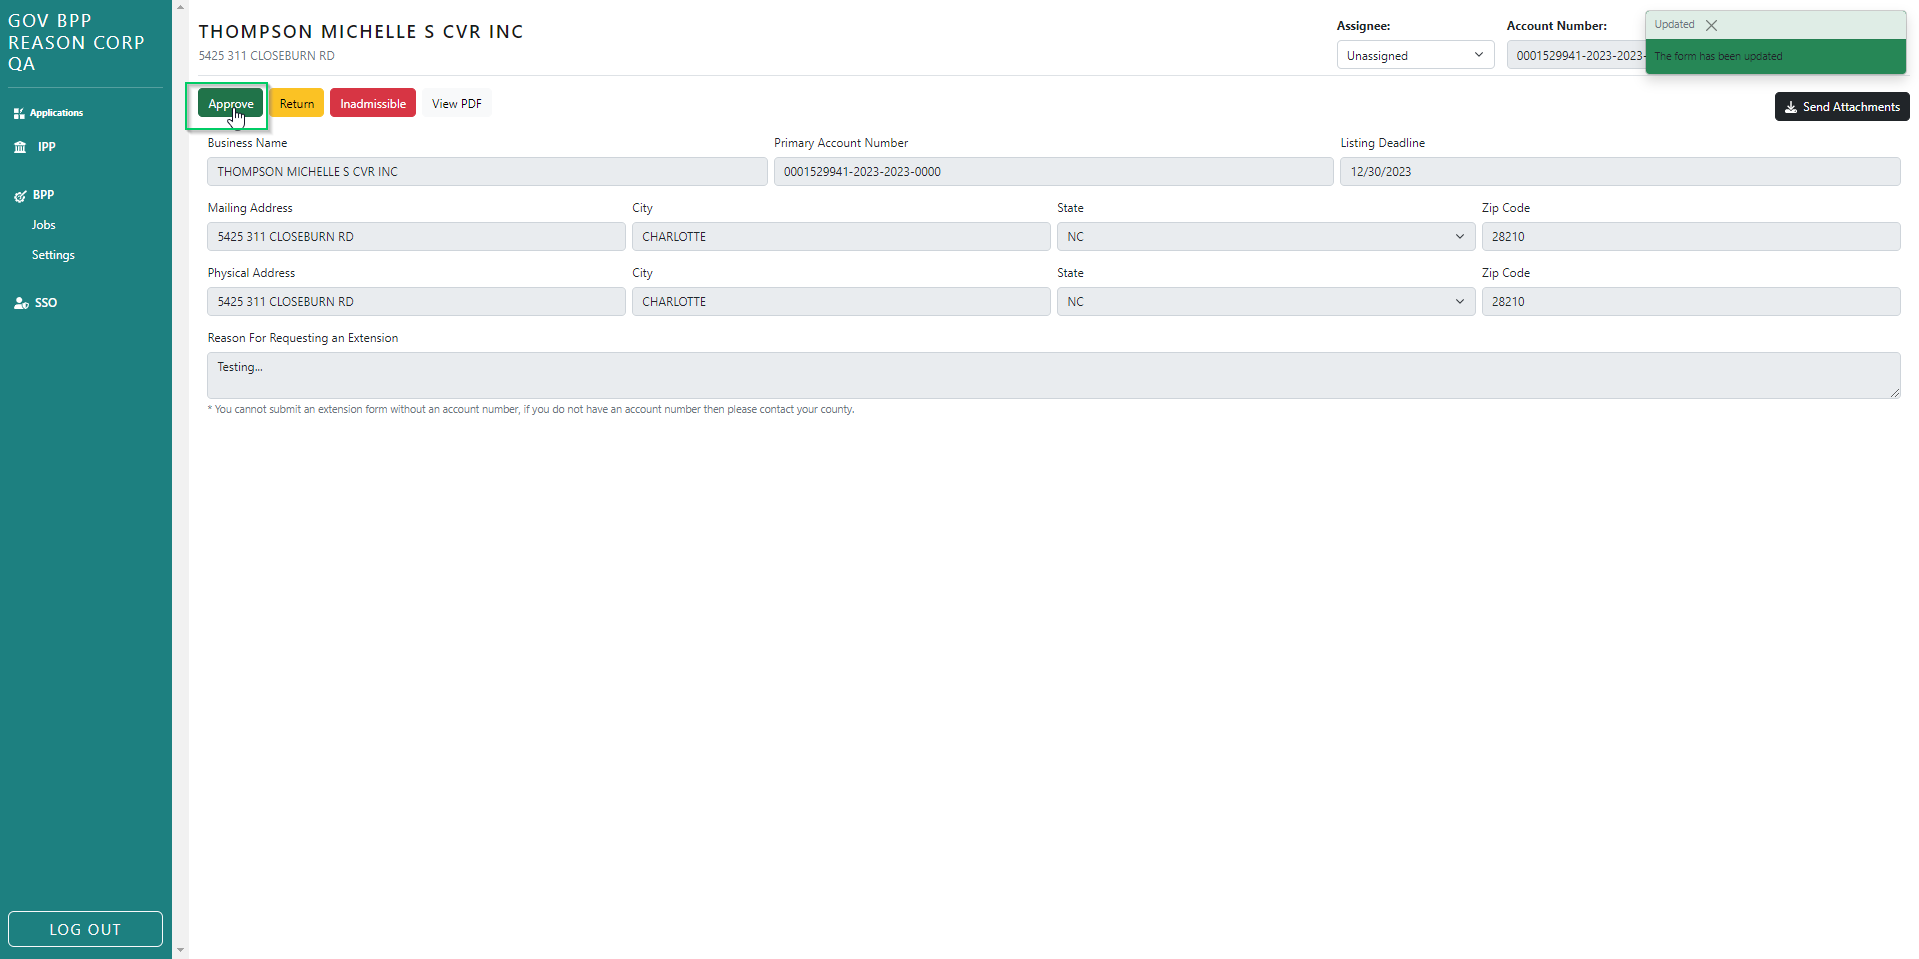
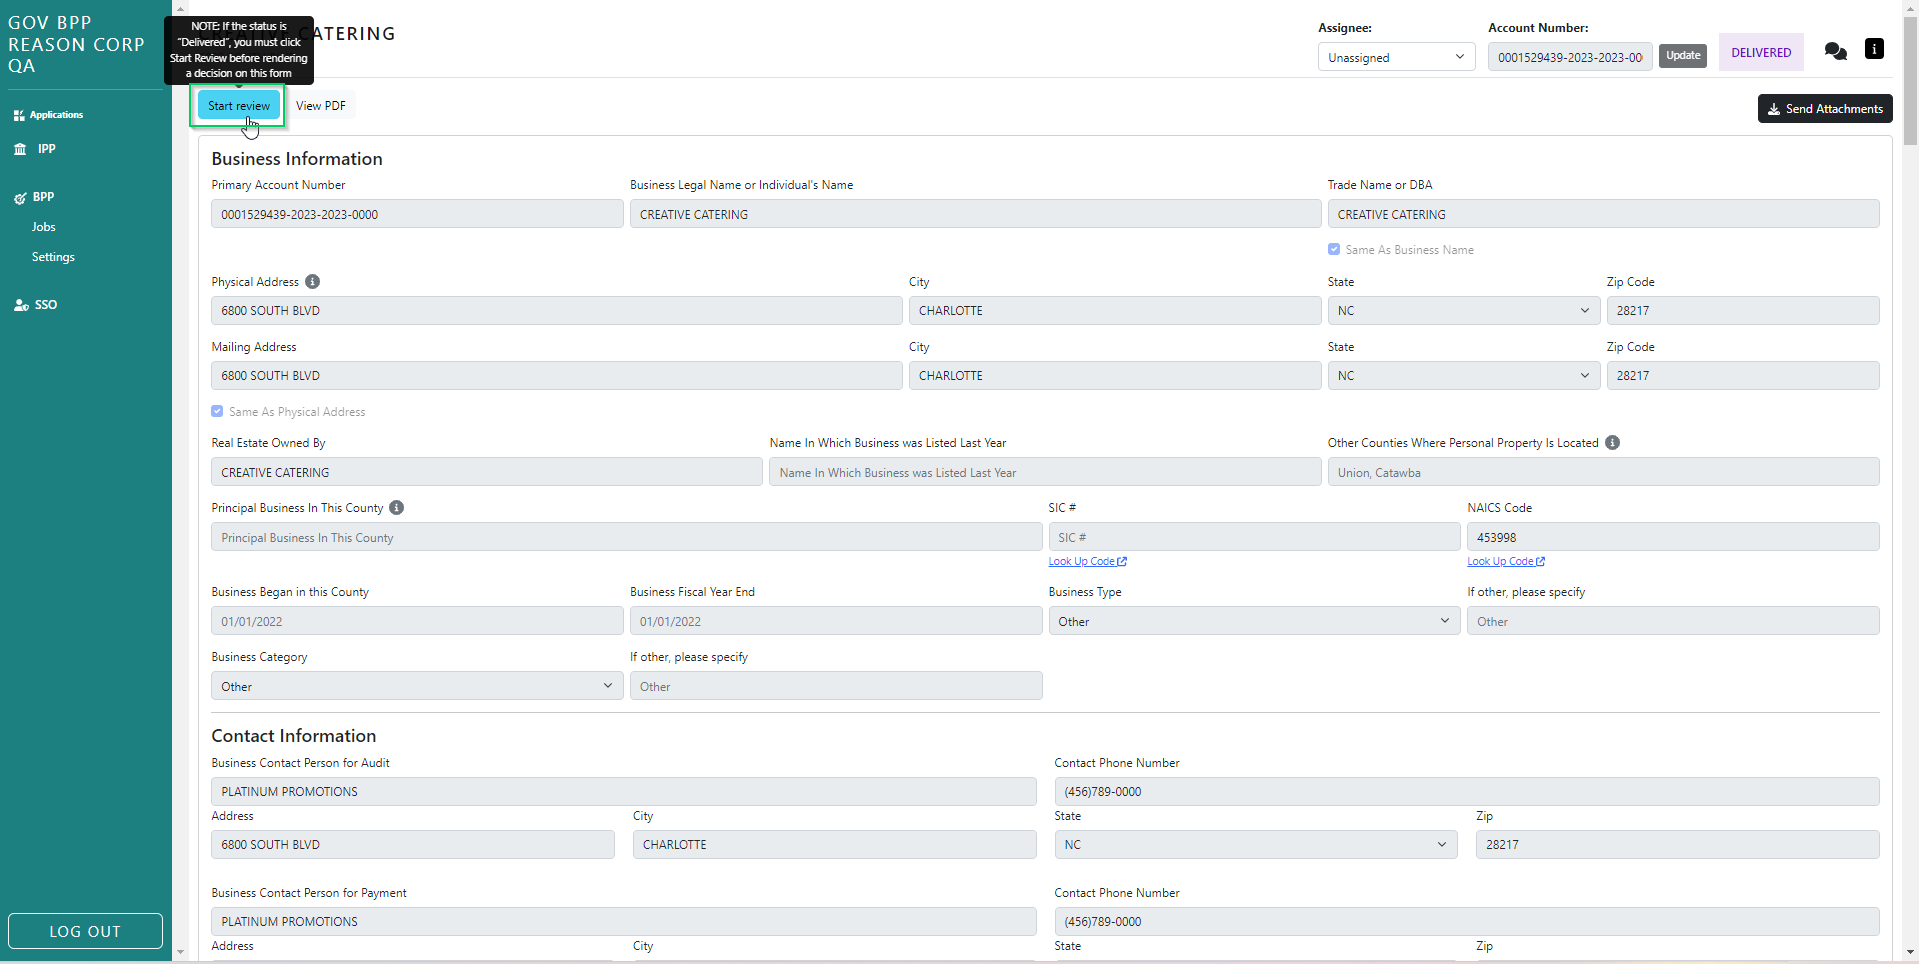
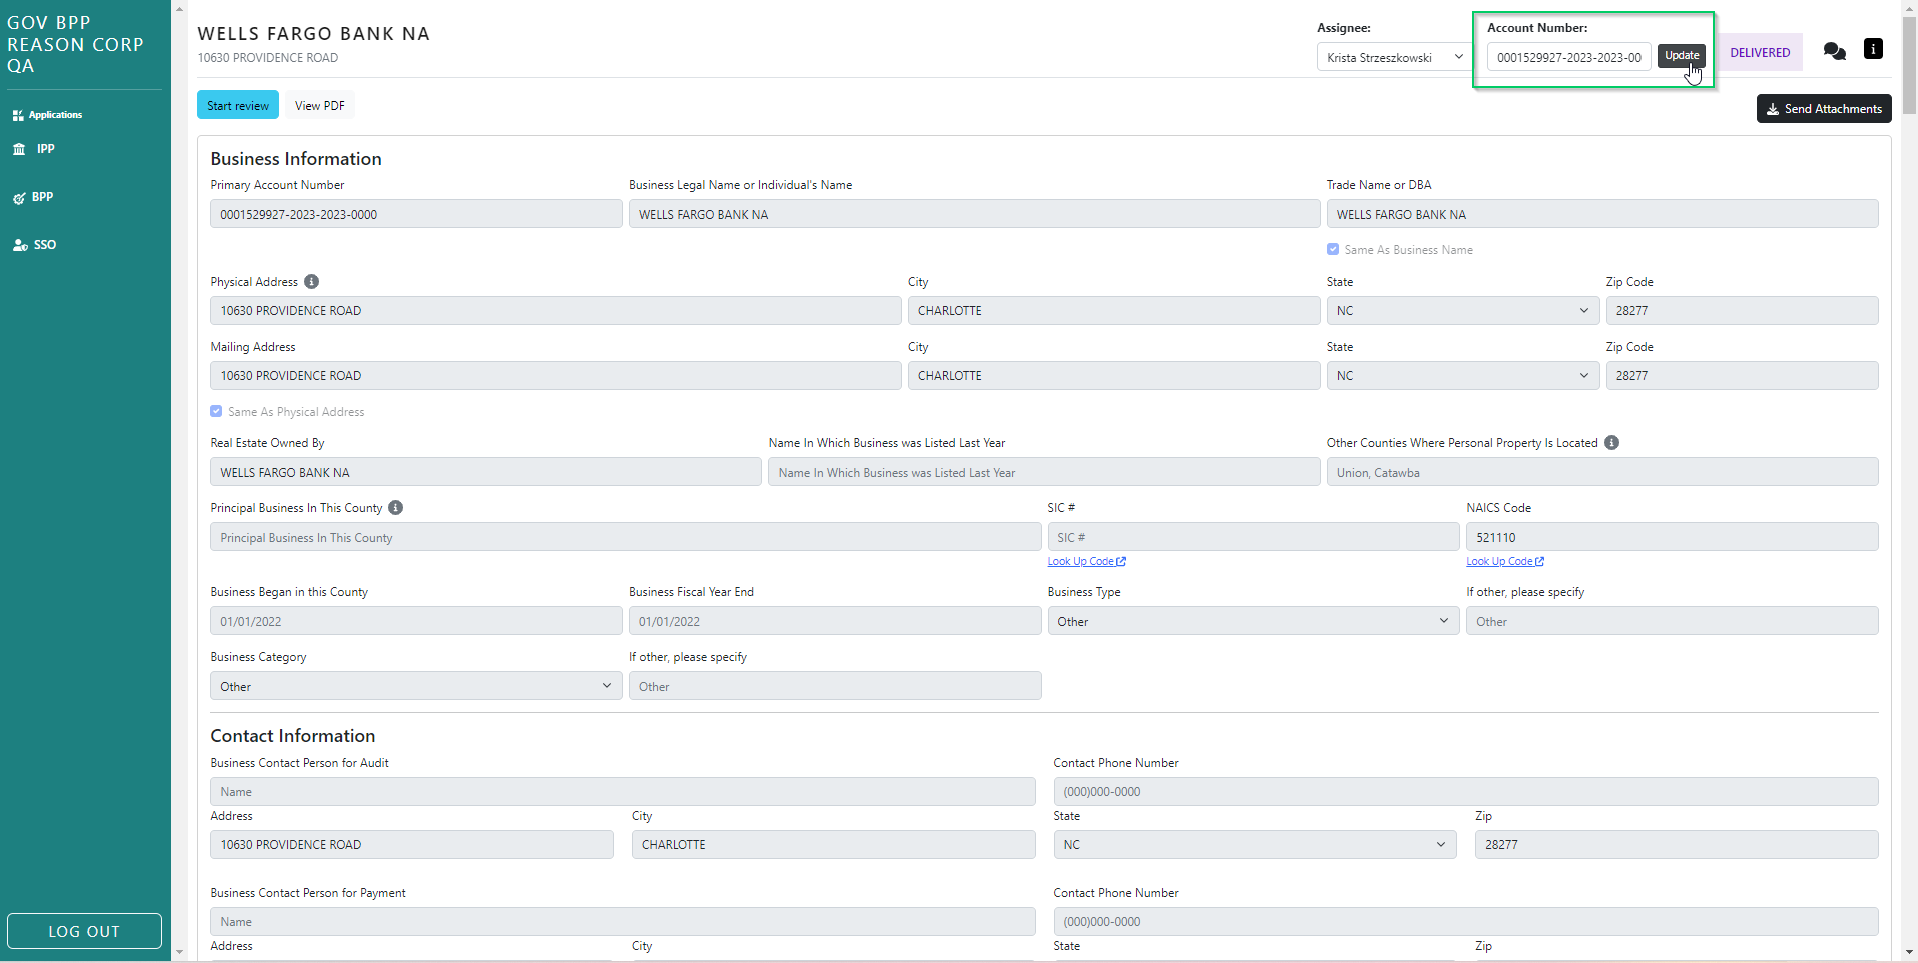
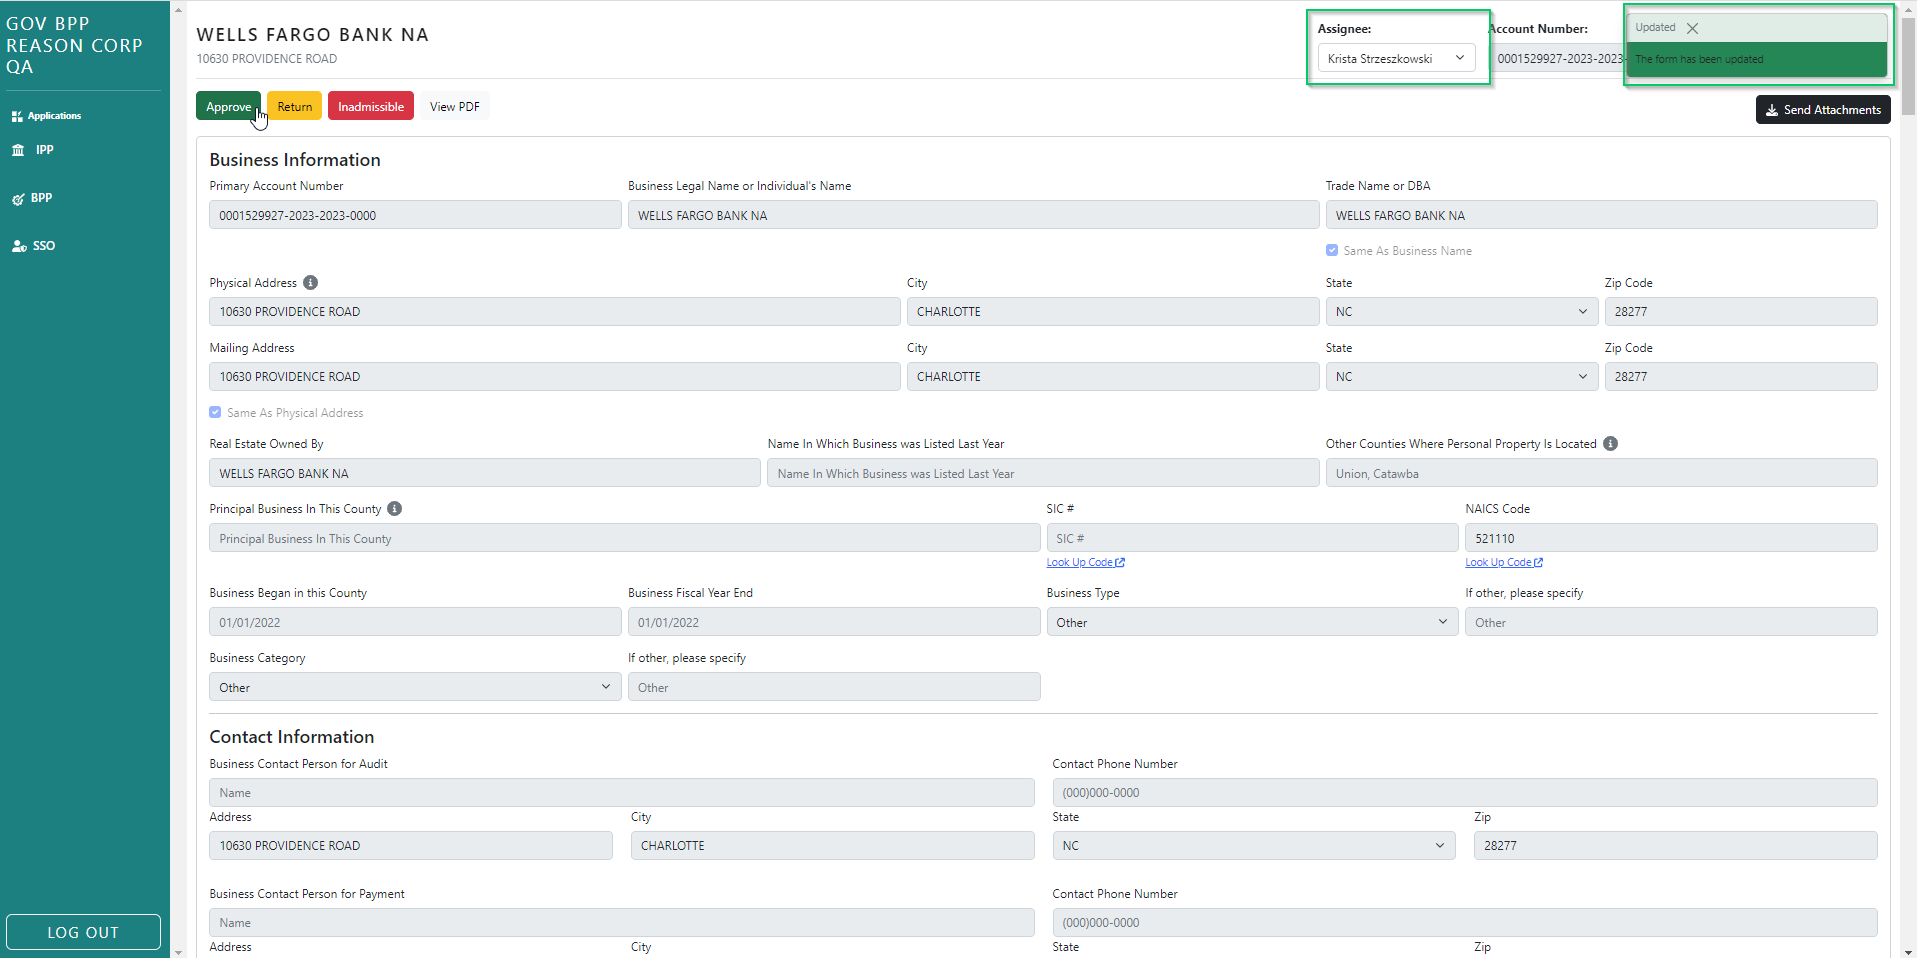
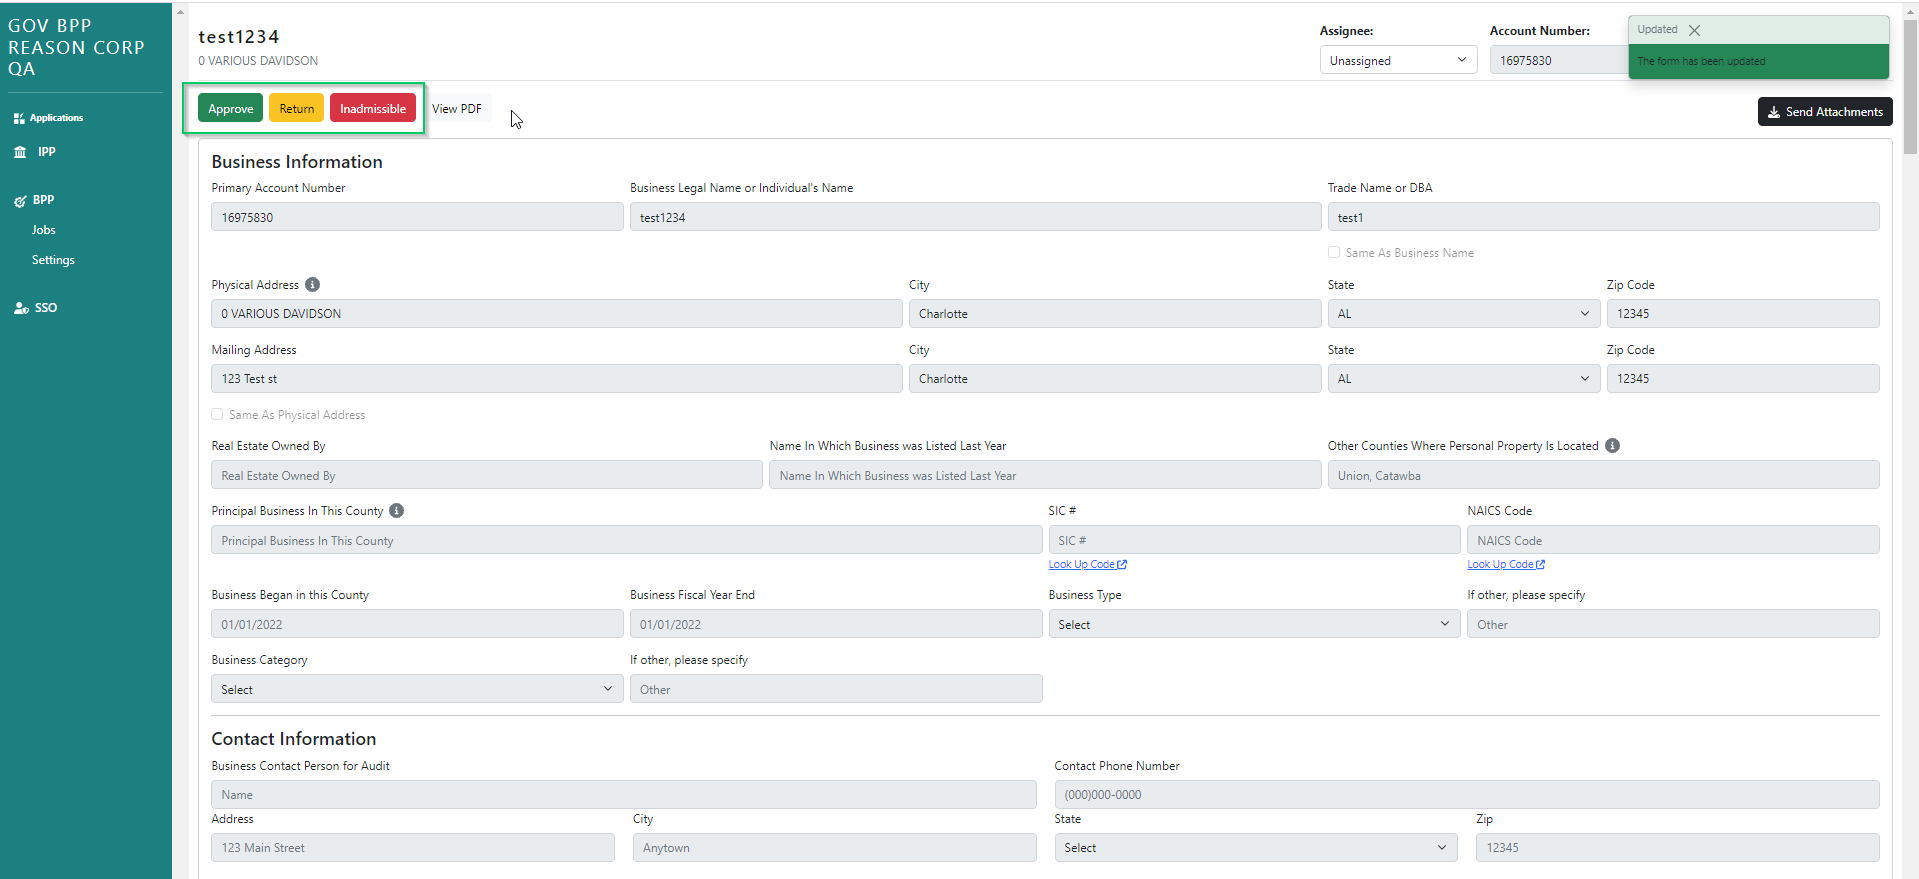
The section at the top of the form details includes basic information about the tax payer, including Business Name, Street Address and account number. It will also include the county user assigned to review the form. If the Account Number is missing or is incorrect, you may update the account number by entering it in the header field. Click 'Update' to save the new information. You will receive a flash message, 'Account Updated' and an email notification will be sent to the person who submitted the form. To start the review process click on green "Start Review" tab.
The form will be assigned to the person who starts the review process. The user has the option to approve, return, mark as inadmissible, or view the pdf from this screen.+
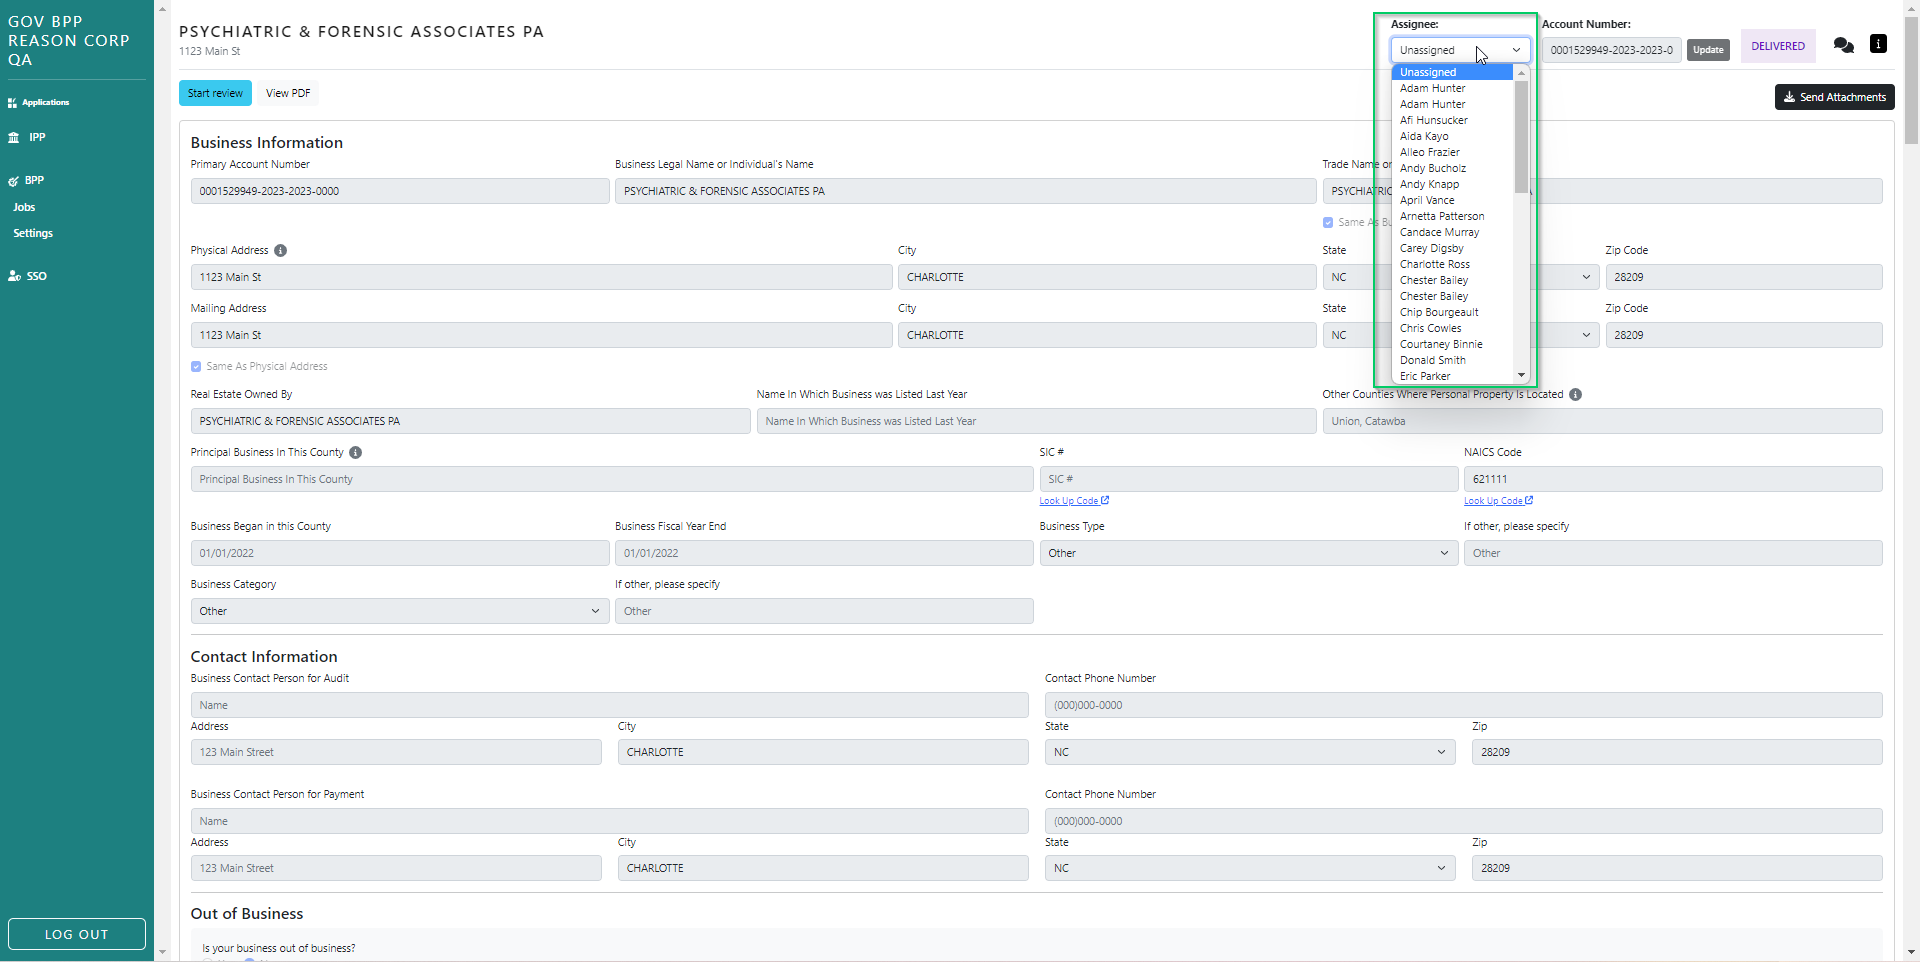
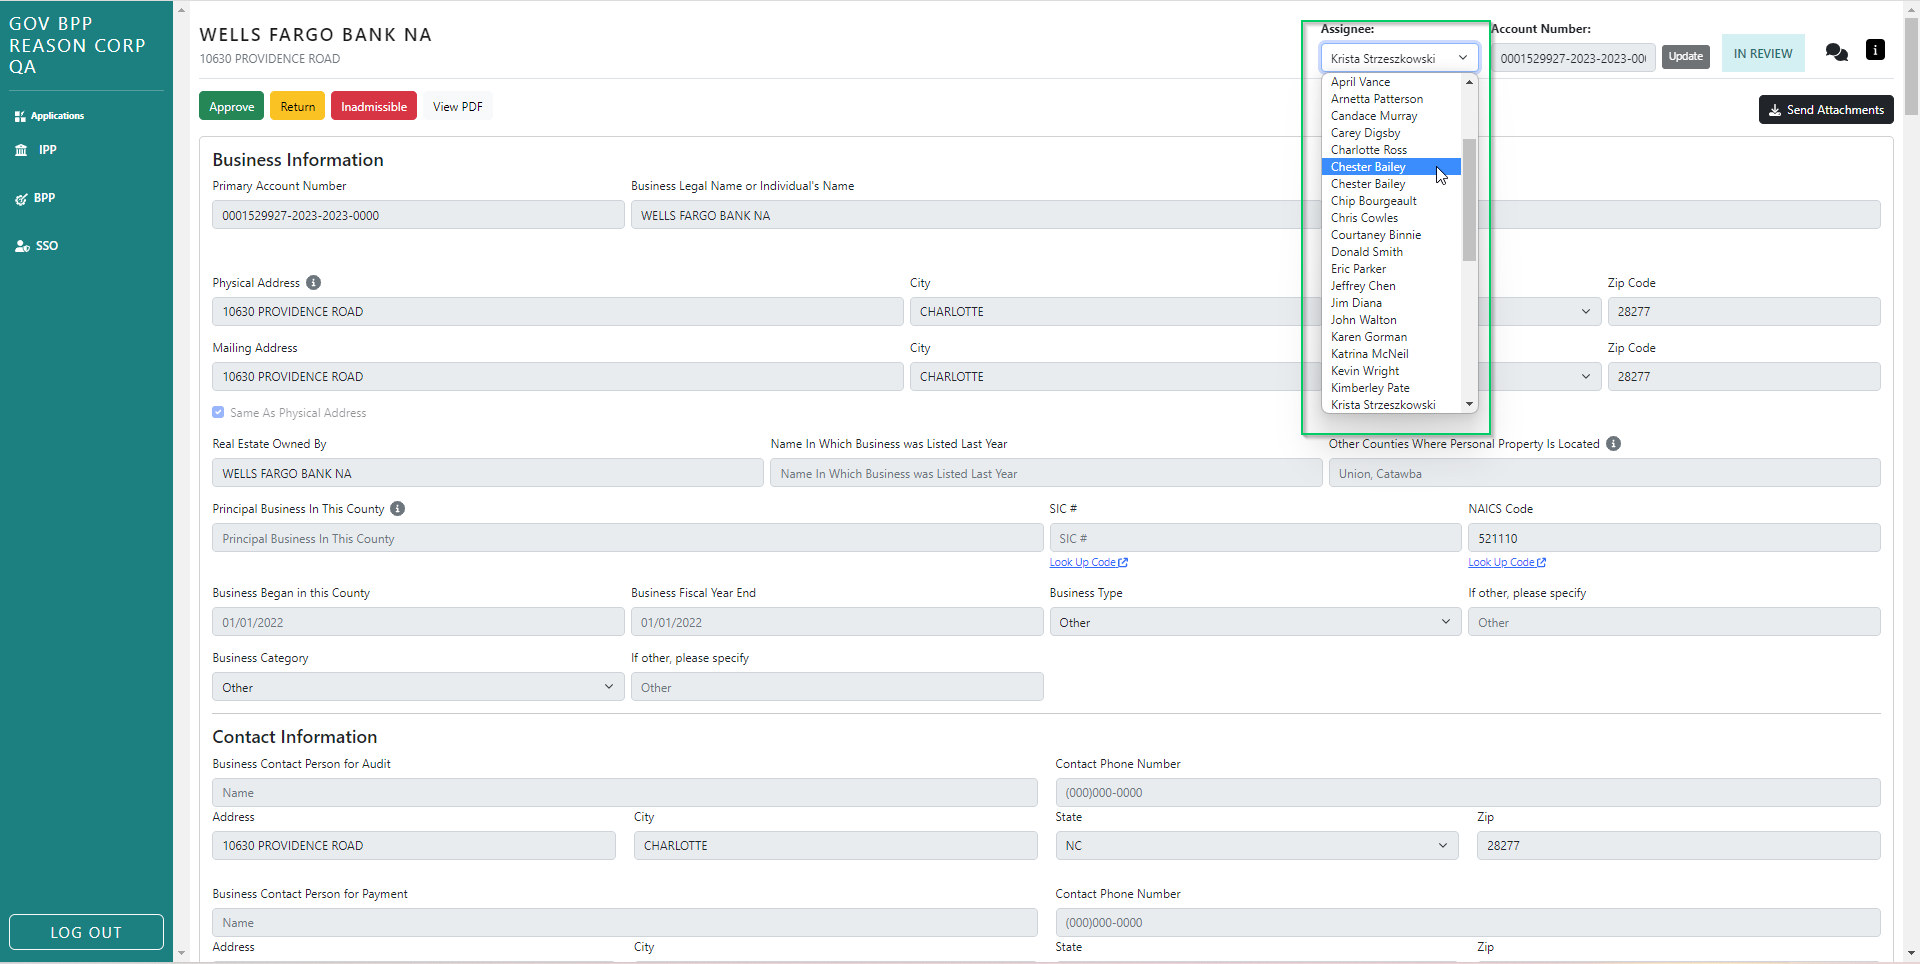
If you have administrative privileges, you can also change the user assigned to a form. Click the drop down for a list of users, then select the user you want to assign the form to.
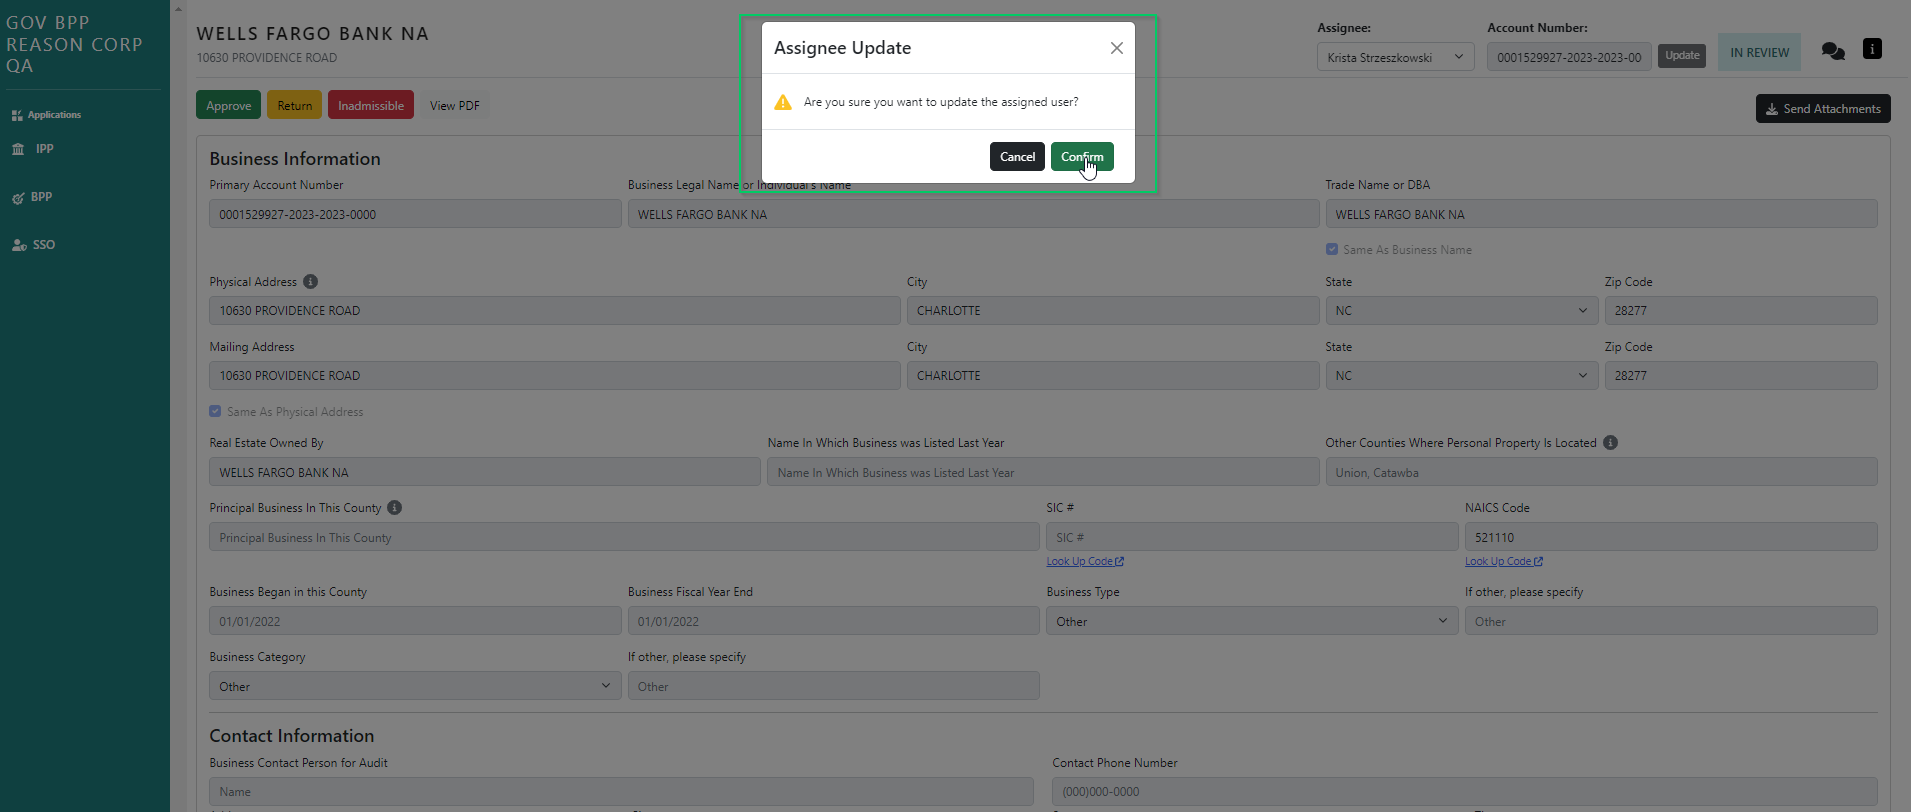
A window will confirm the reassignment. Select Yes to complete the process.
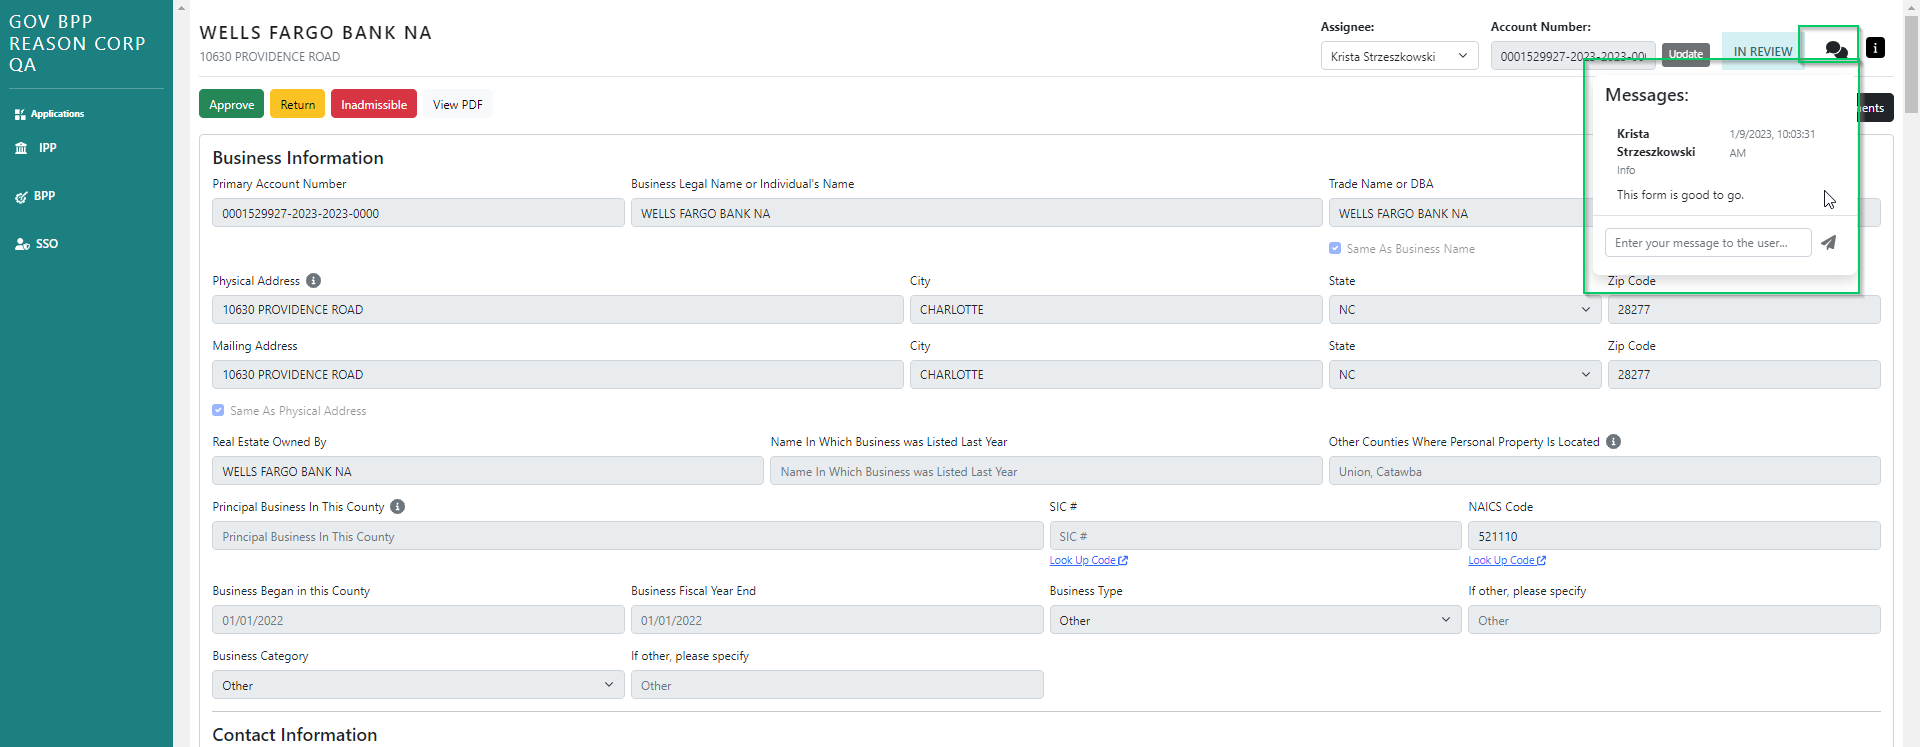
Communication Channel: Messages
At the top, in the header of each form, is the Message section. To open the section, click the icon on the right. To close the section, simply click the icon again.
Within the messages section you can send a message to the taxpayer and see a full history of all messages related to that submission. For example, if a form had been returned and resubmitted, you can see why it was returned and ensure that the issue with the original submission has been addressed. 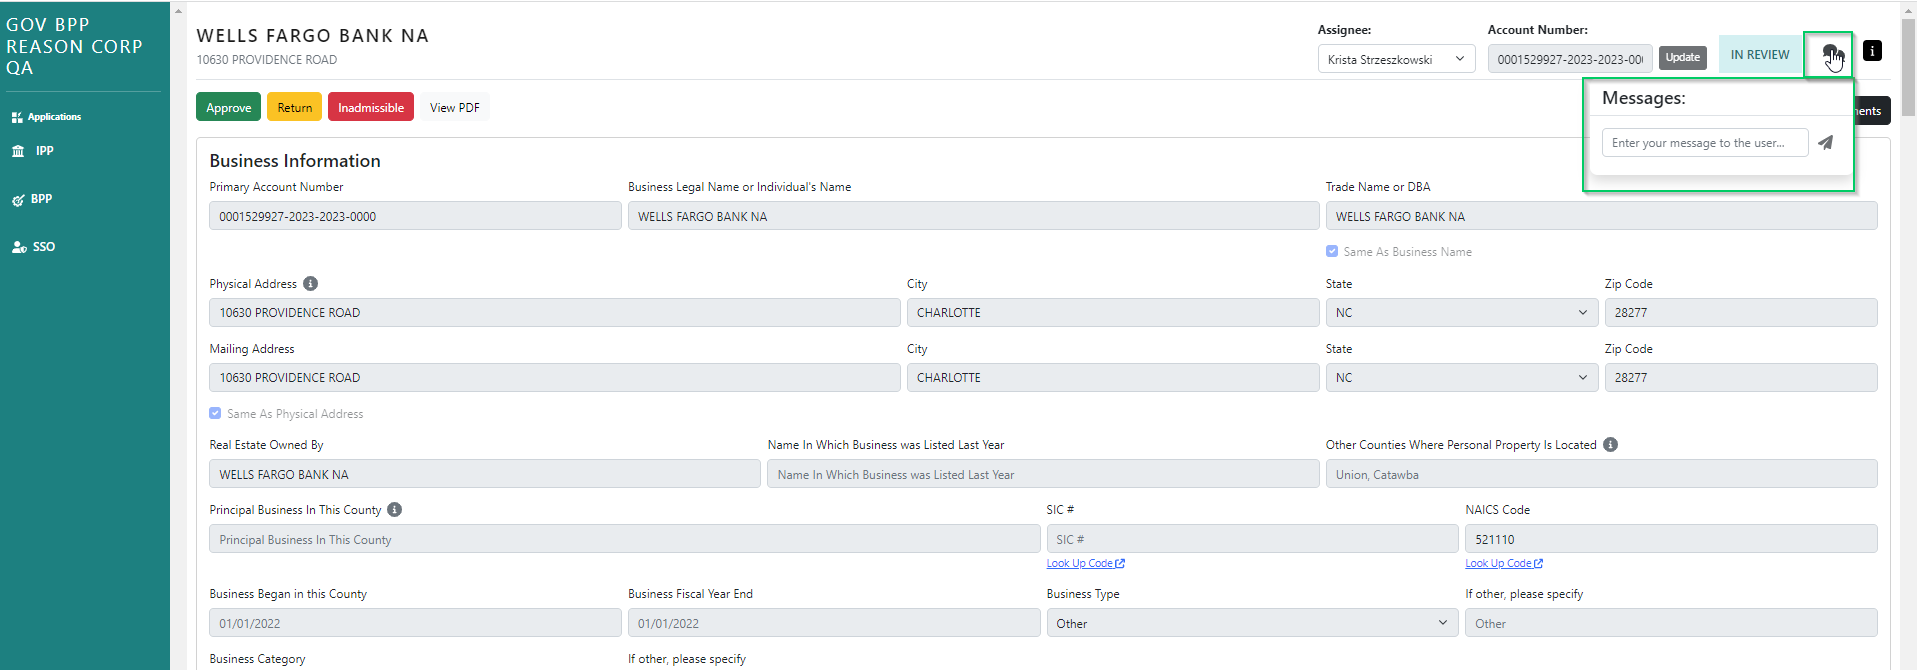
Form Preview
The form details screen shows a read-only version of the submitted form.
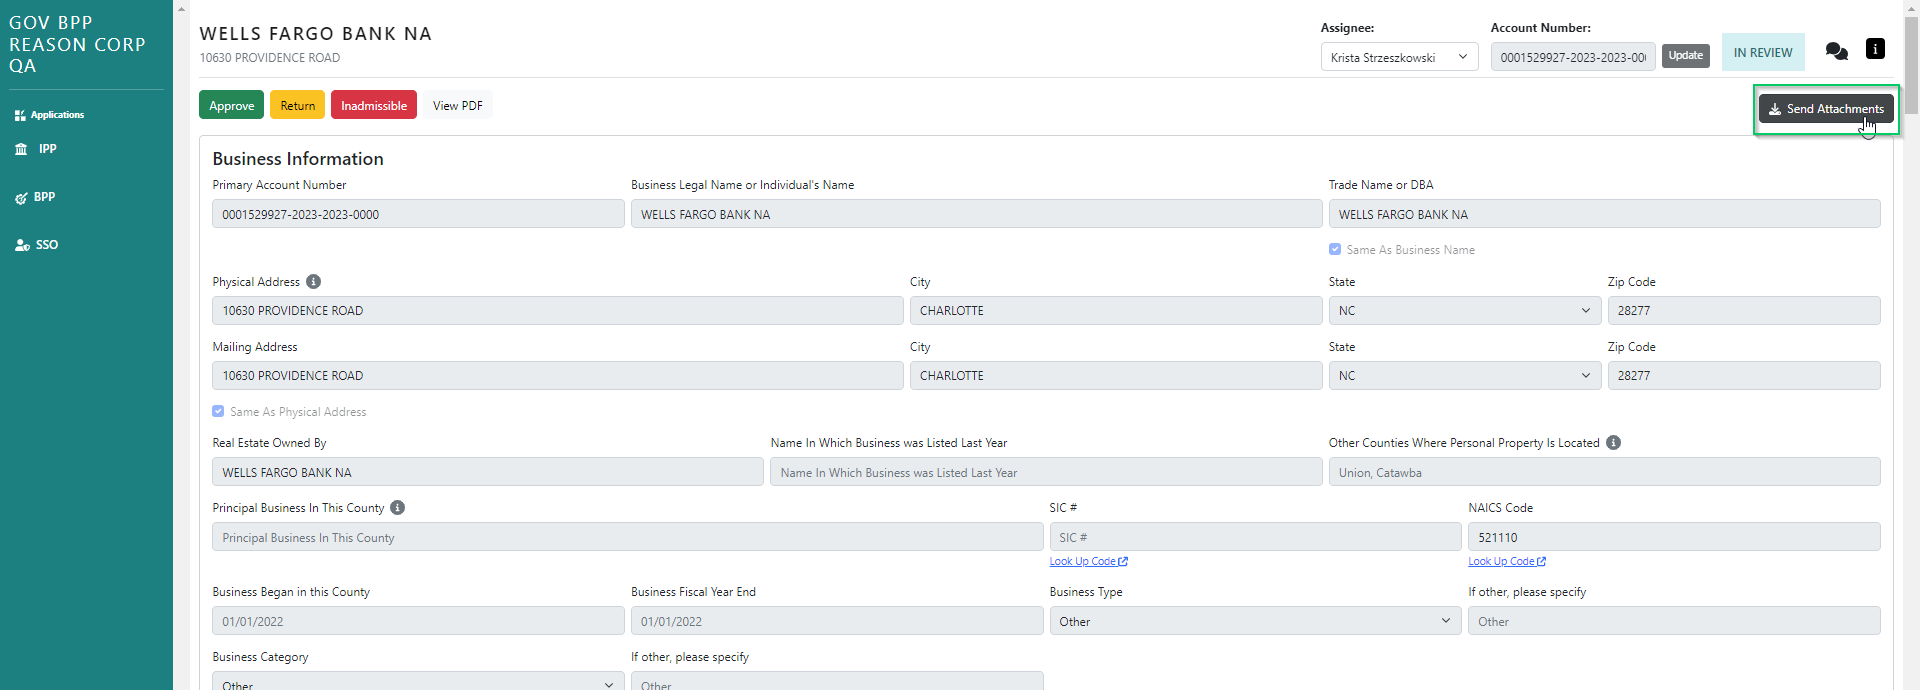
All schedule attachments and any additional attachments can be accessed by pressing the Send Attachments button. Upon pressing this button an email will be sent to the gov user will a link to a zip file that contains all the attachments uploaded with that form.

Review Process
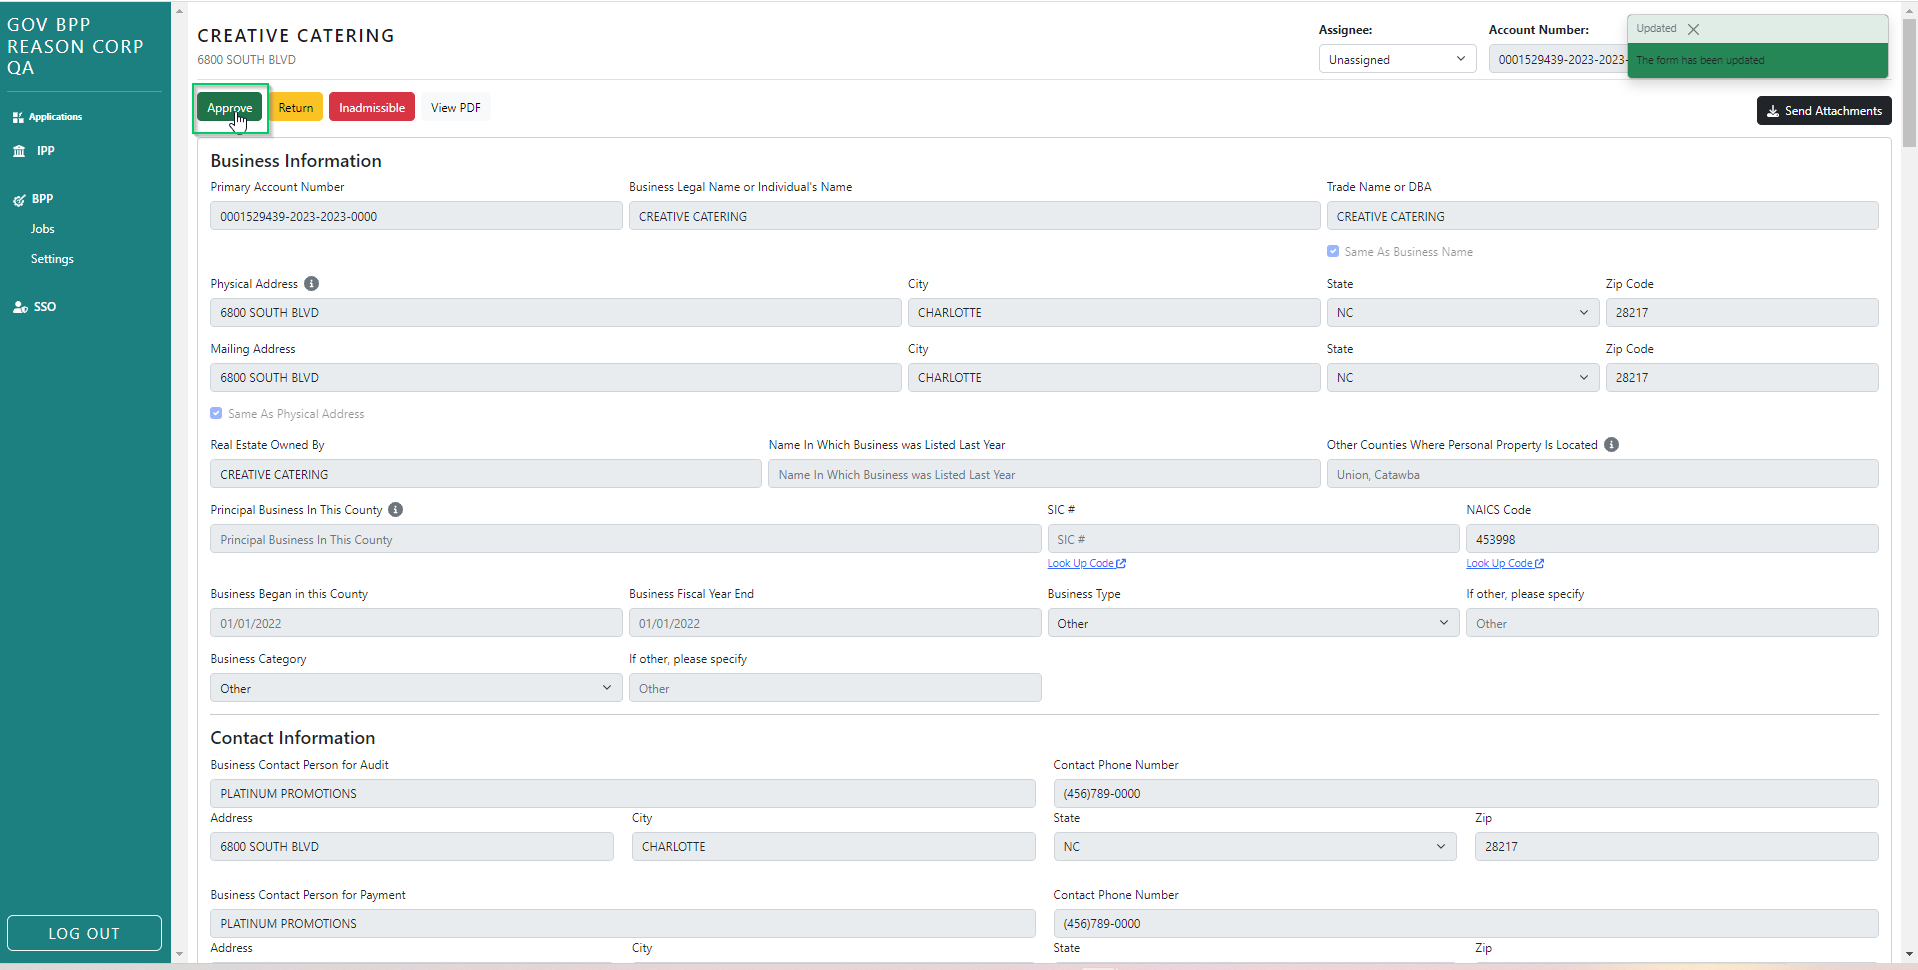
Approve, Return, Inadmissible
After pressing 'Start Review' you can render the form Approved, Returned or Inadmissible. When selected, each button will update the forms status.
Approve: Used when no further information is required from the tax payer. An automated approval message is sent to the taxpayer via the TaxScribe communication channel as well as by email. Status updates to "Approved"
Return: Used when additional information is required from the tax payer. A taxpayer may edit and resubmit a form which was returned to them. A message from the user returning the form is required, which will be sent through the TaxScribe communication channel as well as by email. Status updates to "Returned"
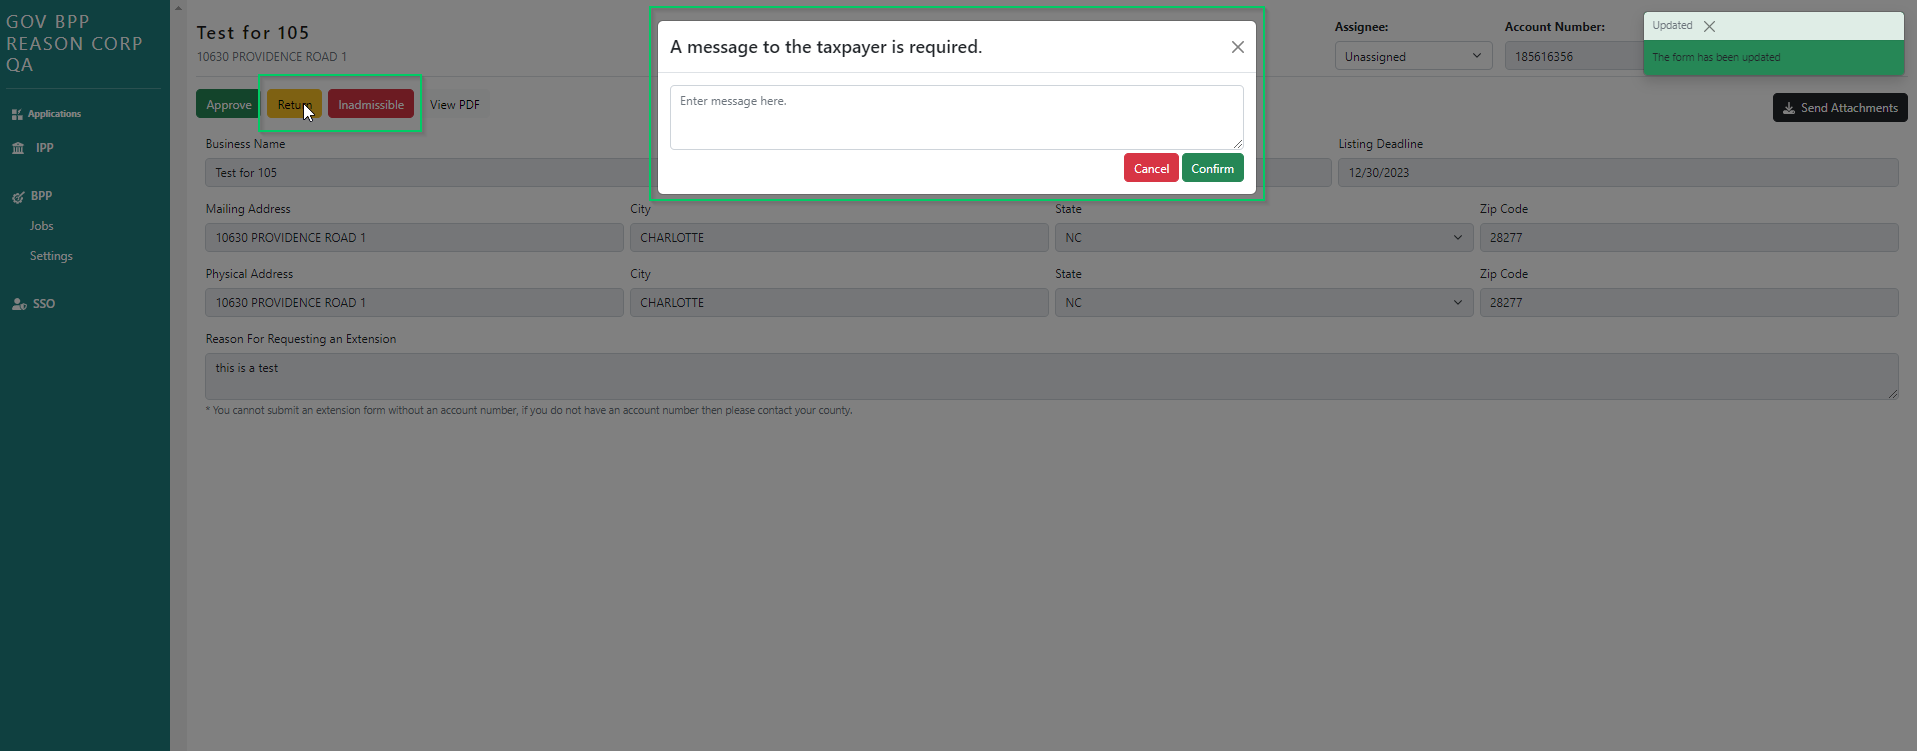
Inadmissible: Used when the form is denied. The taxpayer cannot edit the form and resubmit the form, but it does not prevent the taxpayer from creating a new form for the same account. A message from the user rejecting the form is required, which will be sent through the TaxScribe communication channel as well as by email. Status updates to "Inadmissible"
- Message to Taxpayer box: This box only appears when clicking Return or Inadmissible, the gov user can enter notes in here that that taxpayer will see.
Once Approved, Returned, or Inadmissible, the submission is no longer editable.